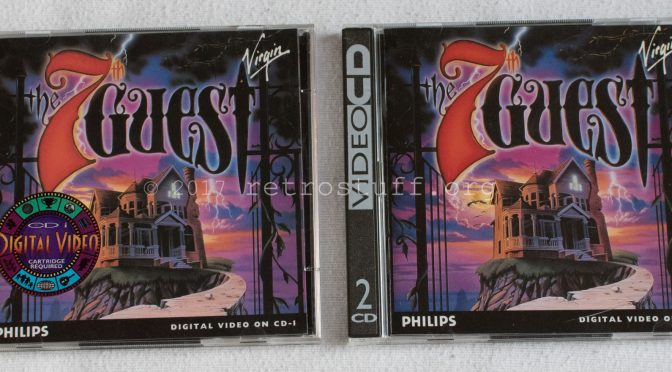
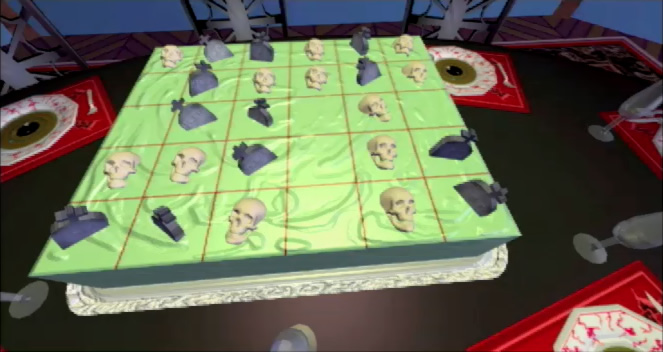
The 7th Guest is a great game for Philips CD-i. Unfortunately, there is an annoying bug that crashes the game when trying to solve the cake puzzle:
Continue reading The 7th Guest CD-i DVC Compatibility / Cake Puzzle Bug

Philips CD-i
The 7th Guest is a great game for Philips CD-i. Unfortunately, there is an annoying bug that crashes the game when trying to solve the cake puzzle:
Continue reading The 7th Guest CD-i DVC Compatibility / Cake Puzzle Bug
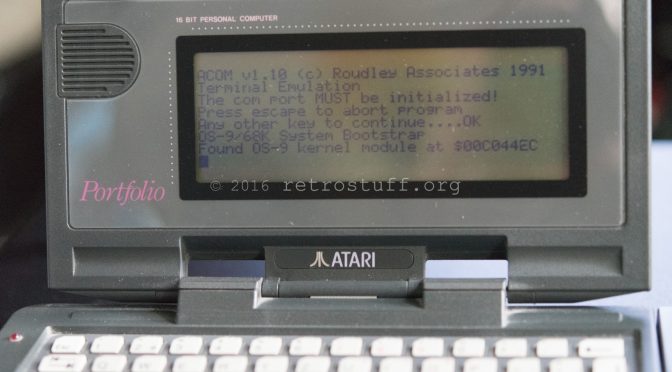
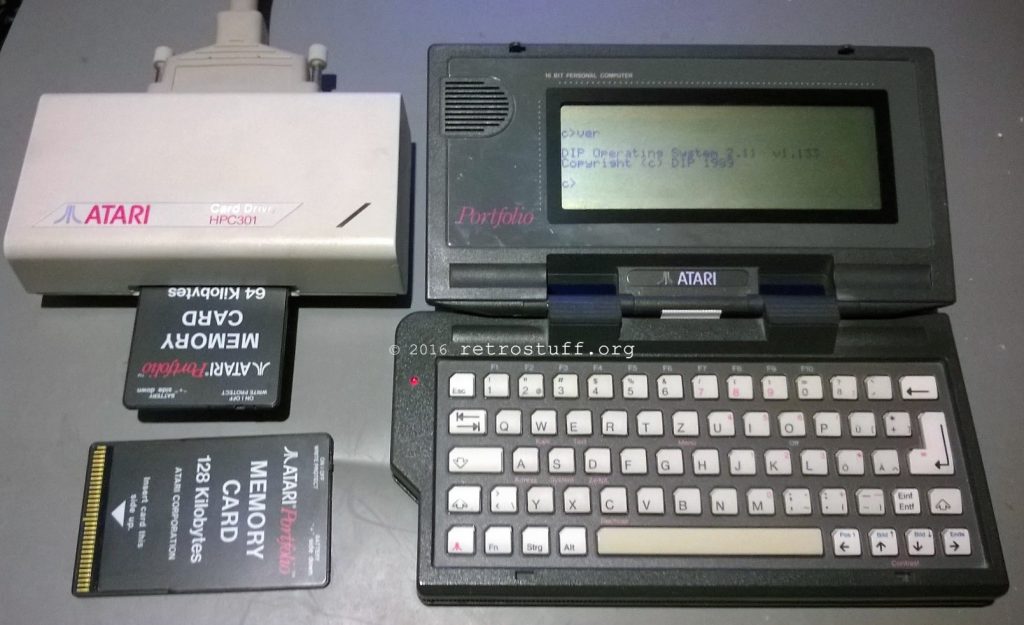
In order to access the Low-Level Test of Philips CD-i players or debug other units with a serial port, you will always need a VT100 compatible terminal. An old laptop with Windows 98 and HyperTerminal works fine, but I was looking for something more portable. The Atari Portfolio with Serial Interface add-on is a good portable choice.
Update: Meanwhile, I’ve found the Psion 5mx Pro to be a better choice.
First of all, we need to transfer the terminal software ACOM to the Portfolio. This is possible via the serial port, but I had to back up some data from the old memory cards too. I hooked up the Atari PC Card Drive HPC-301 to transfer the data and software.
Recently I found a CDI 220/00 with Mini MMC mainboard. It’s a heavy and bulky unit that contains lot of PCBs, wires, screws and metal parts. It’s one of the first consumer CD-i players. Later models have all components on one single mainboard (Mono).
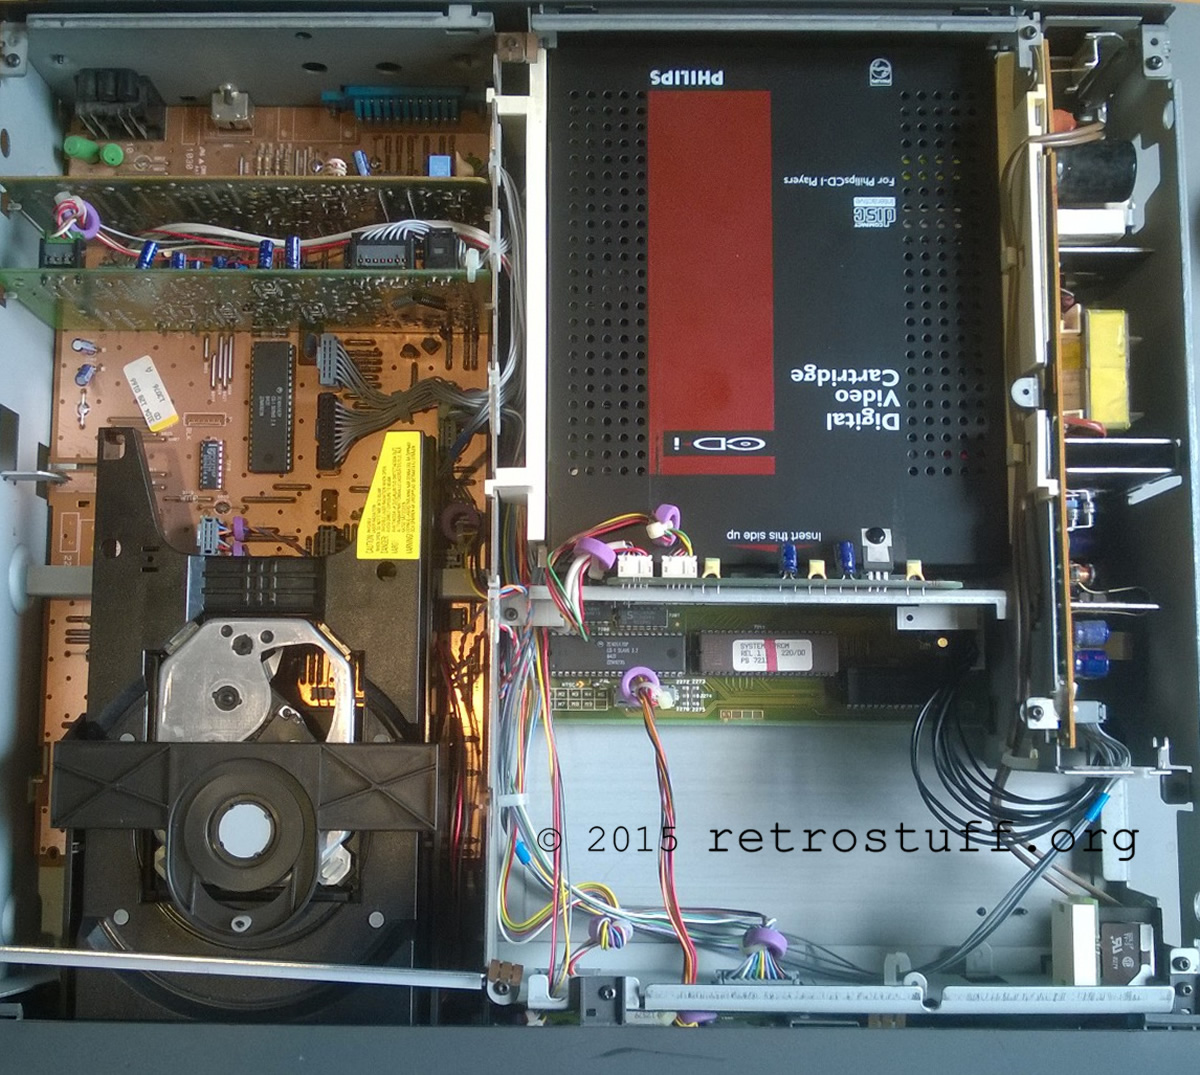
Continue reading Philips CDI 220/00 Mini MMC 60Hz Modification and Timekeeper Replacement
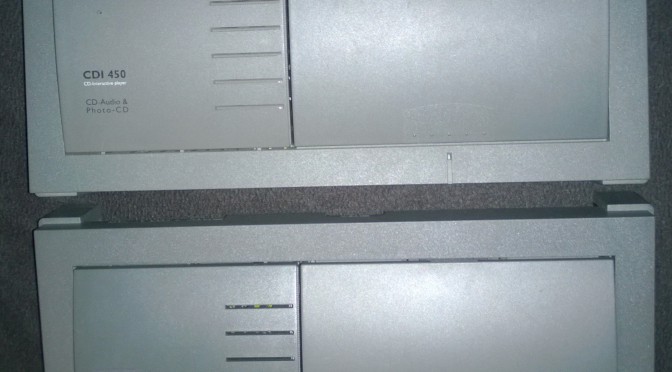
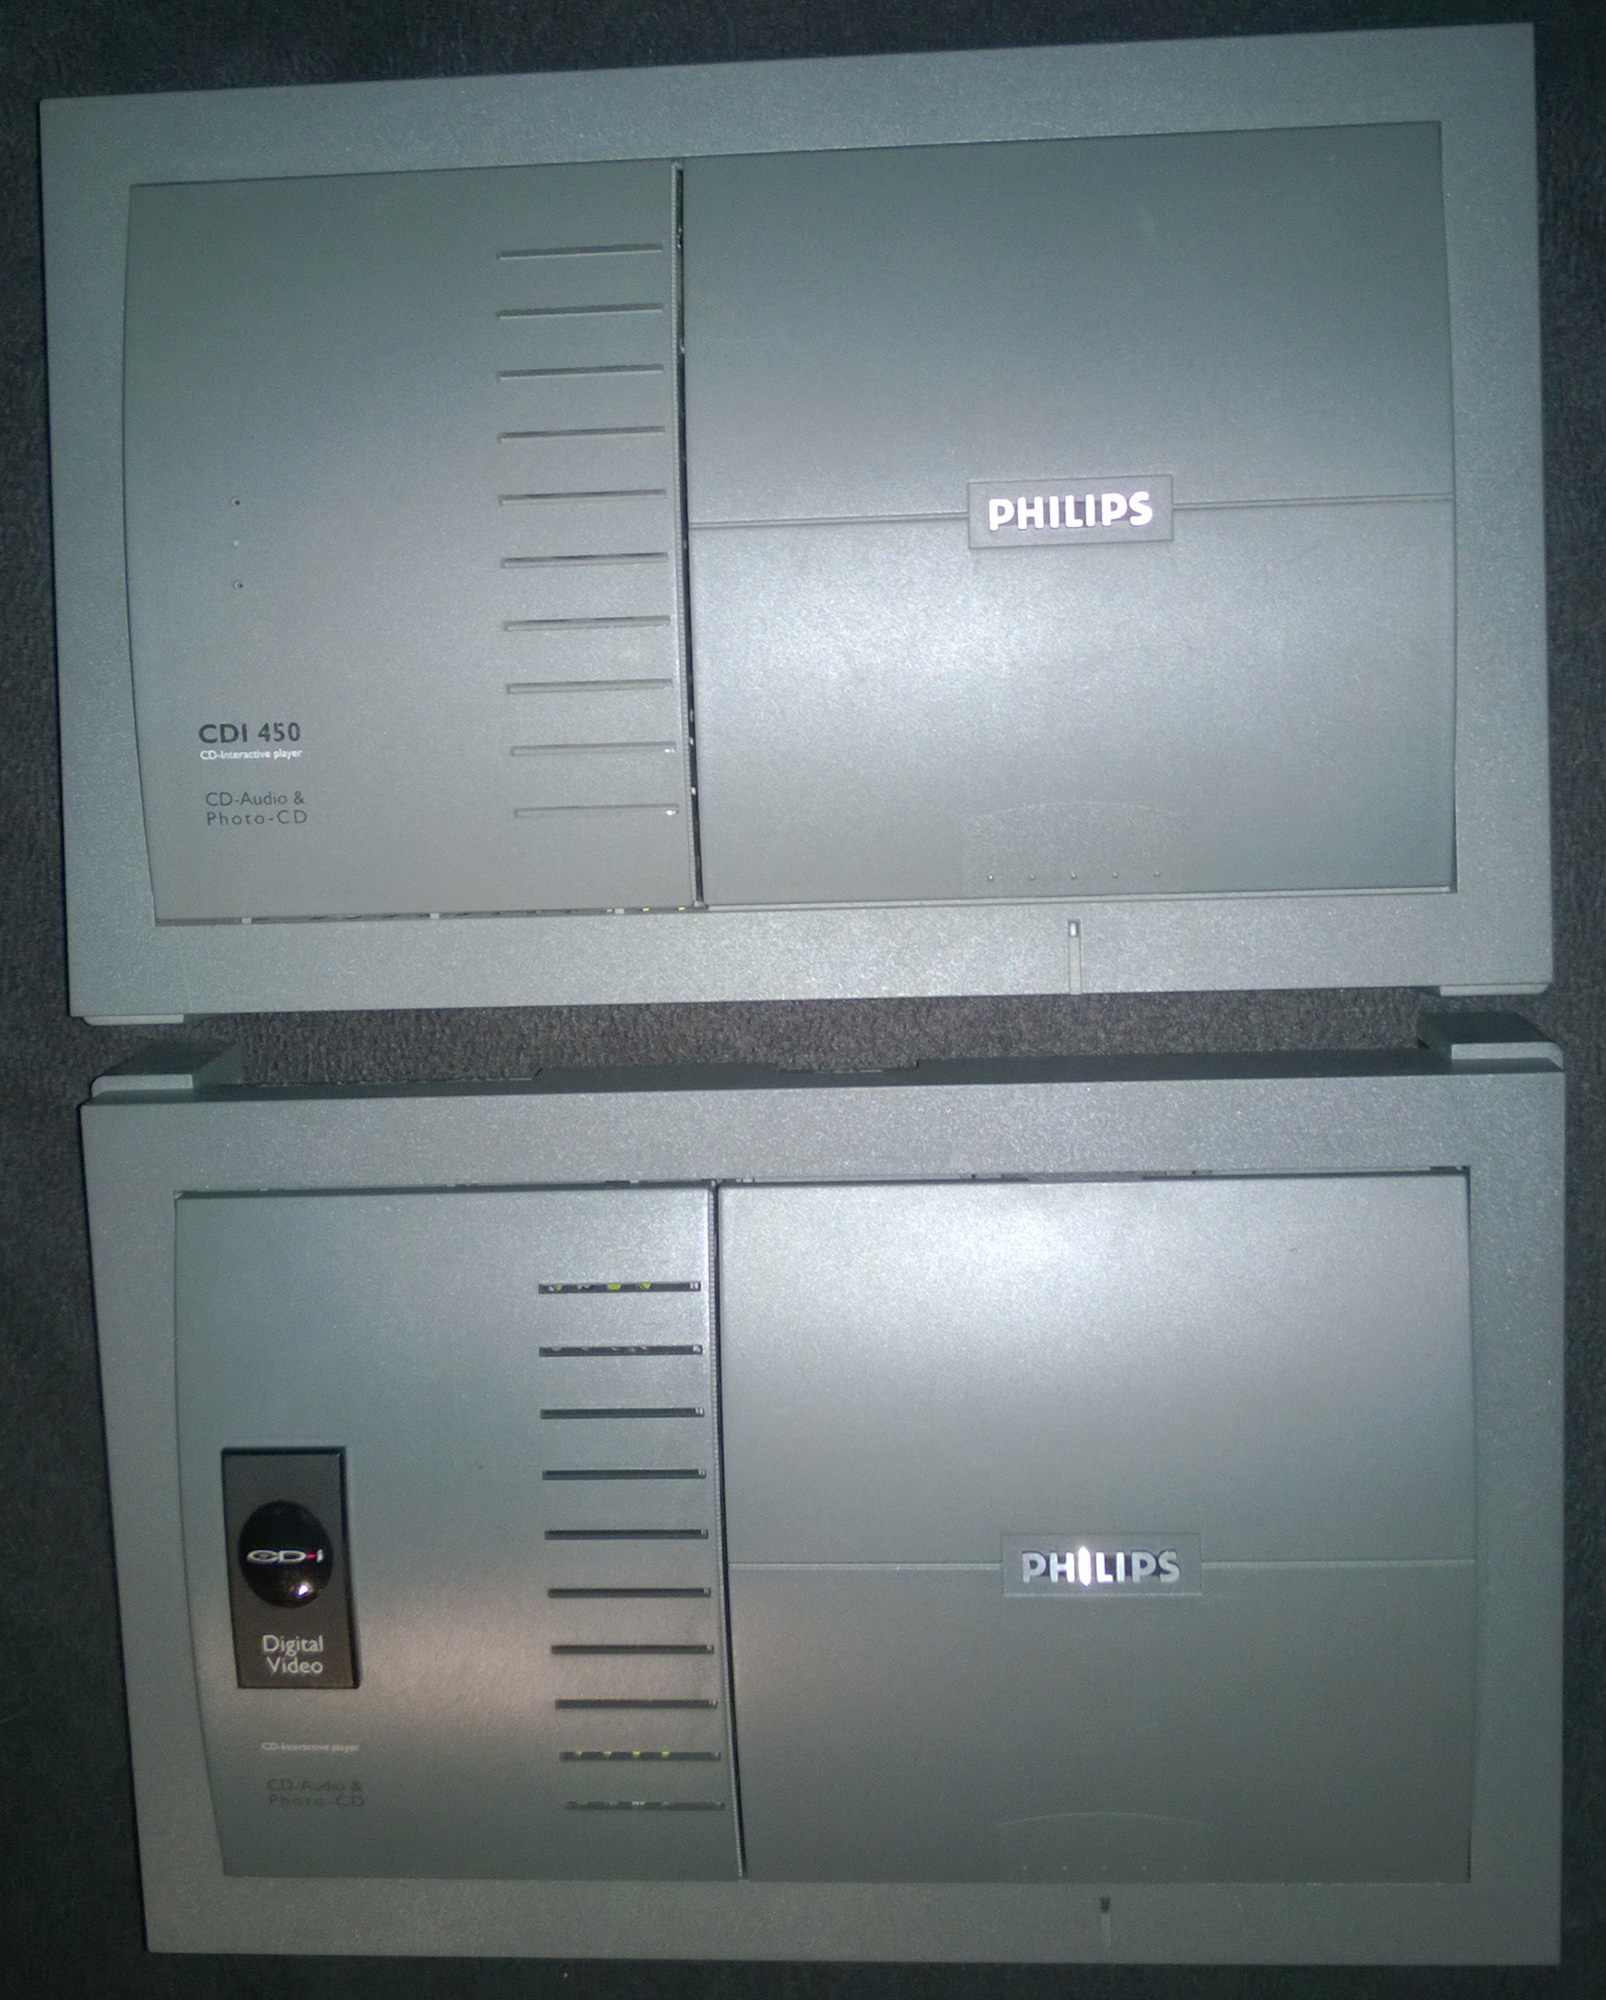
More Philips CDI stuff arrived this week: The twins CDI 450/00 and CDI 550/00. While the 450 is a very common low-cost model, I’ve never seen a 550 before (actually the 450 + DVC was sold as 550).
Chapter 5 of the Philips CDI 220 service manual (the manual that helped finding the right spots for the 60 Hz modification) deals with the built-in service software:
5 SERVICE SOFTWARE

In the set there are 3 different testsoftware available:

1. FTD-display/keyboard test

2. Low Level test

3. Service Shell
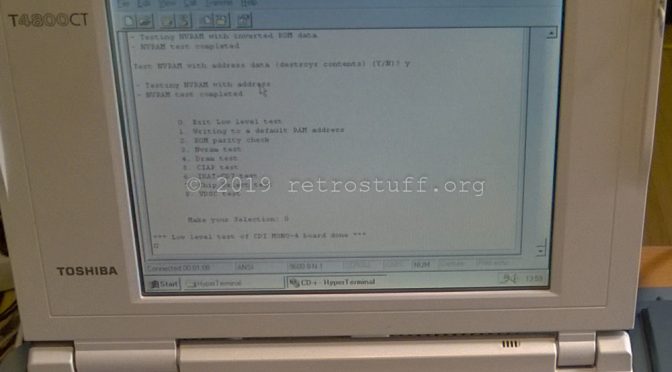
I’m going to cite the instructions for 1. and 3. and add pictures or comments if needed (I’m not going to cover 2. as it requires an extra service pcb and/or terminal).
Note: The service manual is valid for the Philips CD-i players CDI 220/20 220/25 220/39 (PAL) and CDI 220/31 220/37 (NTSC). On other players/models the test instructions should be similar if not the same. Continue reading Philips CDI 220 Service Software / Self-Test
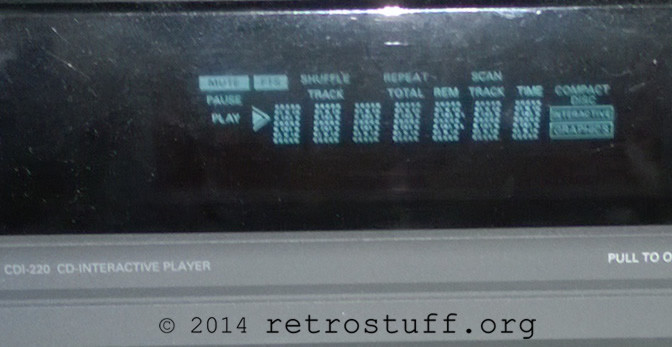
Before messing with the Timekeeper chip or exchanging the battery, it is very important to back up game saves you don’t want to lose from the NVRAM. With a null-modem cable hooked up to a PC, there are two options to communicate with the CD-i player:
To build a cable, we need a standard serial extension cable and a male 8-pin Mini-DIN connector. Remove the male D-Sub connector and keep it for later (we will need it for the Atari Jaguar mouse adapter).
Continue reading Philips CD-i Player Null-Modem Cable for Data Backup and Restore
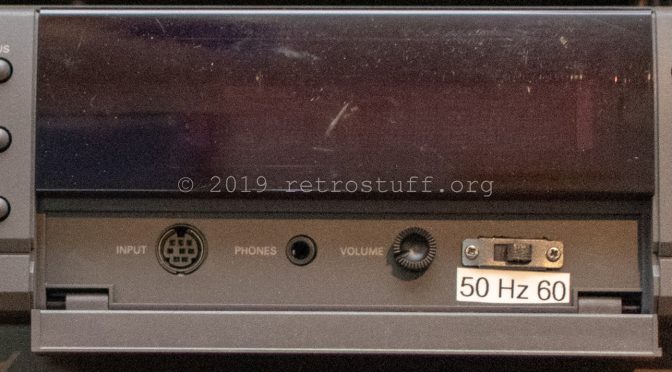
When looking for a modification to improve the video size/quality of DVC games on my PAL CD-i player, I’ve found that only two tutorials are covering that kind of modification (here / here and here). The modification enables a PAL player to display full screen video without the black bars on top and bottom. NTSC players benefit from this modification too, as there are PAL exclusive software titles that already have full screen video (e.g. De Zaak van Sam) – without the modification, parts of the screen are cut off.
Unfortunately, the mainboard of my CD-i 220 differs from those used in the tutorials, so I had to get a service manual to figure it out myself. The service manual I found is valid for the Philips CD-i players CDI 220/20 220/25 220/39 (PAL) and CDI 220/31 220/37 (NTSC). It says there is an unimplemented switch 1201 in square C6 of the mainboard:
Continue reading 60 Hz Modification Tutorial for Philips CD-i Player CDI 220/20