The CDI660/00 is one of the last professional CD-i players by Philips. The mainboard, Mono IV, is also used in various consumer players. So far, there are no tutorials for 60 Hz modification. When this topic came up in the community on The world of CD-i, I looked it up in the CDI220/80 service manual (also Mono IV, with plenty of remarks for other player models) and attempted the modification myself. It has been on my to-do list for quite some years now. First, we need full access to mainboard. Remove the marked screw of the DVC plastic holder.
A floppy disk drive for to the Pippin Atmark is nothing new. In fact, an expansion dock called Pippin Atmark Floppy Unit was released back in the days. These units are incredibly rare and I was neverfinable able to get ahold of one of them in 2020. Apart from an Apple floppy disk drive with 20-pin ribbon cable, these units contained no additional hardware but a simple X-PCI adapter board. It didn’t take long until Japanese enthusiasts tried to replicate these adapters. When I recently rediscovered my Pippin Atmark PA-82001-S, I also looked around for additional hardware. I found this article about an adapter board that had been finally replicated two years ago. This board can still be ordered from OSH Park.
The CPS2 I/O interface with matching kick harness to remove the need for a SuperGun.
I had already ordered the digital AV interface kit from VideoGamePerfection.com in the beginning of the year and was only waiting for the I/O interface to get started. Last month, it finally arrived. Also on the picture: a home-made kick harness and a RG174 coaxial cable.
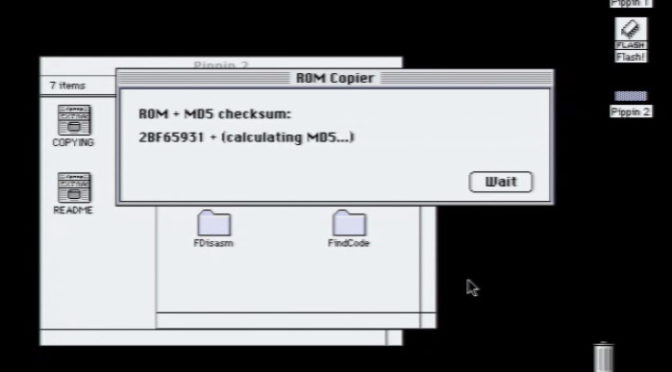
Earlier this month, I wrote about my Pippin Atmark PA-82001-S Monitoring Unit. Initially, I didn’t plan to do any modifications to this special Pippin model. But then Keith Kaisershot told me that it is possible to feed a long SCSI cable over the metal lips of the case without doing any permanent modification. He also asked me to verify the checksum of the ROM. In this article, I will add external SCSI to my Pippin and also dump the ROM.
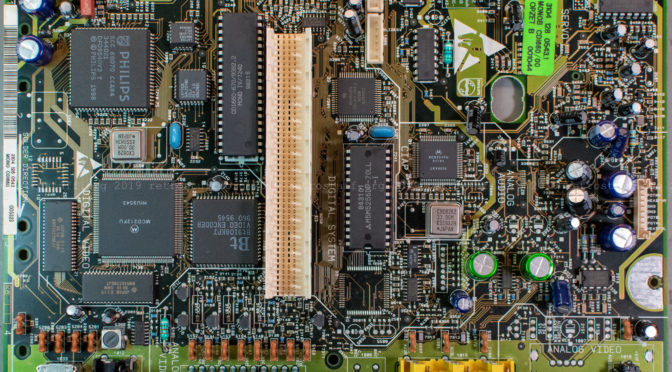
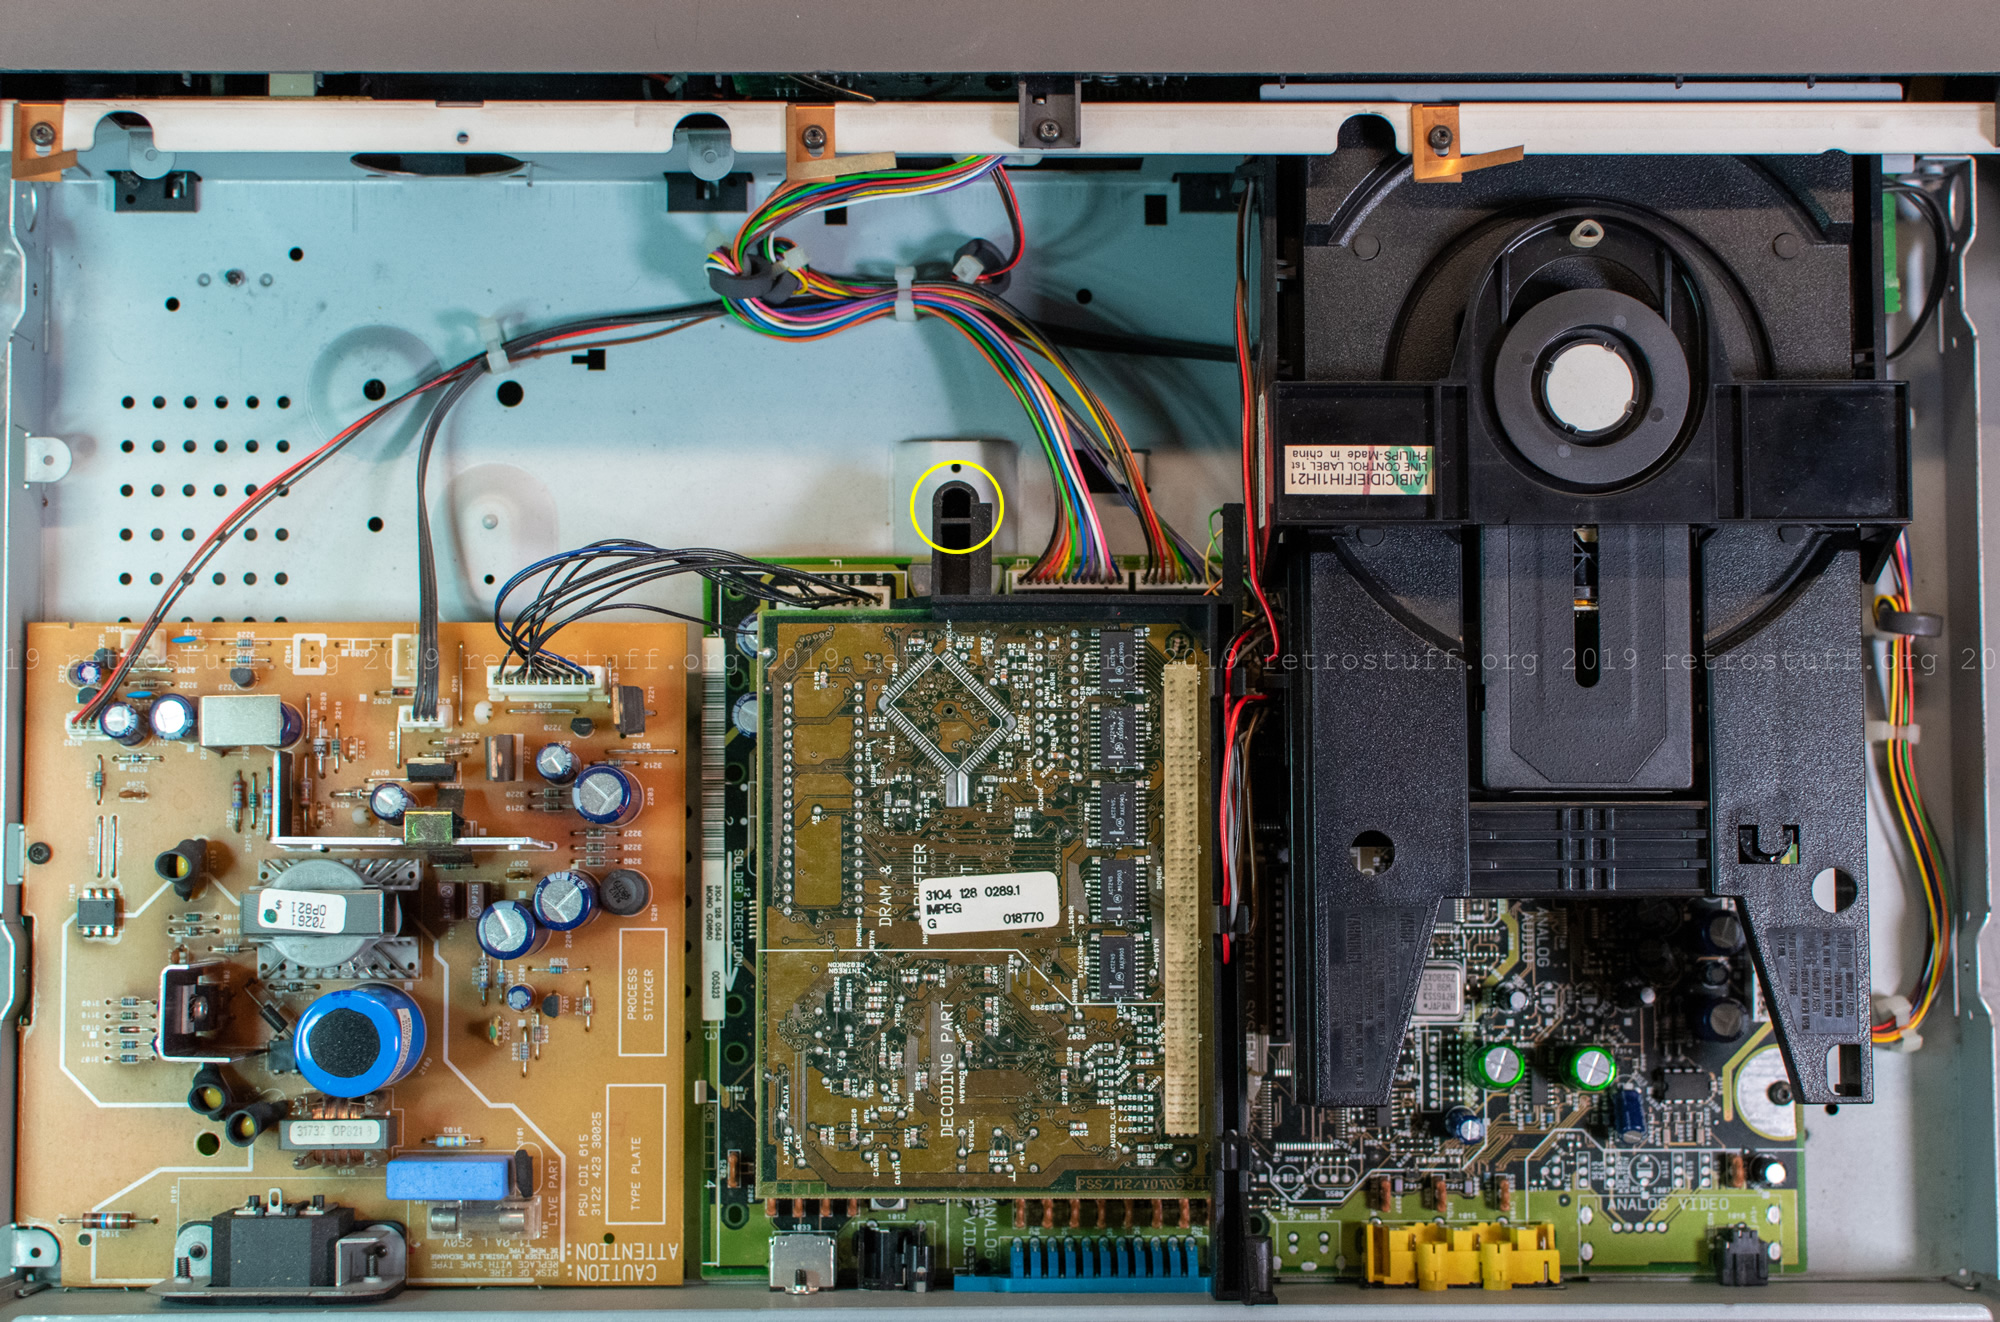
My Philips CDI605T/20 needed repairs before I could use it fully. Some of the repairs were mandatory for operation (Timekeeper), while others were to make it easier on the ears (fan, optical disc drive tray). I already had experience with a Mini MMC chassis on the very similar consumer player CDI220/00 and knew what to expect inside (its service manual helped a bit). It is actually possible to perform these repairs without taking the entire case apart (see the Shortcut sections). I took special precautions and took photos of each step so that I could put everything back together in the end.
I began with removing the case and the bezels of the extension cards on the rear. Make sure to slide out the lower card first, otherwise its metal plate will grind on the solder side of the upper card.
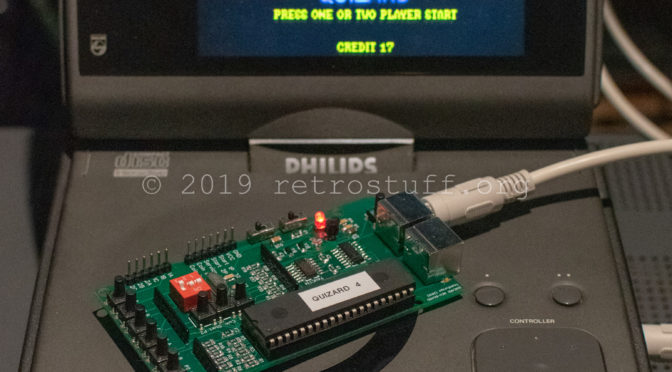
Quizard was a series of quiz games published by TAB-Austria in the ’90s. What makes it special is the fact that it is one of the very few arcade games based on Philips CD-i hardware. The protection of Quizard 1.x and 2.x has been figured out quite a while ago and since then it is emulated in MAME. Quizard 3.x and 4.x, however, refused to run – until now. A first step was done when Team Europe dumped a protection MCU a couple of years ago. Very soon, they will release an MCU board that will turn almost every CD-i player into a Quizard arcade machine. I received a sample last week and just finished assembling and testing it.
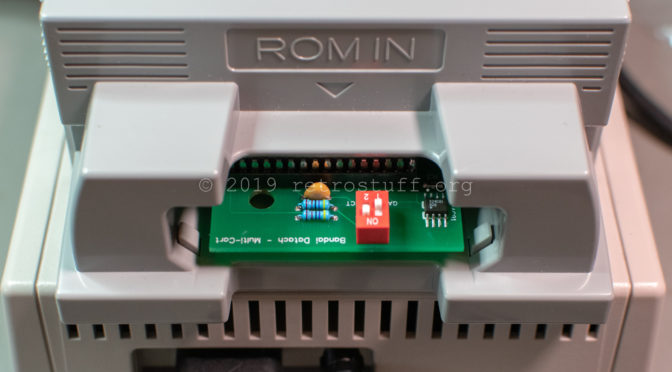
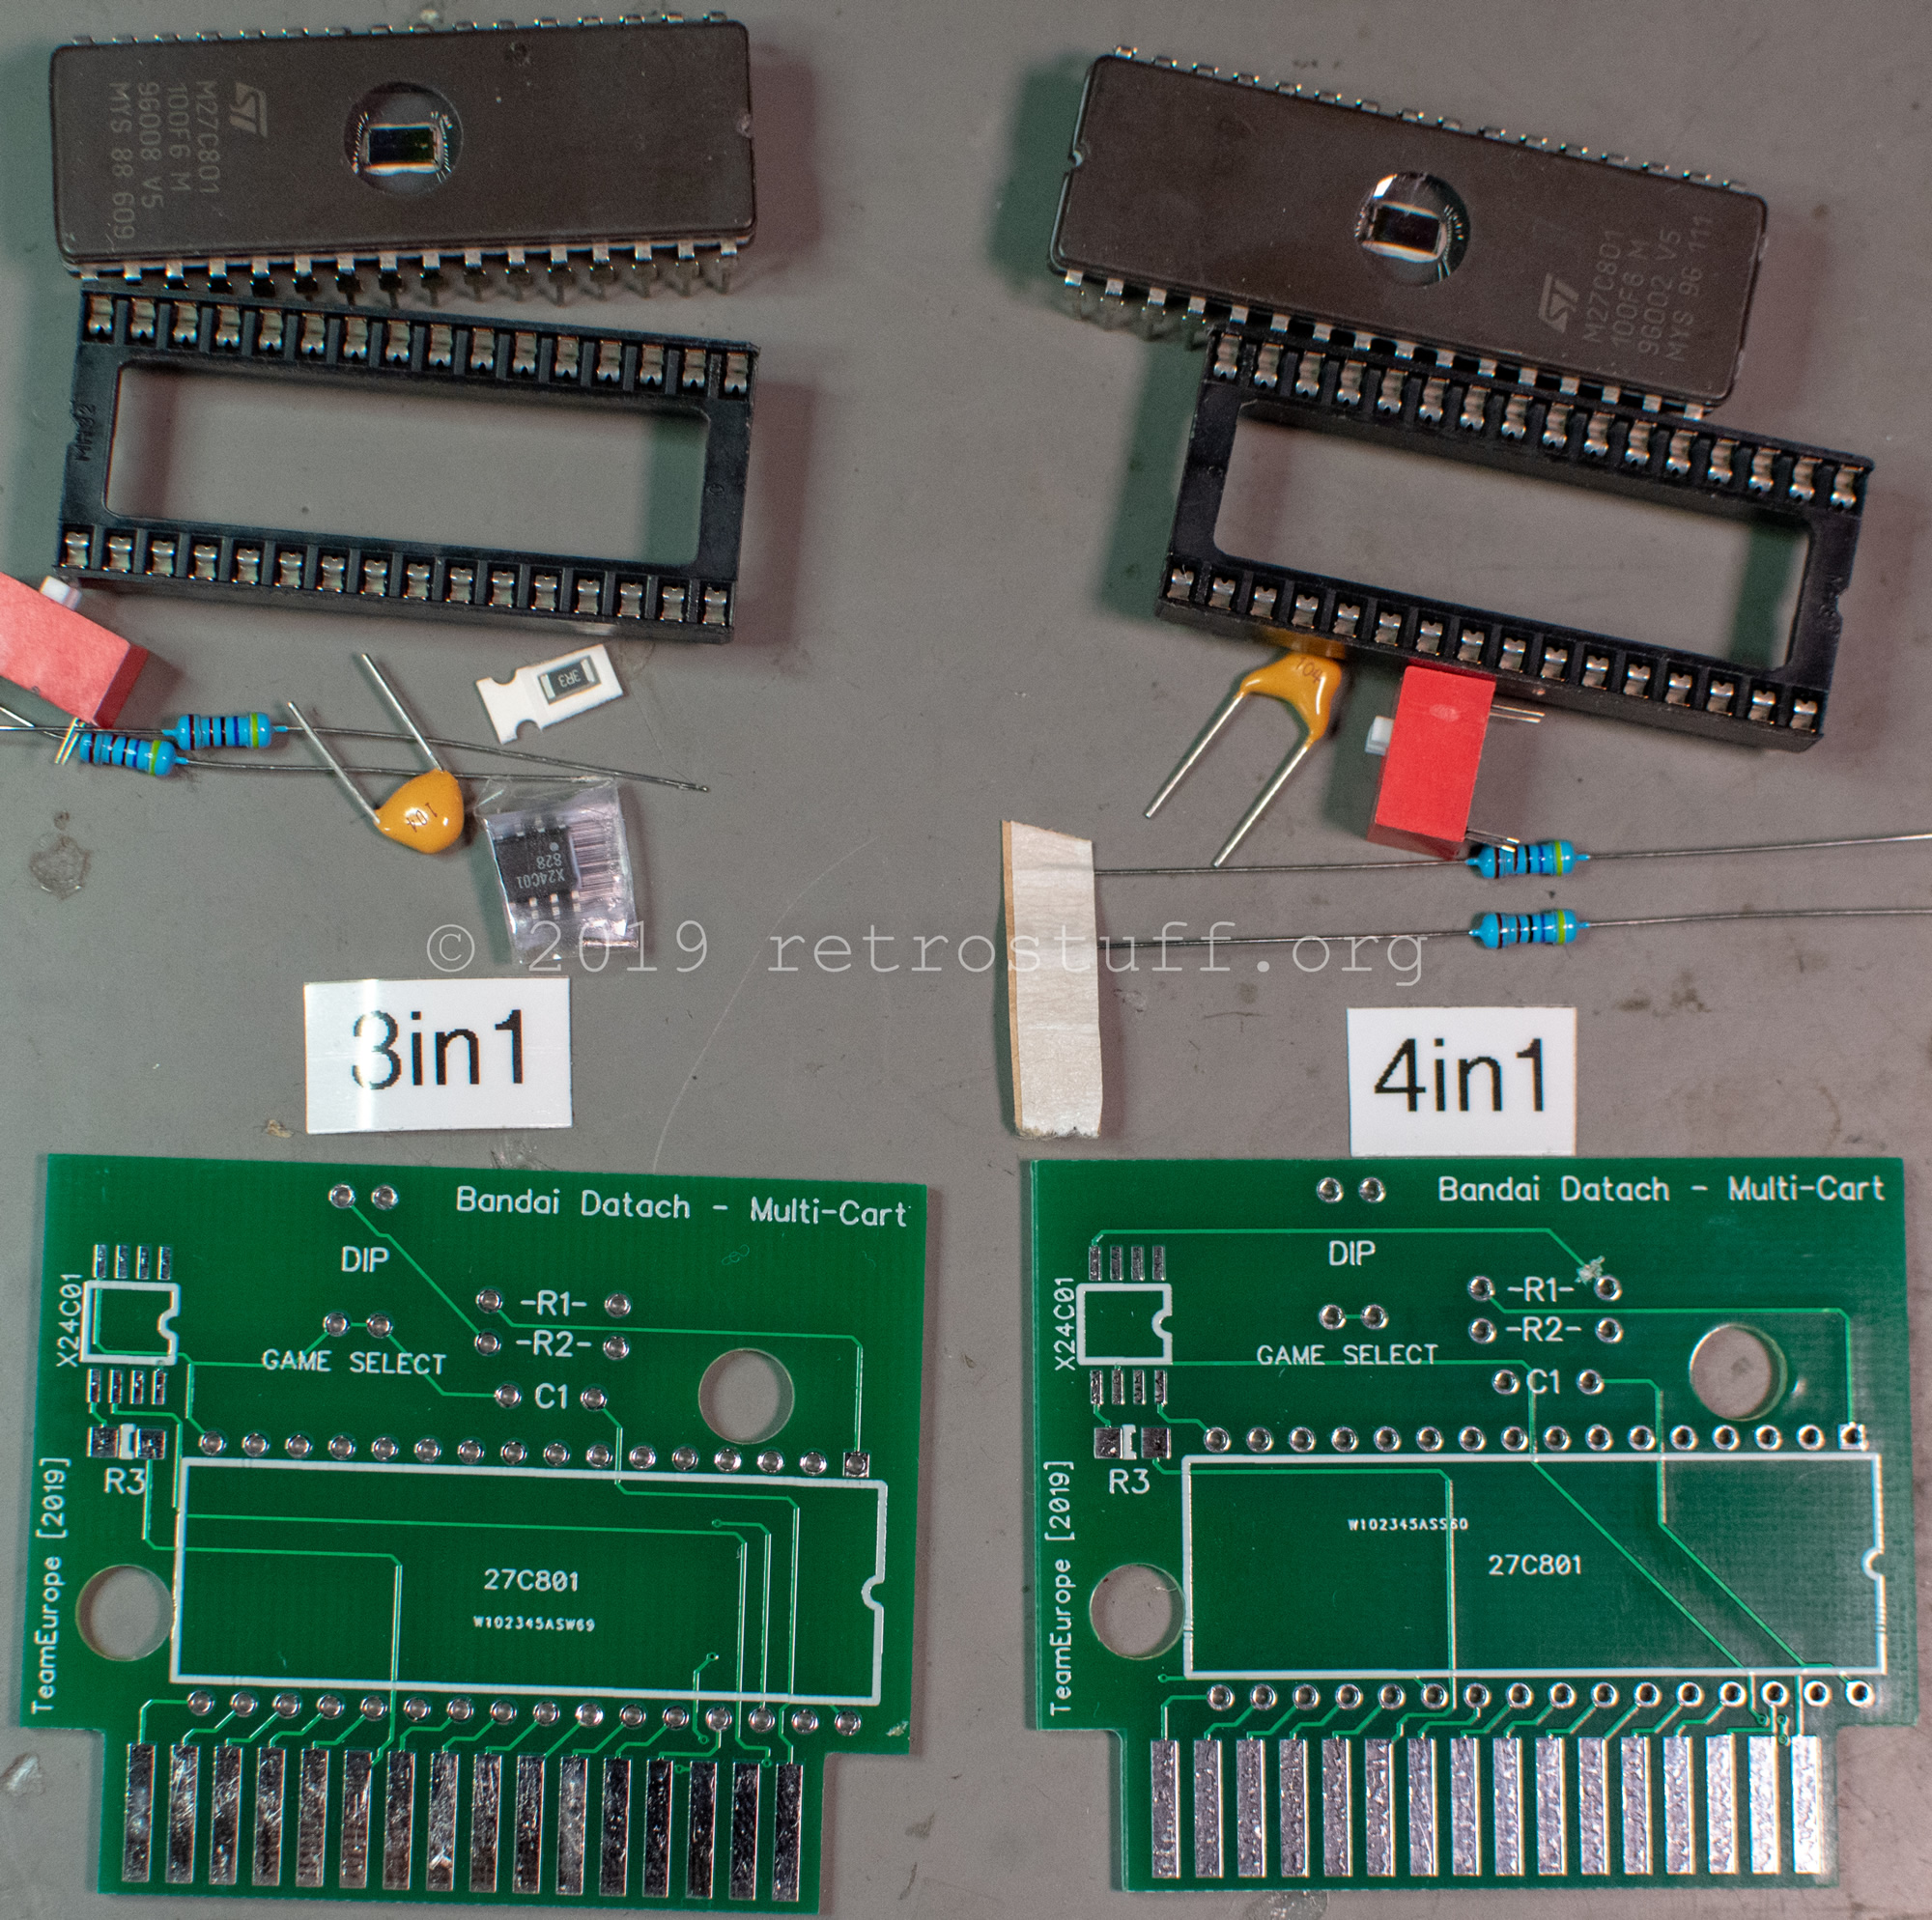
This has just arrived: A flash cart (multi-cart) by TeamEurope. I’ve been involved in the development in the very beginning and am very excited that it has finally has become reality. This is the kit that I’ve received upon special request:
After I had my first MVS at home, it didn’t take long until more arcade hardware followed. For example this CPS2. It looks shabby and needs some work, but it already has a Darksoft CPS2 Multi Kit installed.
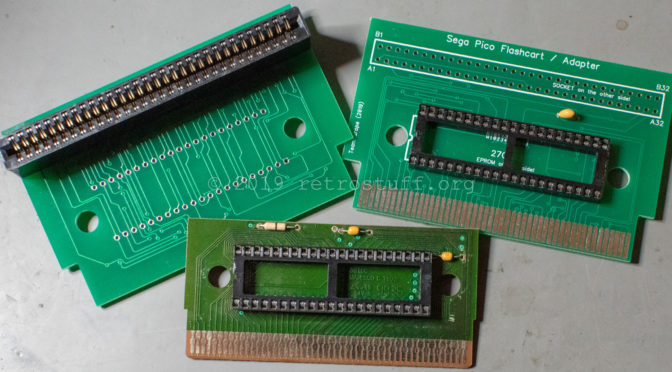
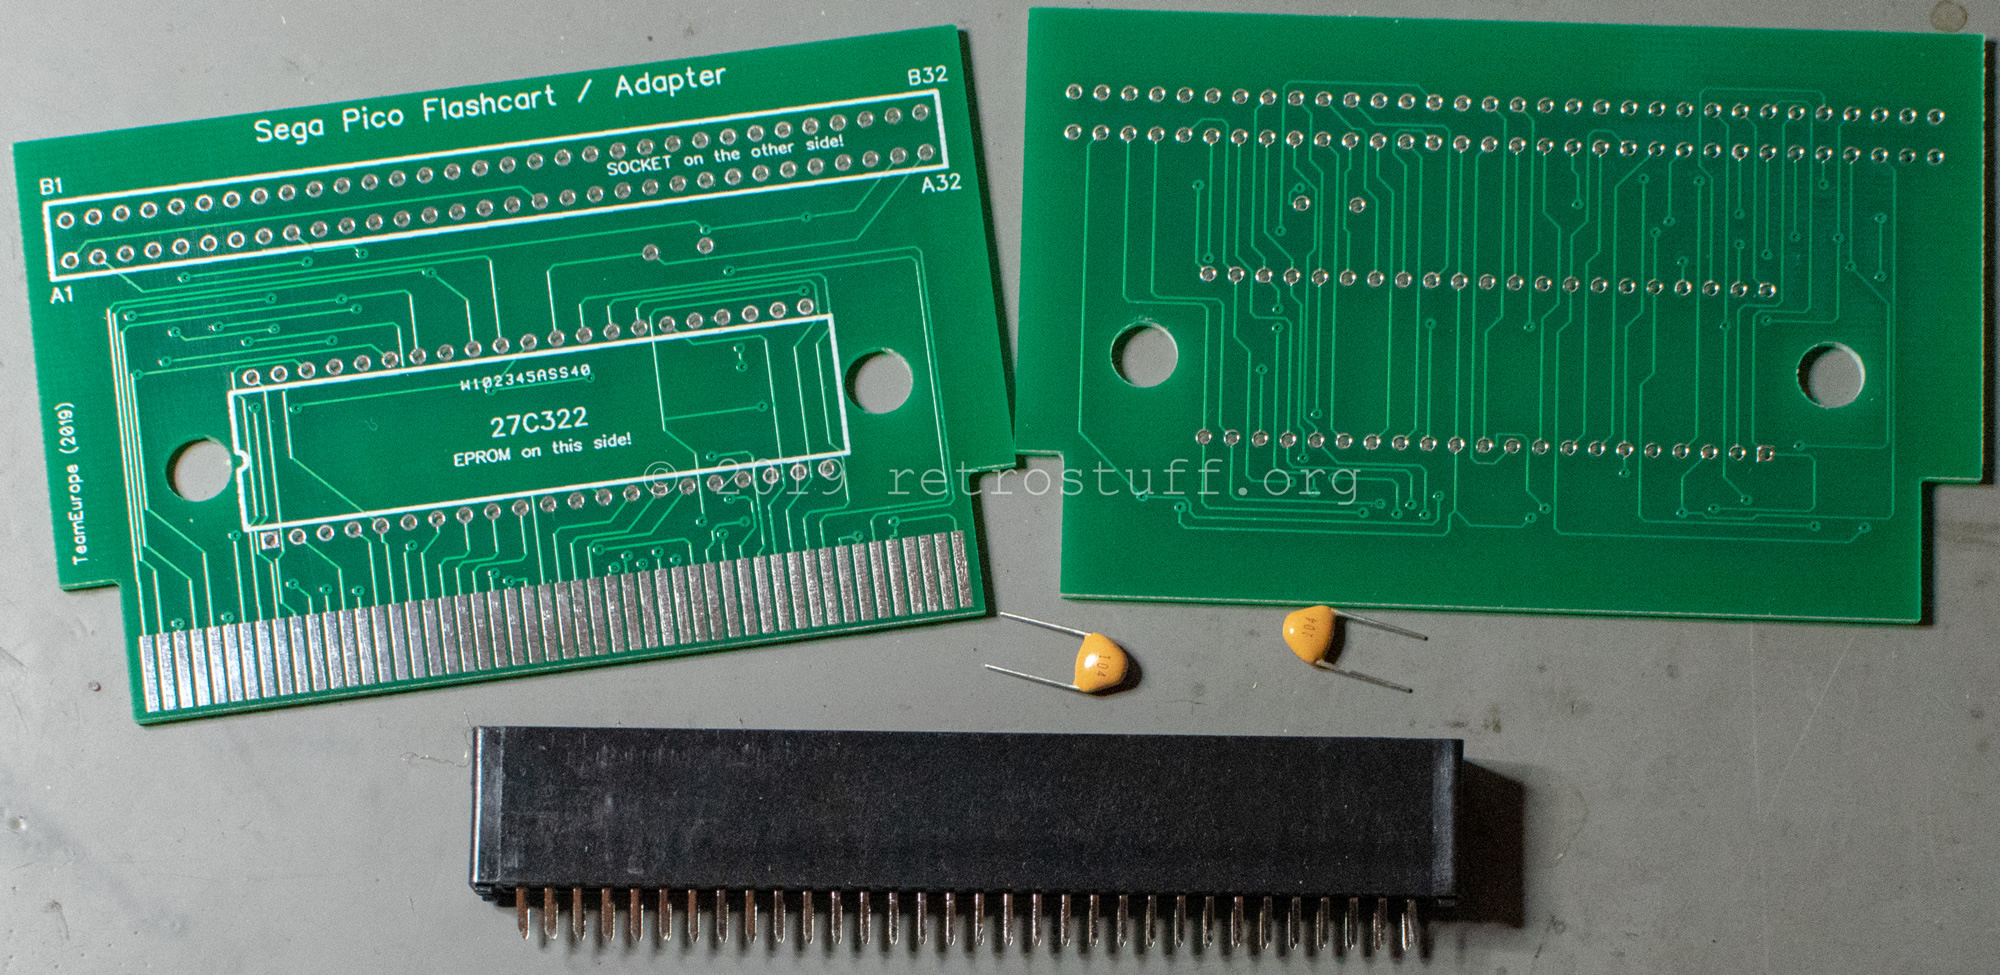
The times are over, when I had to hunt down and modify Sega Pico game cartridges that had been assembled in Mexico. This has just arrived from TeamEurope: Parts to build a real Sega Pico flash cart and more.