
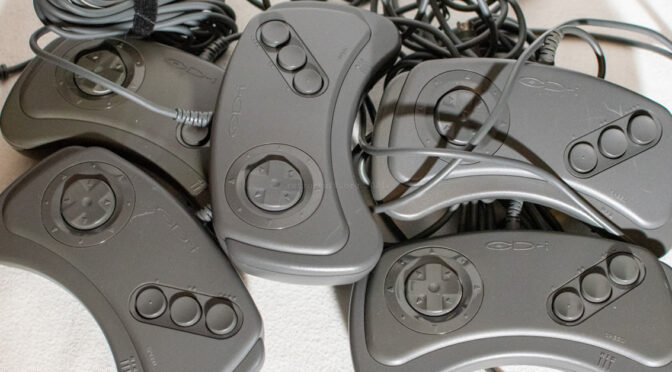
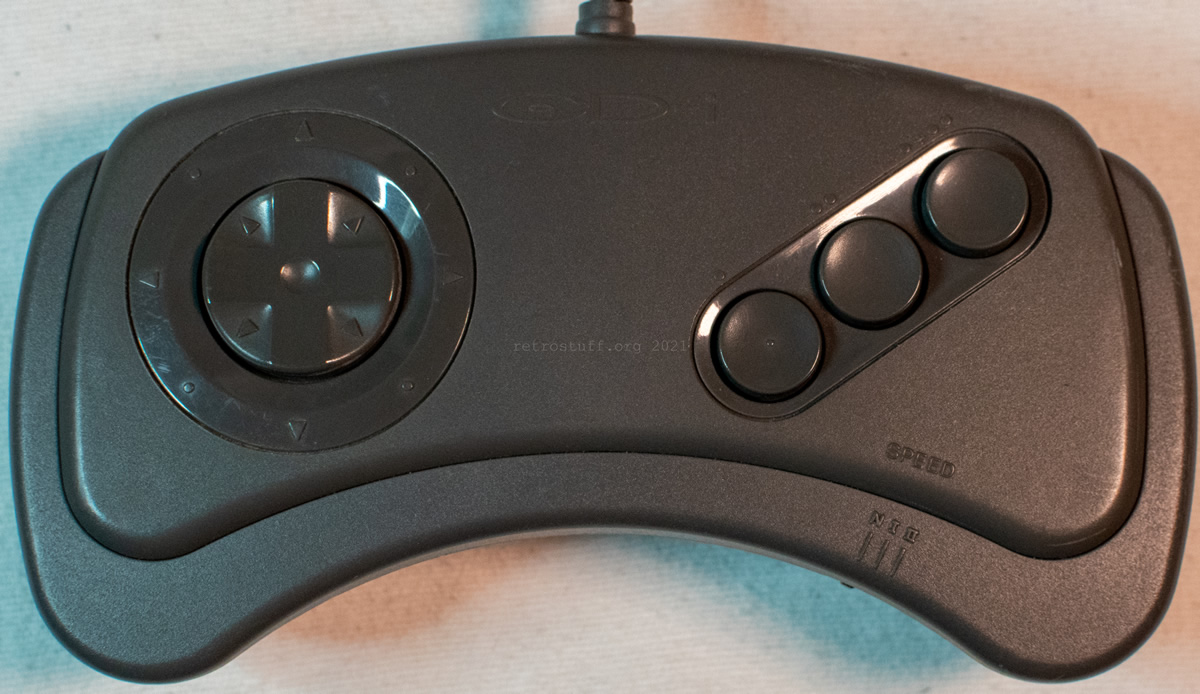
Recently, I acquired yet another CD-i player for repair and it came with a Philips 22ER9021 CD-i Gamepad. The gamepad showed two common signs of usage: Broken cable insulation and an unresponsive D-Pad.
The coating is broken right behind the cable strain relief. I’ve seen much worse cases of broken insulation and even ripped out conductors, but this still needs to be fixed before it becomes worse.
Fixing the cable
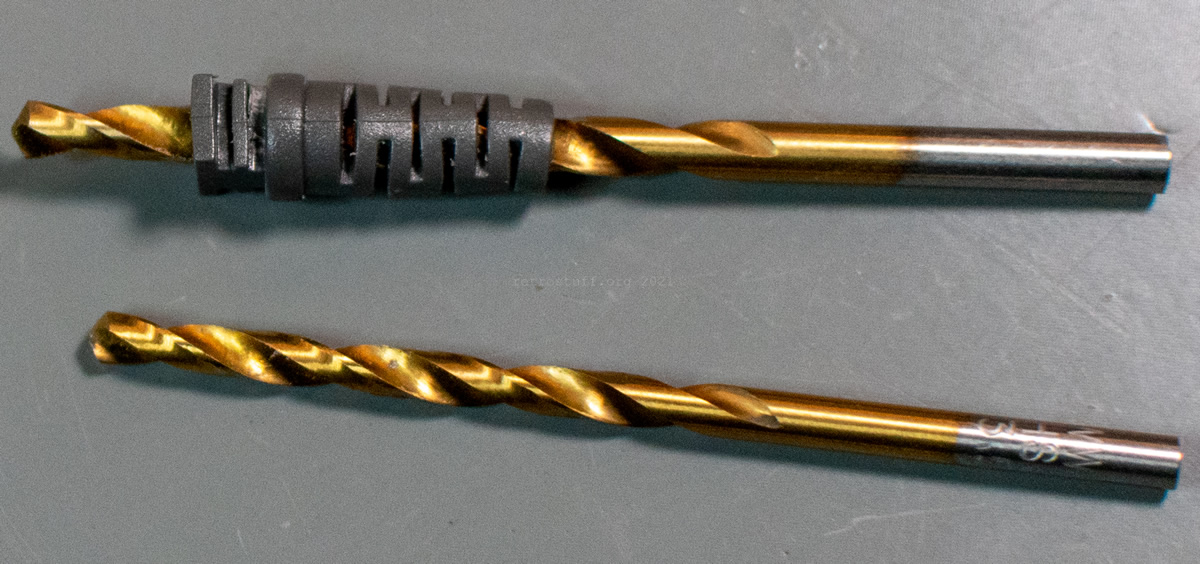
I started with cutting the cable before and after the strain relief and tried to pull out the remains. With pliers and some force, I was able to get most of it out, but there were still pieces of the coating bonded inside that didn’t want to come out. Then, I took a 3,5 mm drill and carefully drilled through the cable strain relief, digging out the remains of the coating. I was almost able to thread the controller cable back in, but when it was half-way in, it didn’t want to go any further. I had to work my way through with a 4 mm drill and was finally able to get the cable back in.
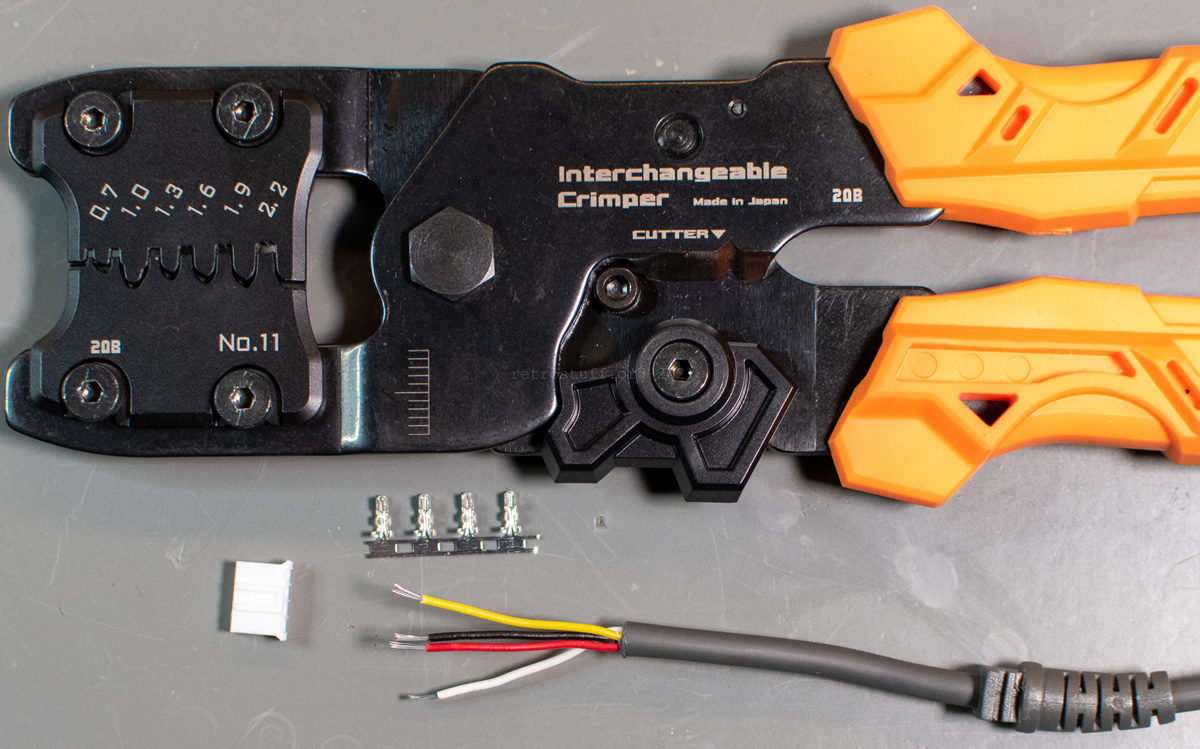
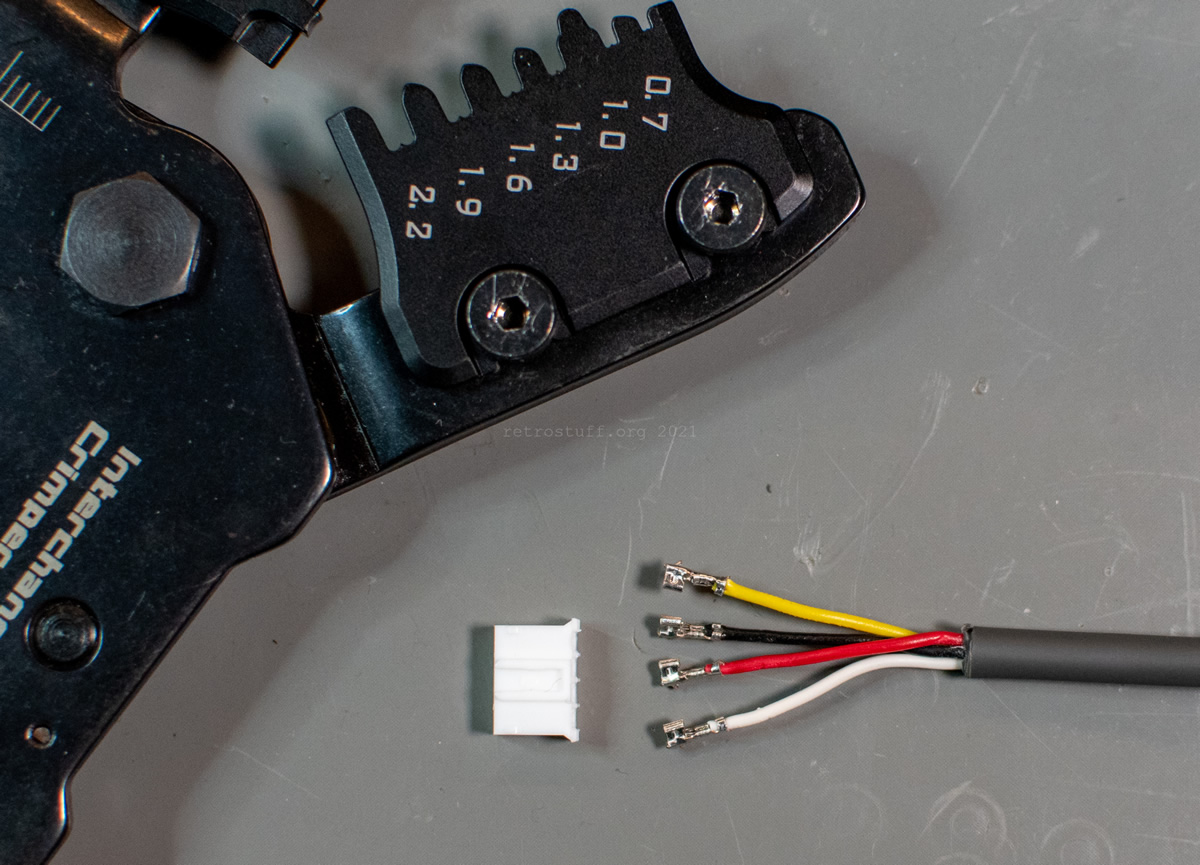
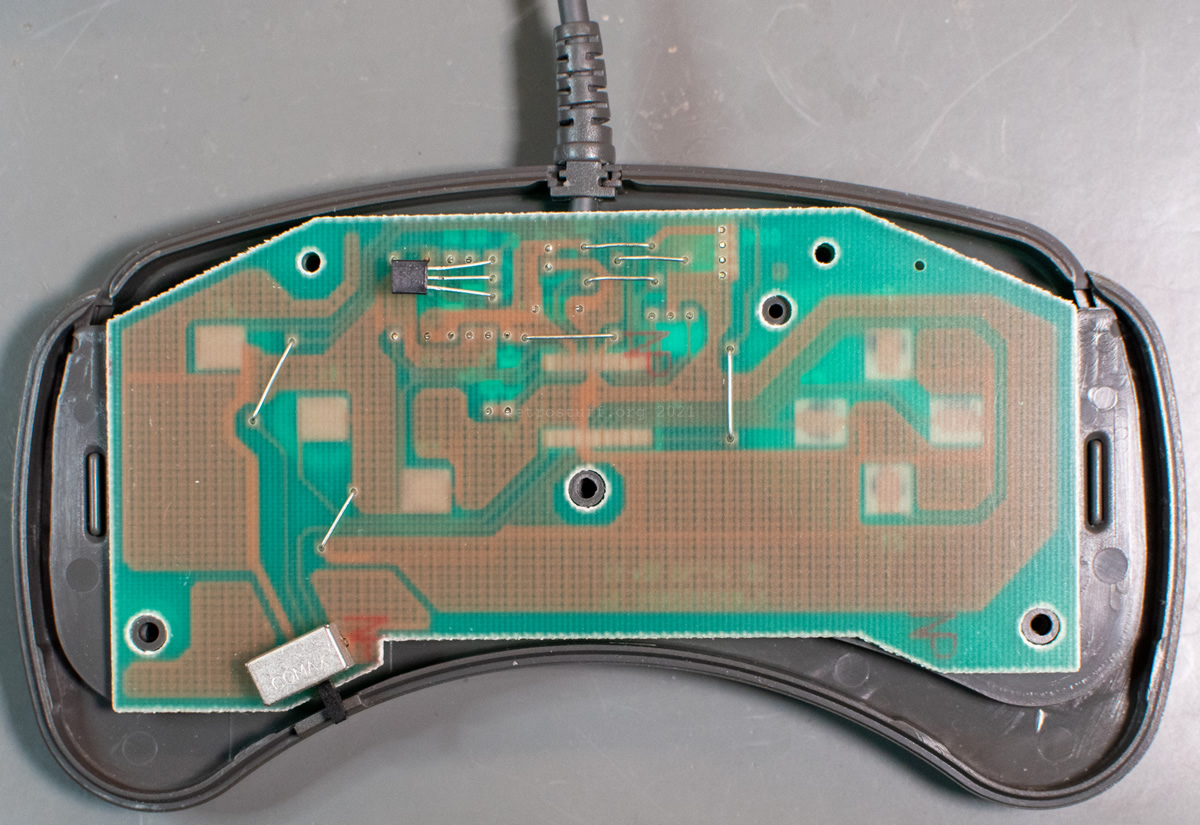
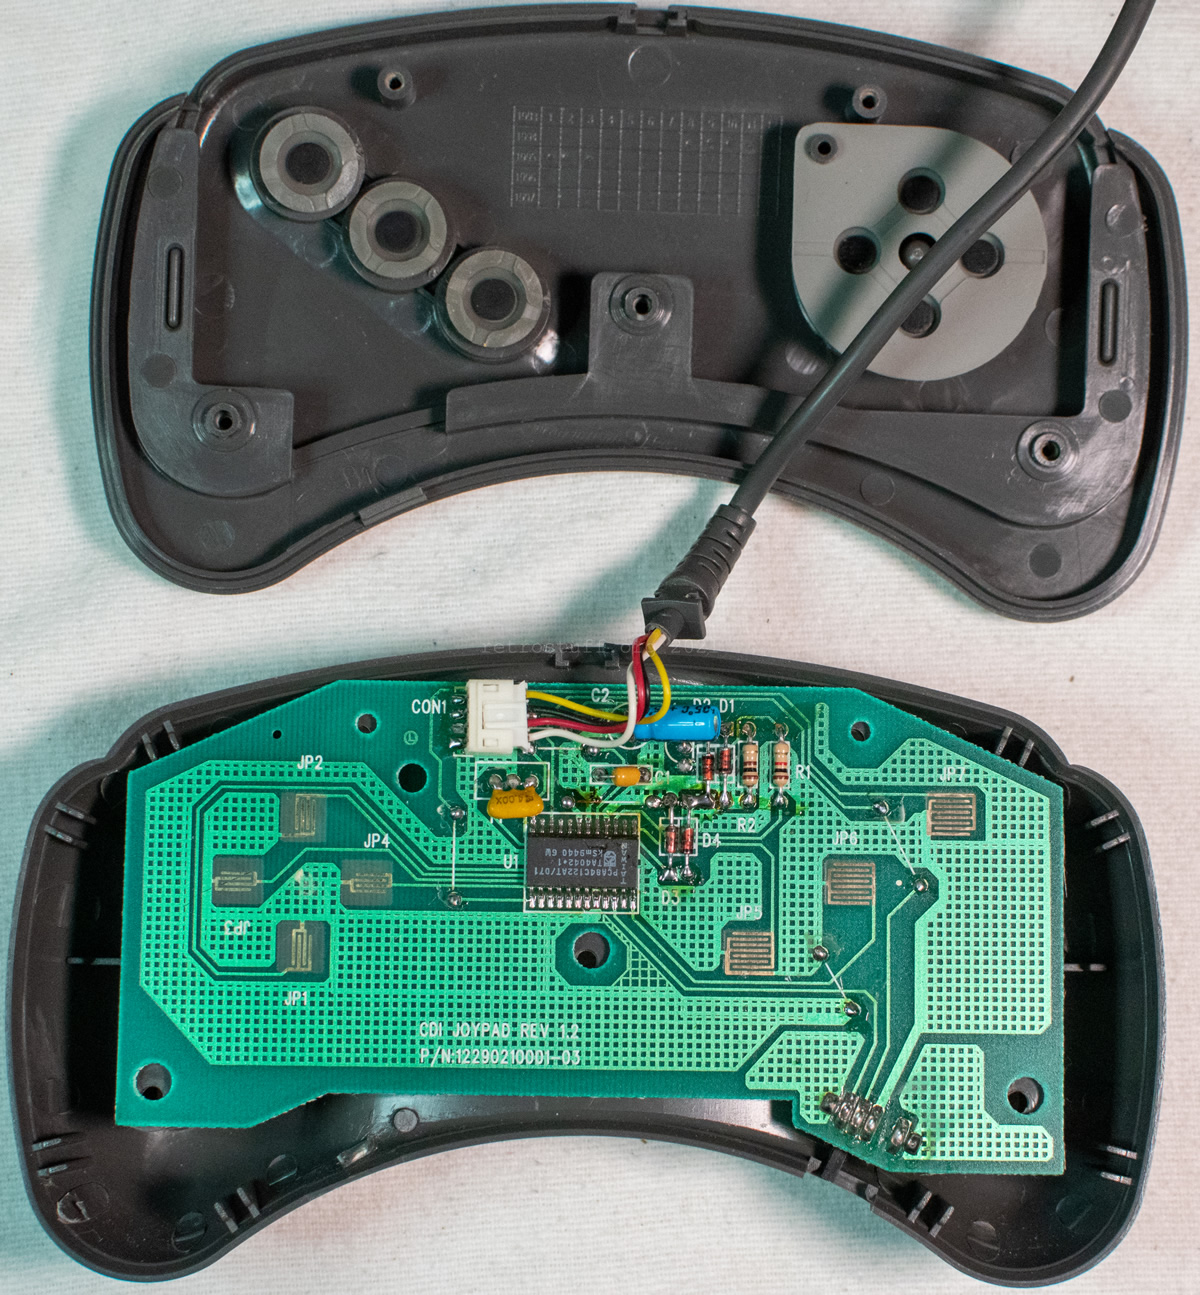
Next, I needed to reconnect the cable with the controller PCB. An easy approach is to solder the conductors to the remains of the old conductors or directly to the connector. I went a different route instead and crimped a JST PH connector. Whatever route you take, this is the pinout (the colours of the conductors are also shown; I assume that they are always the same for this model):
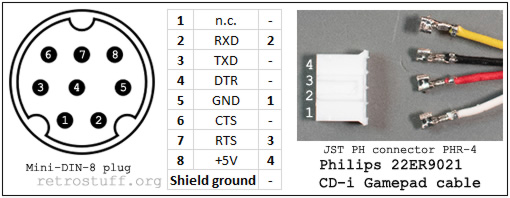
A box full of connectors can be bought very cheap from Amazon etc. Make sure that you get the PH type with 2 mm pitch and 4-pin housings (PHR-4). Don’t expect that these are original JST connectors though.
For crimping, I used the 1,3 mm die of an Engineer PAD-11 crimp tool (PA-09 works fine too).
Note to self: Next time, remove 2-3 times as much of the cable coating.
Fixing the D-Pad
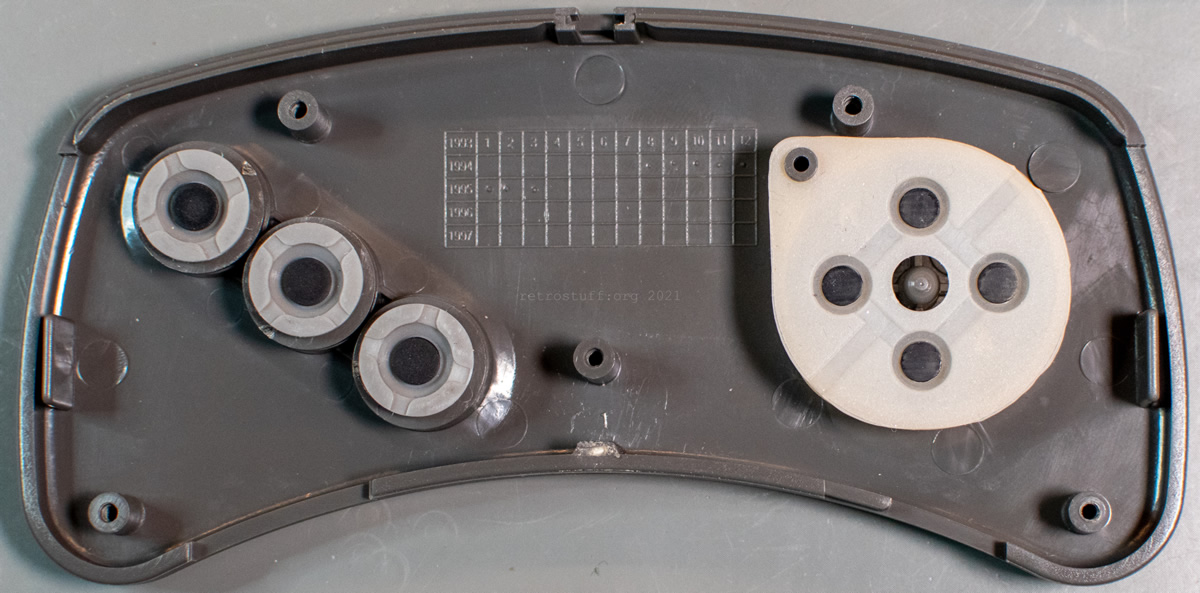
The reason for the D-Pad being unresponsive can be seen right away: The conductive rubber buttons are all broken and barely stay in place. In search for a replacement, I came across a broken Sega Six Button Control Pad (or clone – not sure about that). The rubber pad has the same size and alignment, only the outer hole is a bit smaller and is missing two notches in the brim.
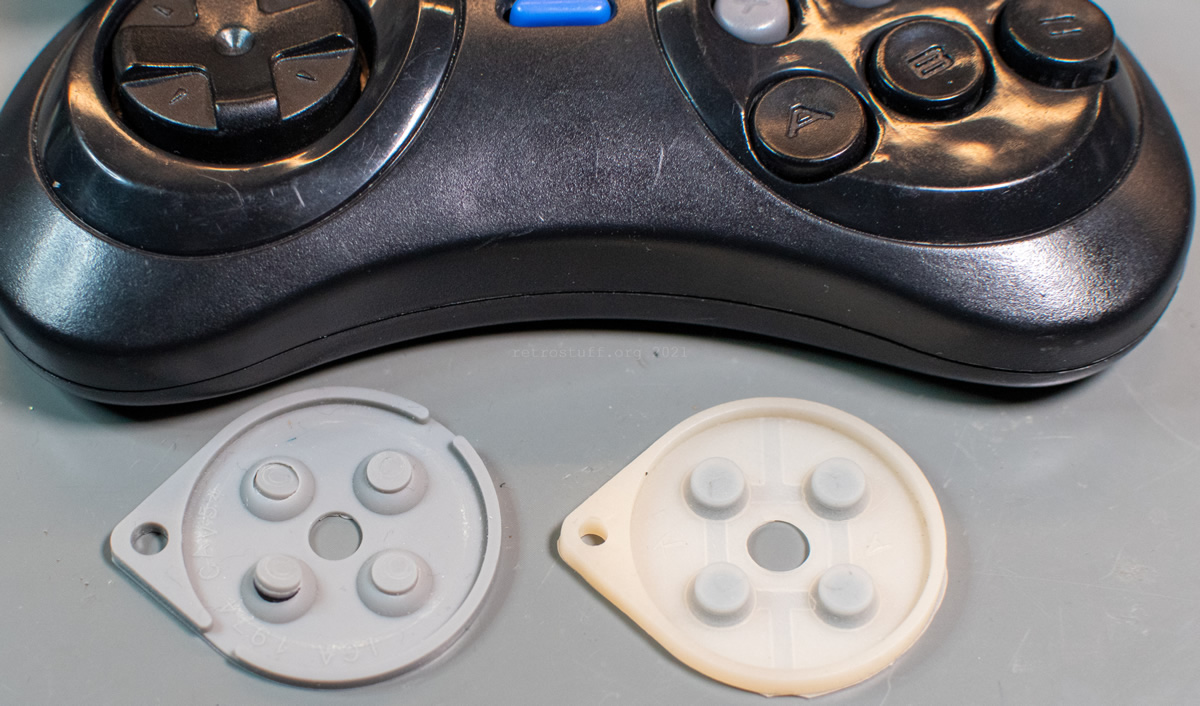
It still fits perfectly without any modification. Original rubber pad on the left, replacement rubber pad on the right:

With the new pad in place, I assembled the controller again. If you remember my note from above about the cable coating, it still fits but needs some bending and force to put the PCB back in.
The Philips 22ER9021 CD-i Gamepad worked right away after the repair. However, the directional controls were a bit stiff in the beginning and needed more pressure. After a bit of playing Hotel Mario (good game to test all buttons of the controller), it became much easier and now it behaves like a new controller.
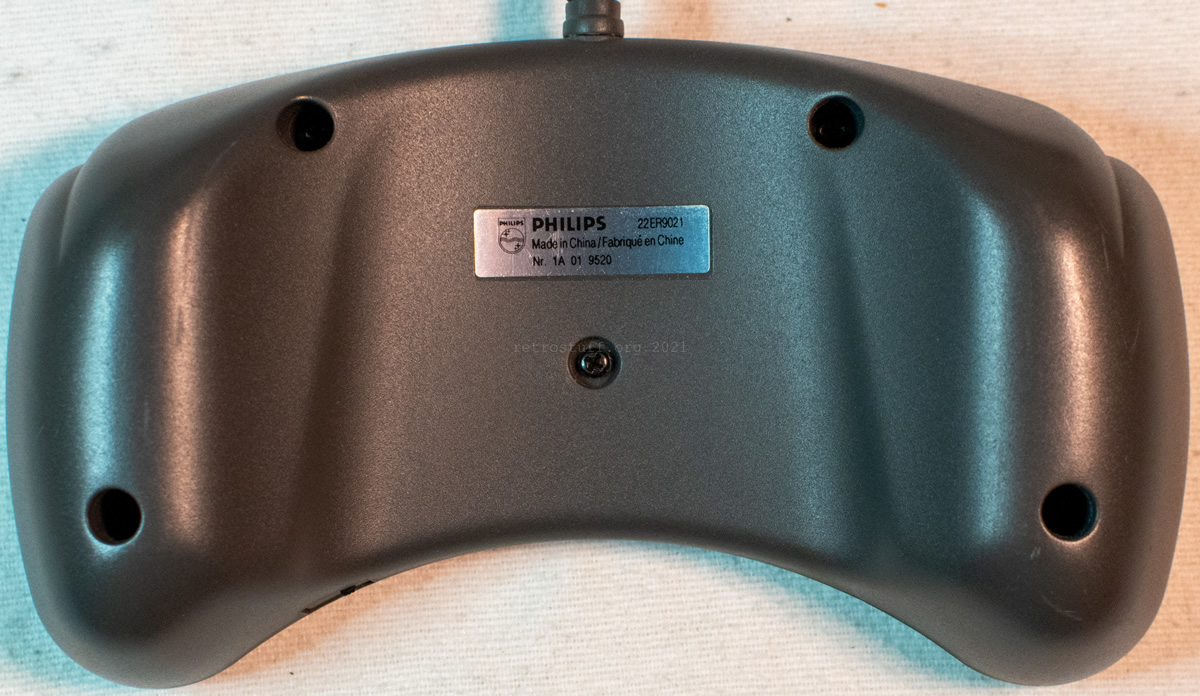
A closer look at the 22ER9021 CD-i Gamepad
Are all 22 ER 9021 CD-i Gamepads the same? Probably.
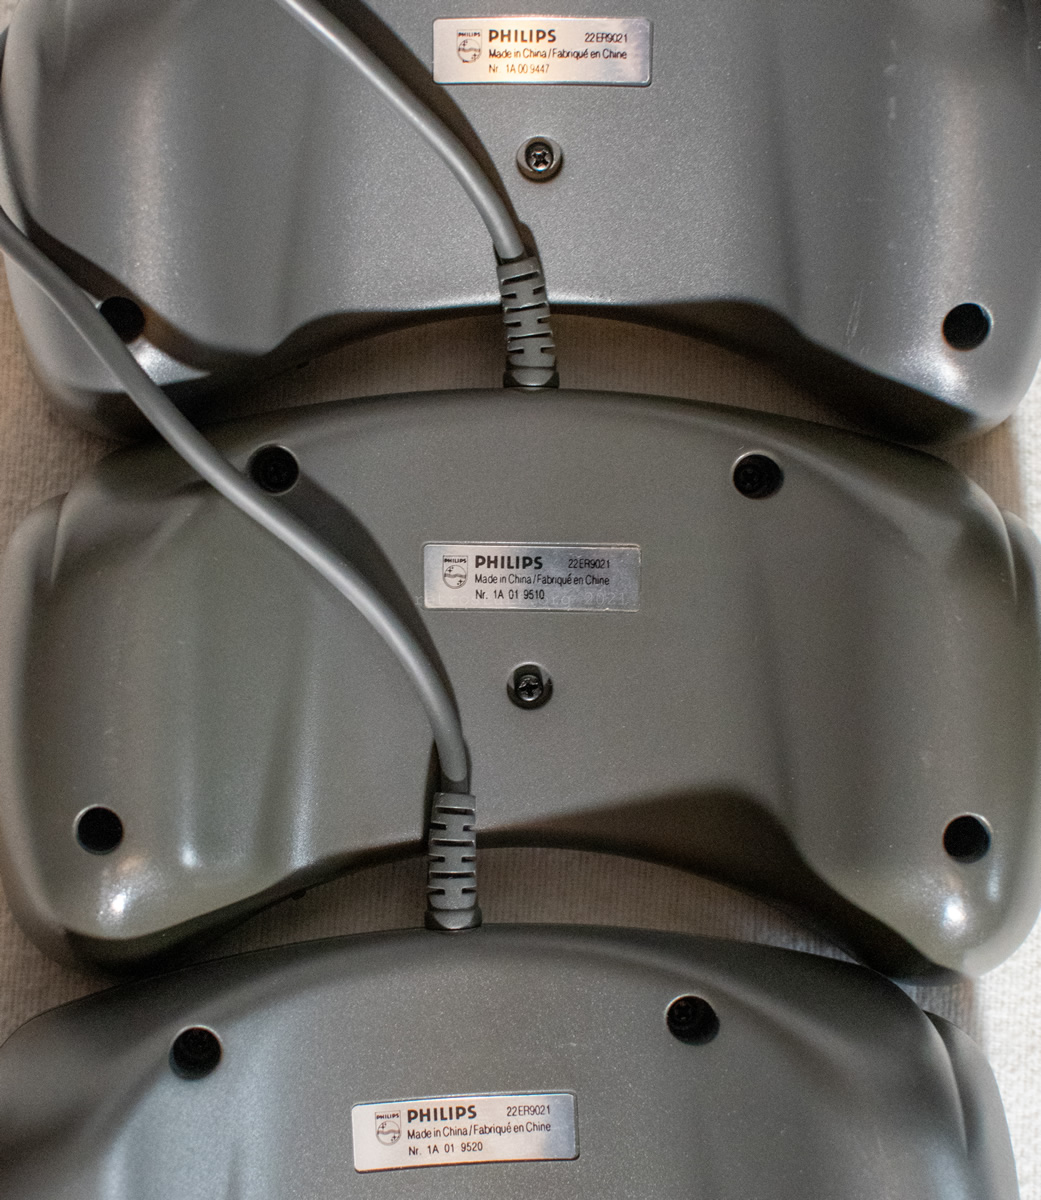
So far, I’ve seen three different numbers on the labels on the back:
Nr. 1A 00 9447
Nr. 1A 01 9510
Nr. 1A 01 9520
I assume that the last four digits are year and Calender week, but we never know with Philips’ confusing versioning scheme.
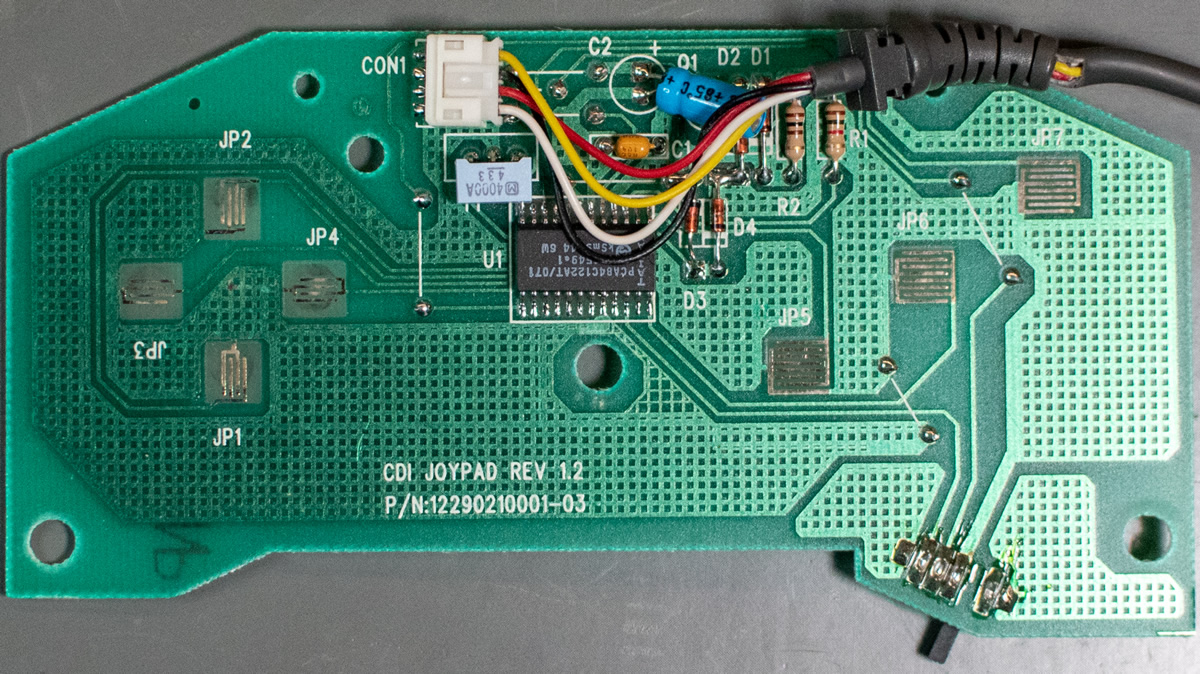
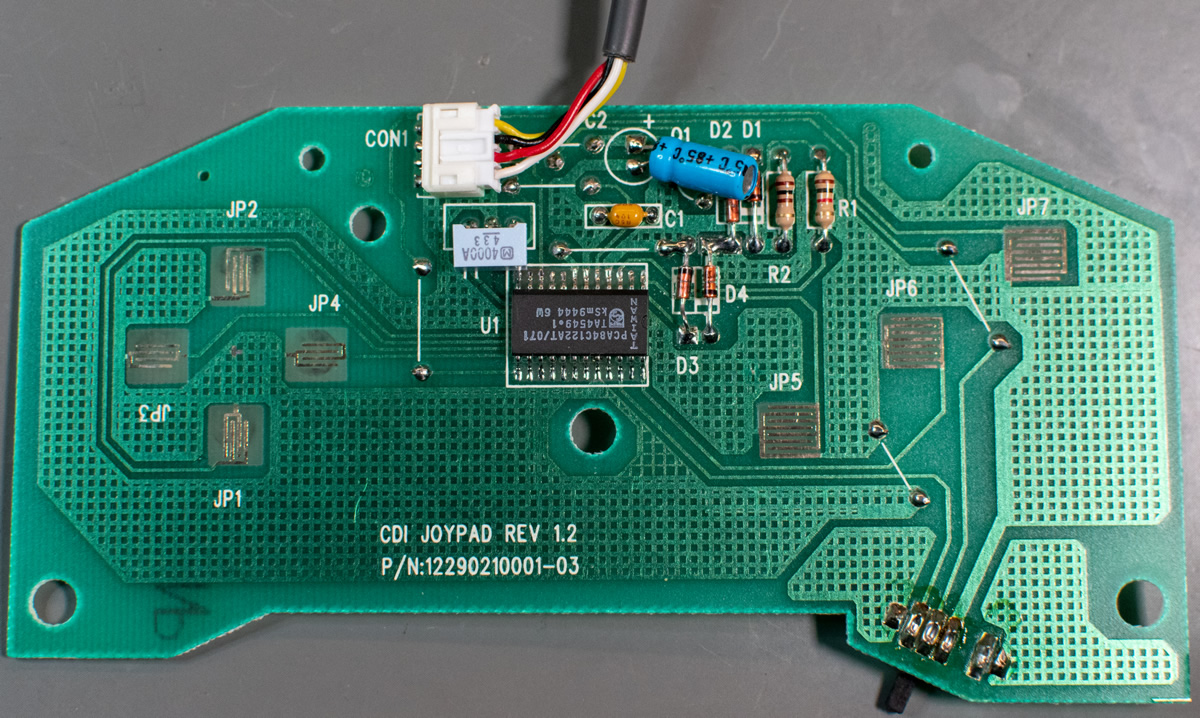
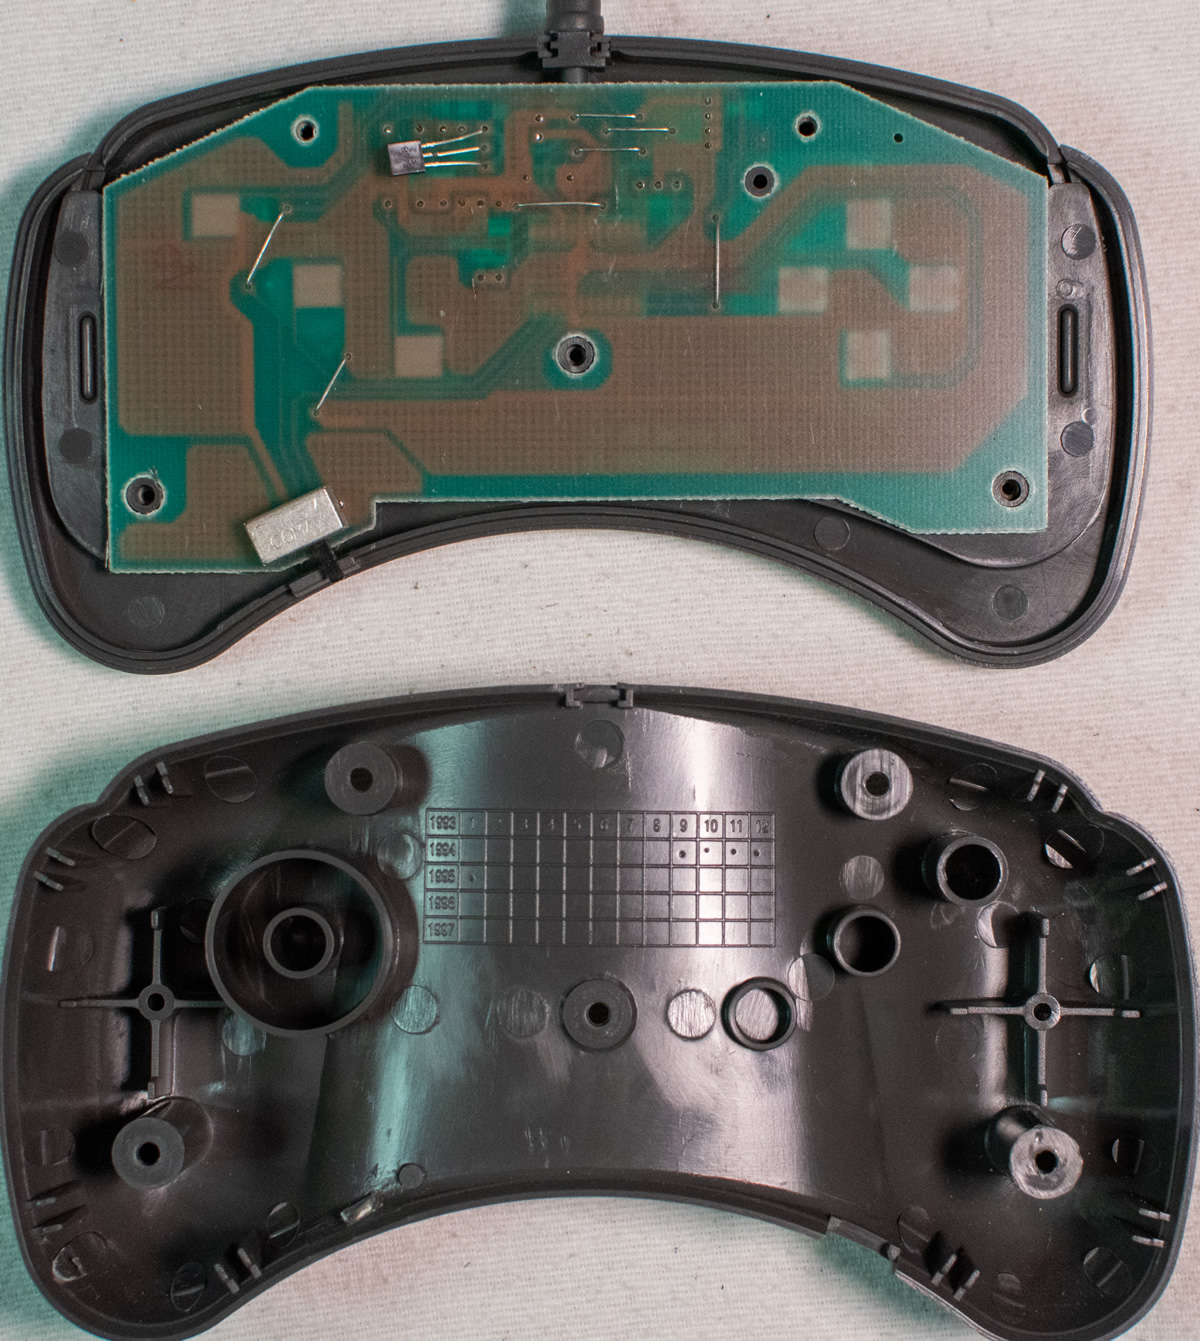
Inside, they all have the same PCB with these markings:
CDI JOYPAD REV 1.2
P/N:12290210001-03
Update (2022-11-23): This topic is continued in the article Philips 22ER9021 and TecnoPlus TP520 CD-i Gamepads.
Here are some more pictures of a 22ER9021 CD-i Gamepad that I disassembled about two years ago. Back then, I started documenting the pinout.
Great article, like always! 😉
Thanks, Omegalfa!
Which Sega controller did you use specifically? I can’t seem to find one that works.
Six Button Control Pad (or clone)
That does fit, but the raised portions of the rubber are not quite as tall which makes for a slightly floppy controller. Unless that’s just how this controller always was. I’ve never been able to use it until now so I suppose that’s a plus.