
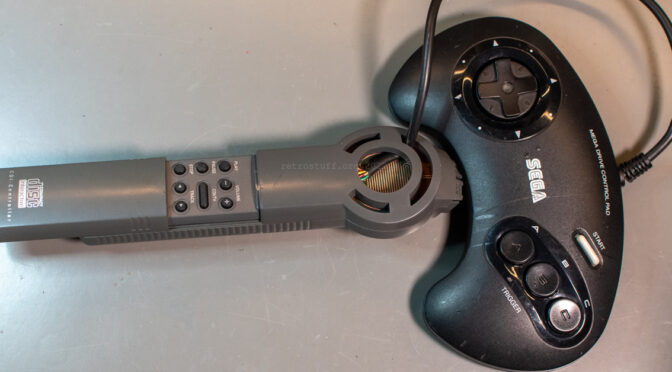
A quick and dirty hack to save a broken Philips CD-i RC6 remote control with a Sega Mega Drive controller.
Most CD-i players come with or are compatible with the 22ER9055 CD-i Commander, an RC6 remote control with a pressure-sensitive thumbpad. There are three known versions of the CD-i Commander:
- RV 7701 – standard remote for most CD-i Players.
- RV 7704 – with additional stand-by button for CDI660 and 670.
- RV 7706 – with additional controls for CDI740.
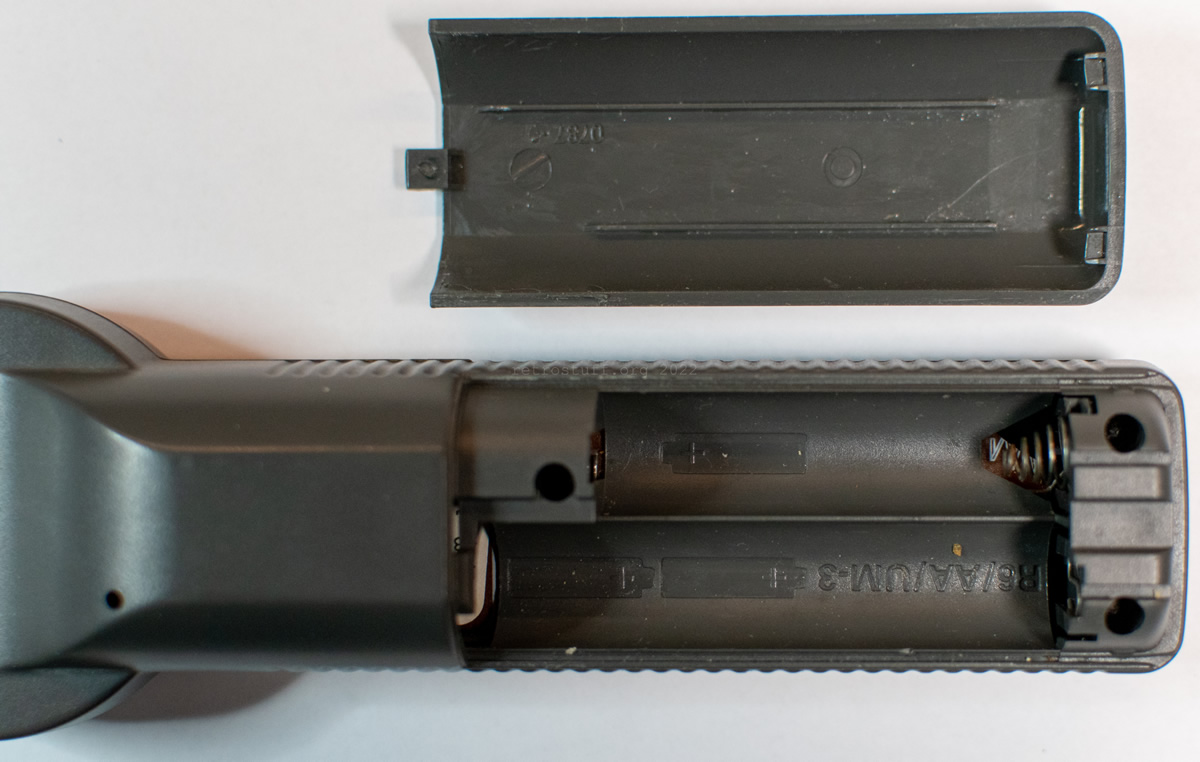
When buying a used remote control, your first action should be to check the battery compartment for obvious leaking damage and also take it apart to find hidden damage. You never know if there were accidents in the past and previous owners just cleaned out the battery compartment without looking further into it.

Pressure pad
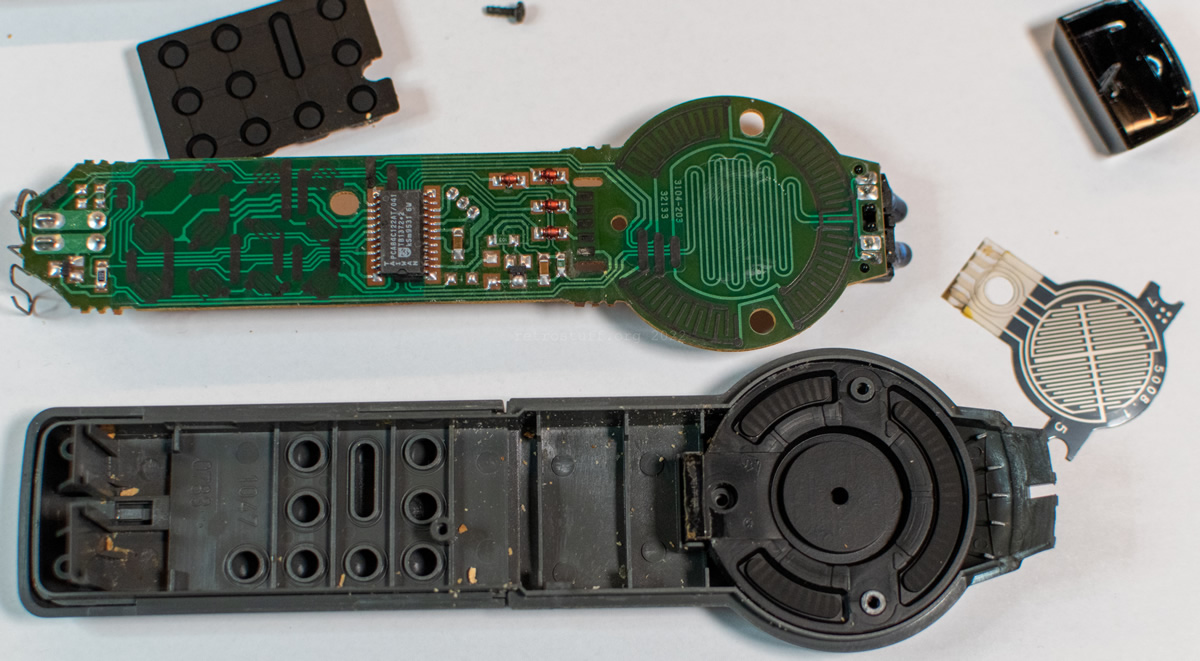
A very important component of these remote controls is the pressure pad that sits underneath the thumbpad.
The pad on the left is damaged. Battery leakage has crept from the contacts between the films, dissolved some of the glue and damaged the tracks of the conductive paint. The pad on the right has some oxidation on the contacts but is working perfectly.
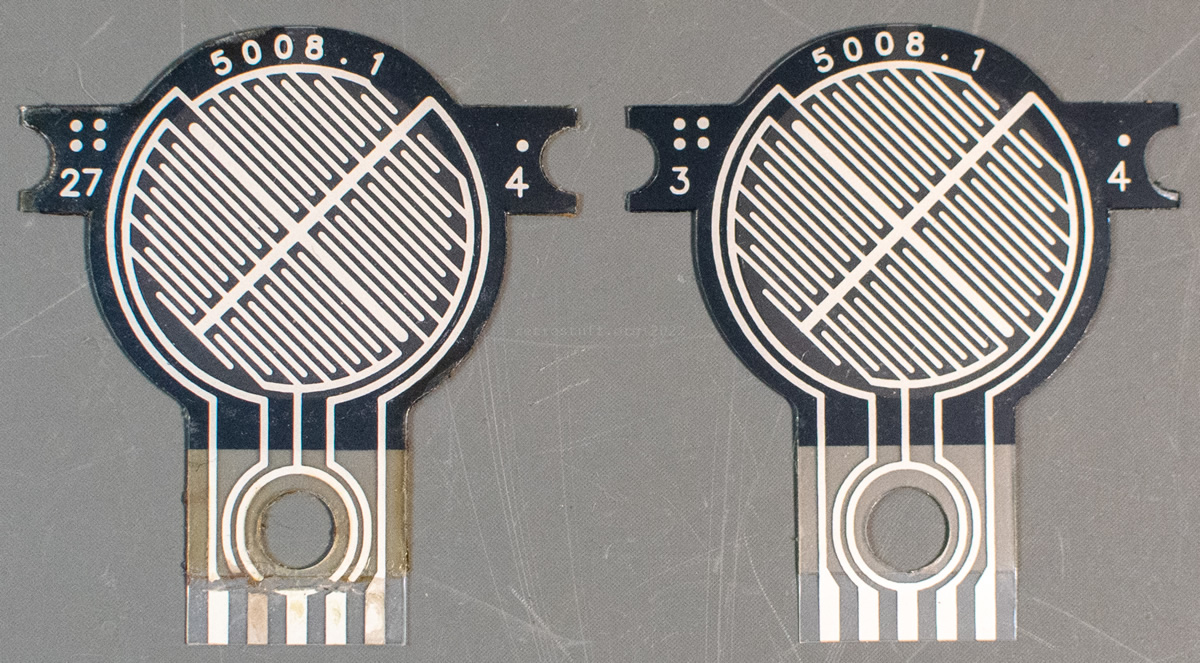

This is how it looks when you pull it apart. On the left film is a comb-like structure of conductive paint and on the right film a layer of resistive carbon. You can clearly see the damage of the corrosion. So far, I haven’t been able to find a solid way to fix the traces.
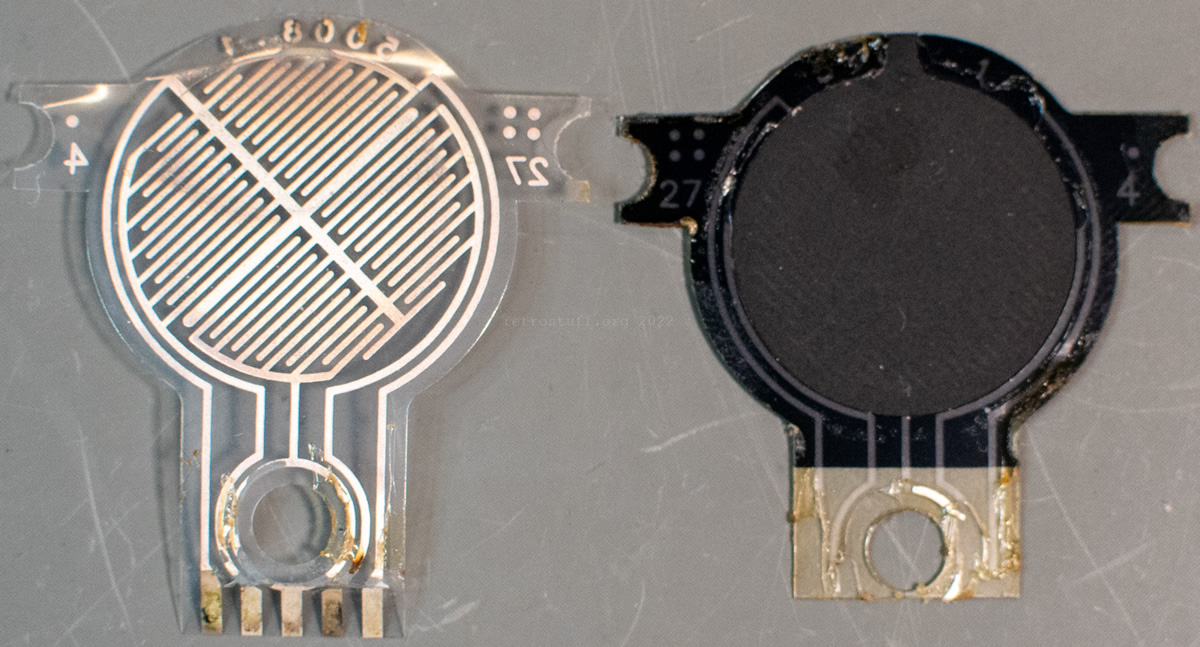
How does the pressure pad work?
The harder you press anywhere on the pad, the lower the resistance gets between the four contacts on the left (connected to the combs in each quadrant) and the common contact on the right (connected to the cross-shaped comb). By measuring the resistance changes of each quadrant, you can figure out pressure and direction(s).
Microcontroller and matrix
A PCA84C122AT/041 8-bit microcontroller for remote control transmitters by Philips Semiconductors reads the changes of resistance and sends the corresponding RC6 command to the CD-i Player. At the moment, it isn’t entirely clear how the interpretation works. What is known is that the common contact is connected to T0/INT (test T0 and external interrupt input). All other buttons on the remote are connected to the standard I/O port lines (P00 to P07 – scanning and P10 to P17 – sensing).
Here you can see where the contacts of the pressure pad align with the carbon contacts on the PCB. If you want to install additional/external controls then you can use the solder points on the diodes below (as pictured). Also marked are the scan/sense lines of the action buttons I and II.
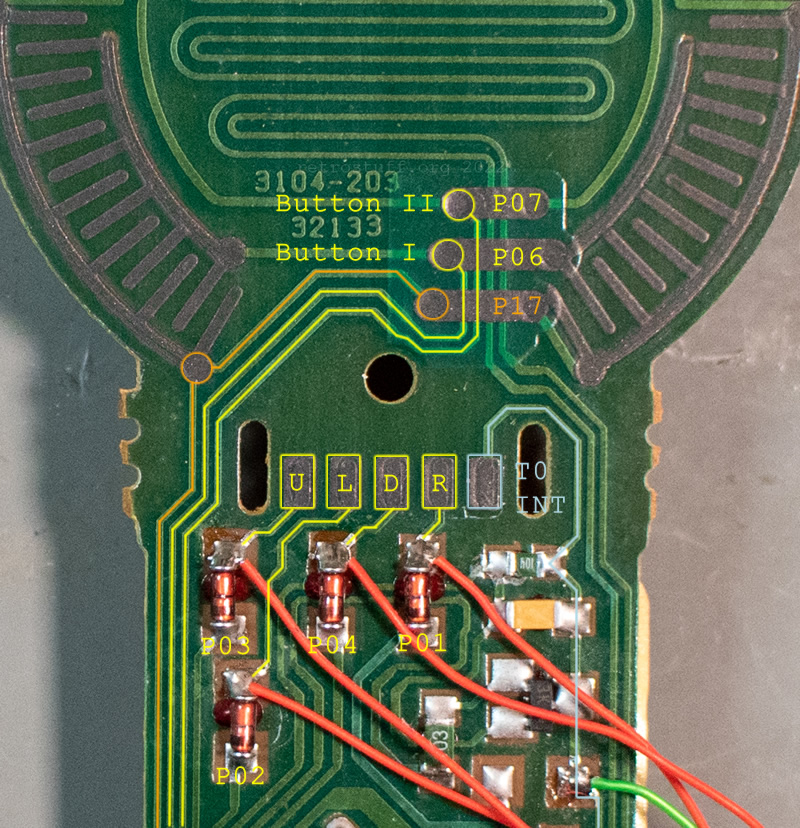
This is the scan/sense matrix for all buttons on the RV 7701 and RV 7704 remote controls. There are many blank spots that need to be examined further. What has already been figured out is that you can use the scan lines P01 to P04 together with the sense line P17 for full-speed (fixed) directional controls.
| P00 | P01 | P02 | P03 | P04 | P05 | P06 | P07 | |
| T0/INT | Right | Left | Up | Down | ||||
| P10 | PLAY | TRACK > | ||||||
| P11 | STAND BY (660) | (spare 1) | ||||||
| P12 | STOP | (spare 2) | ||||||
| P13 | PAUSE | TRACK < | ||||||
| P14 | VOLUME – | VOLUME + | ||||||
| P15 | CDI/TV (1) | CDI/TV (2) | ||||||
| P16 | ||||||||
| P17 | Right (fixed) | Left (fixed) | Up (fixed) | Down (fixed) | Button I | Button II |
Remote control hack
There are various levels of damage that range from corroded battery terminals and dried residue, corroded traces and carbon pads on the PCB to a damaged pressure pad (shown above). Before you start, make sure that battery leakage is properly removed and neutralized and/or wash (soak) the entire PCB with distilled water and IPA. Then, inspect the PCB for damaged traces and areas where the leakage has crept underneath the carbon pads and solder mask.
This RV 7701 PCB had experienced medium leakage and even after washing, it was still in a bad shape and already lost the directional pad and some traces. (Don’t mind the tests wires, they are only there to confirm basic operation.)

Initially, I thought that I had only lost the directional pad and that the action buttons I and II could stay as they were. I intended to add an external controller in the style of a WiiMote with a Nunchuk. However, while cleaning the affected areas with a glass fibre pencil, it became pretty clear that I couldn’t save the upper half of the remote. All carbon pads and bridges and the solder mask had to go. That voided my plans of keeping the action buttons and called for a new plan.
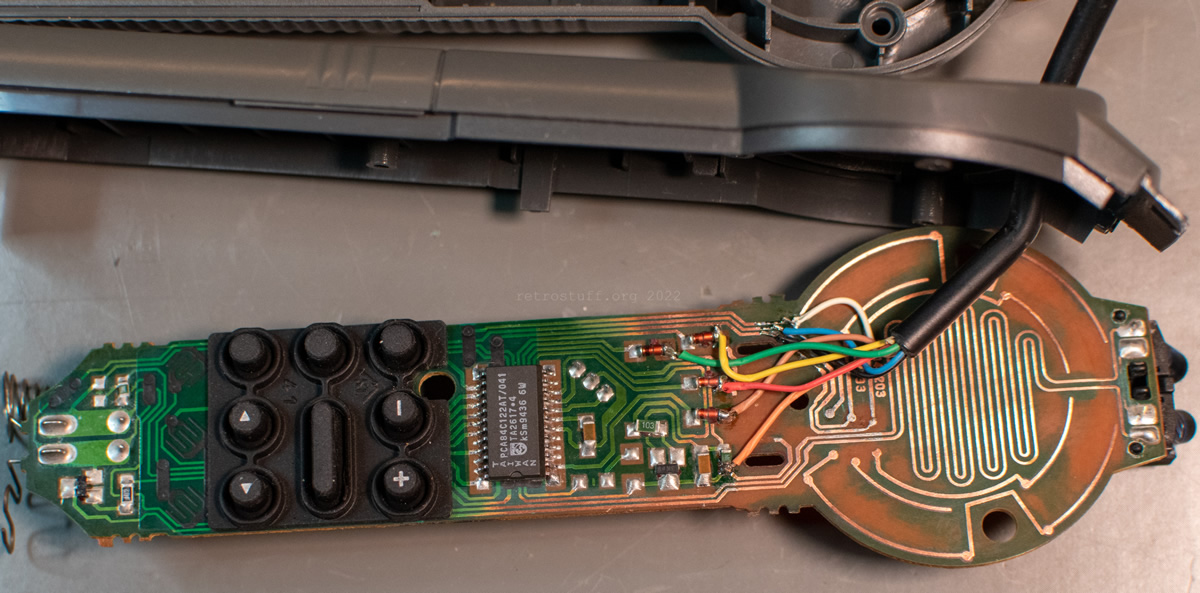
The PCB is now wired for an external controller with two common grounds/sense lines (T0/INT and P17) for both directions and action buttons.
Connection table
The following table shows how to wire an external, modified Mega Drive controller with two common grounds. If you don’t want to do that (or if you want to wire a Master System controller directly to the remote), then you can use P17 as common ground and omit the wire to T0/INT. However, that will prevent you from adjusting the speed of the directional controls.
| CD-i Commander | Mega Drive control pad |
| P01, Right | 4, Right |
| P02, Left | 3, Left |
| P03, Up | 1, Up |
| P04, Down | 2, Down |
| P06, Button I | 9, A + C |
| P07, Button II | 6, B + Start |
| P17, Sense (buttons) | 8, former GND |
| T0/INT, Sense (var. speed) | 5, former +5 V |
Mega Drive control pad modification
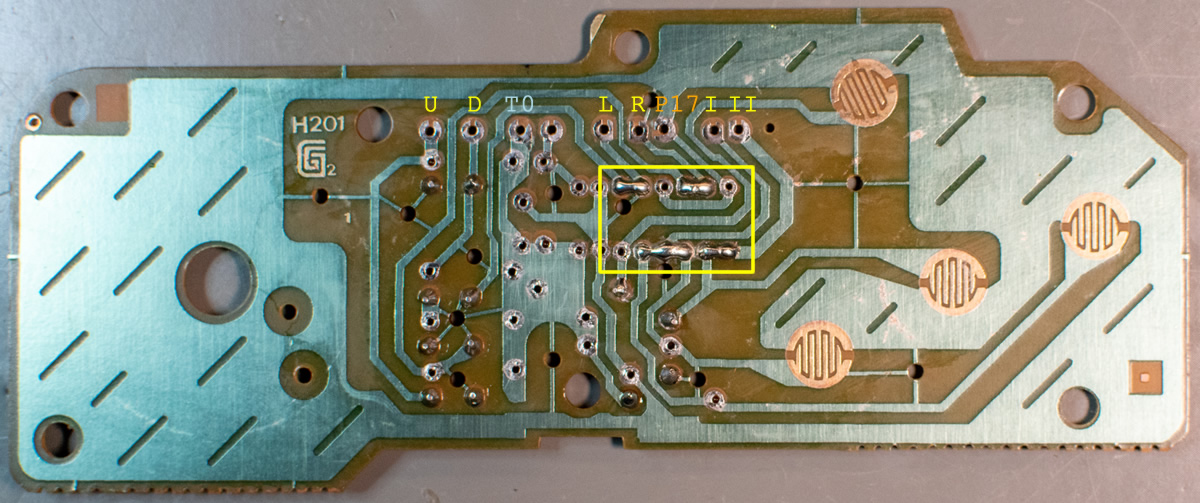
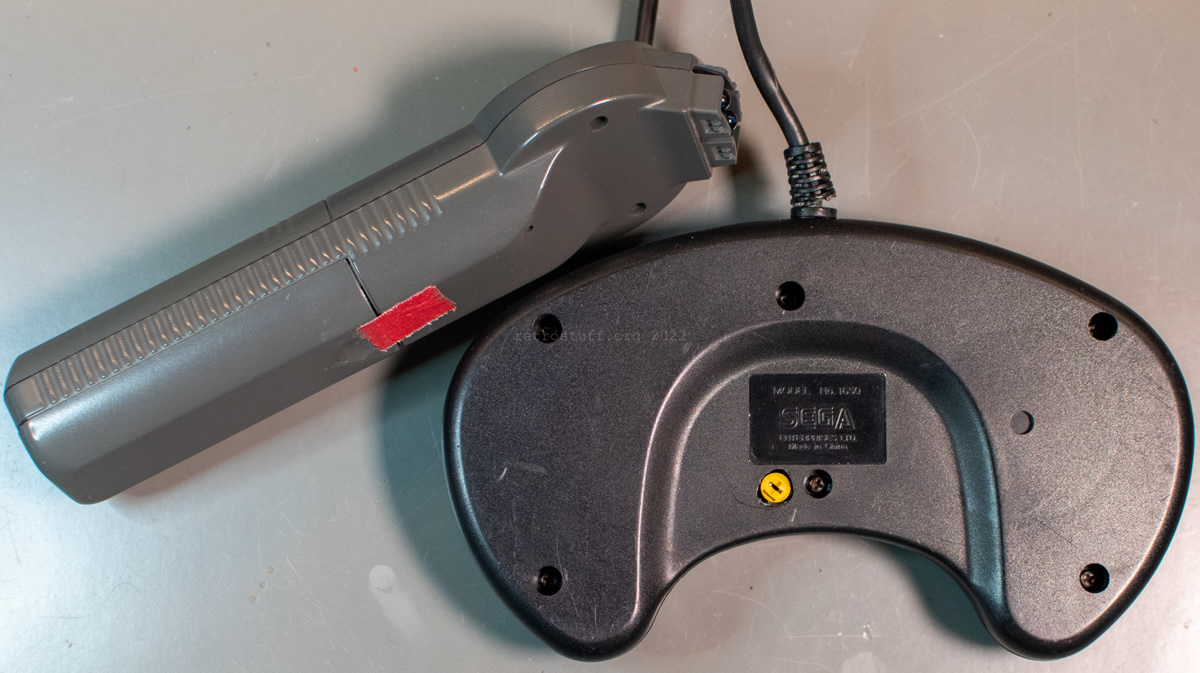
I used an old, broken Mega Drive control pad that had nothing left to lose. Luckily, it was a revision with the directional pads on the back, which made it very easy to work with two common grounds.
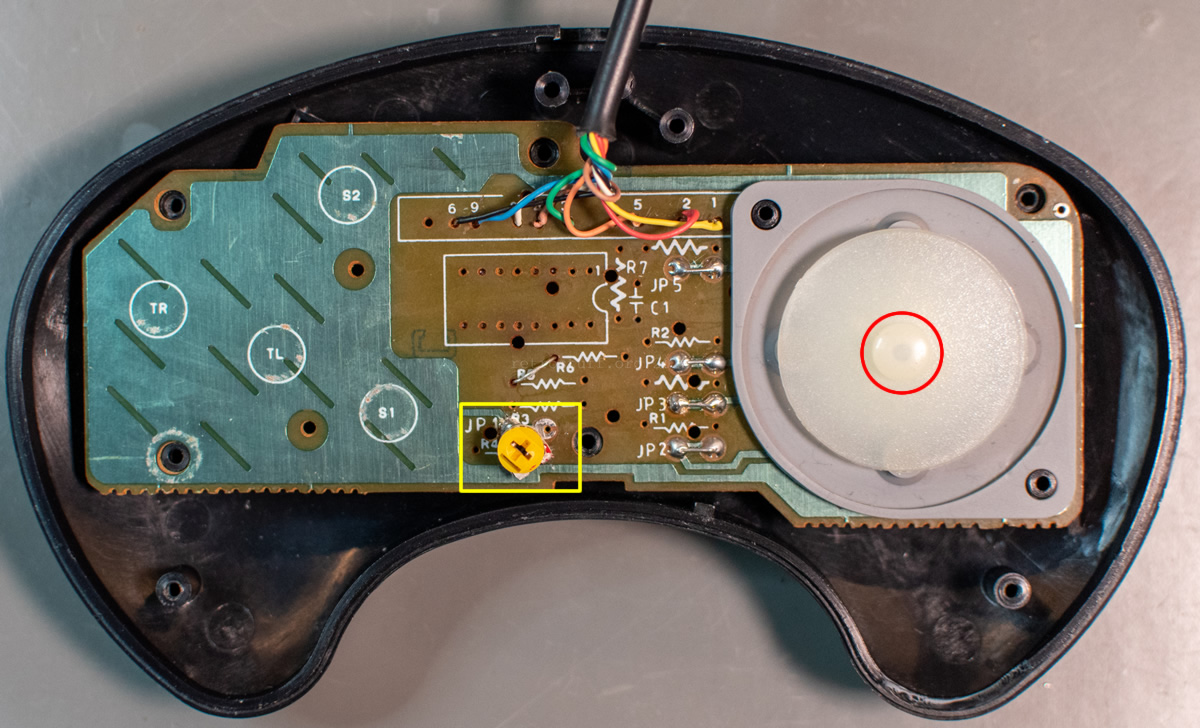
First, I removed all components but the four jumpers that go to the directional pads (JP2 – JP5 in the yellow rectangle).
The ground planes on front and back were connected with jumper JP1. I moved it a bit so it now connects the ground on the back to the former +5 V rail on the front (blue rectangle). Optionally, you can also replace JP1 with a potentiometer, see below.
I also added a jumper to connect the buttons B and Start with each other (red rectangle).

On the front, I made a couple of solder bridges (Left, Right, A+C and B+Start) to be able to connect the wires on the contacts indicated above.
This is the final result before assembly. As a last minute change, I replaced JP1 with a potentiometer to control the speed (yellow rectangle). Before assembling, I put some grease in the area of the red circle for smooth and silent operation.
On the back, I drilled a hole to access the potentiometer.
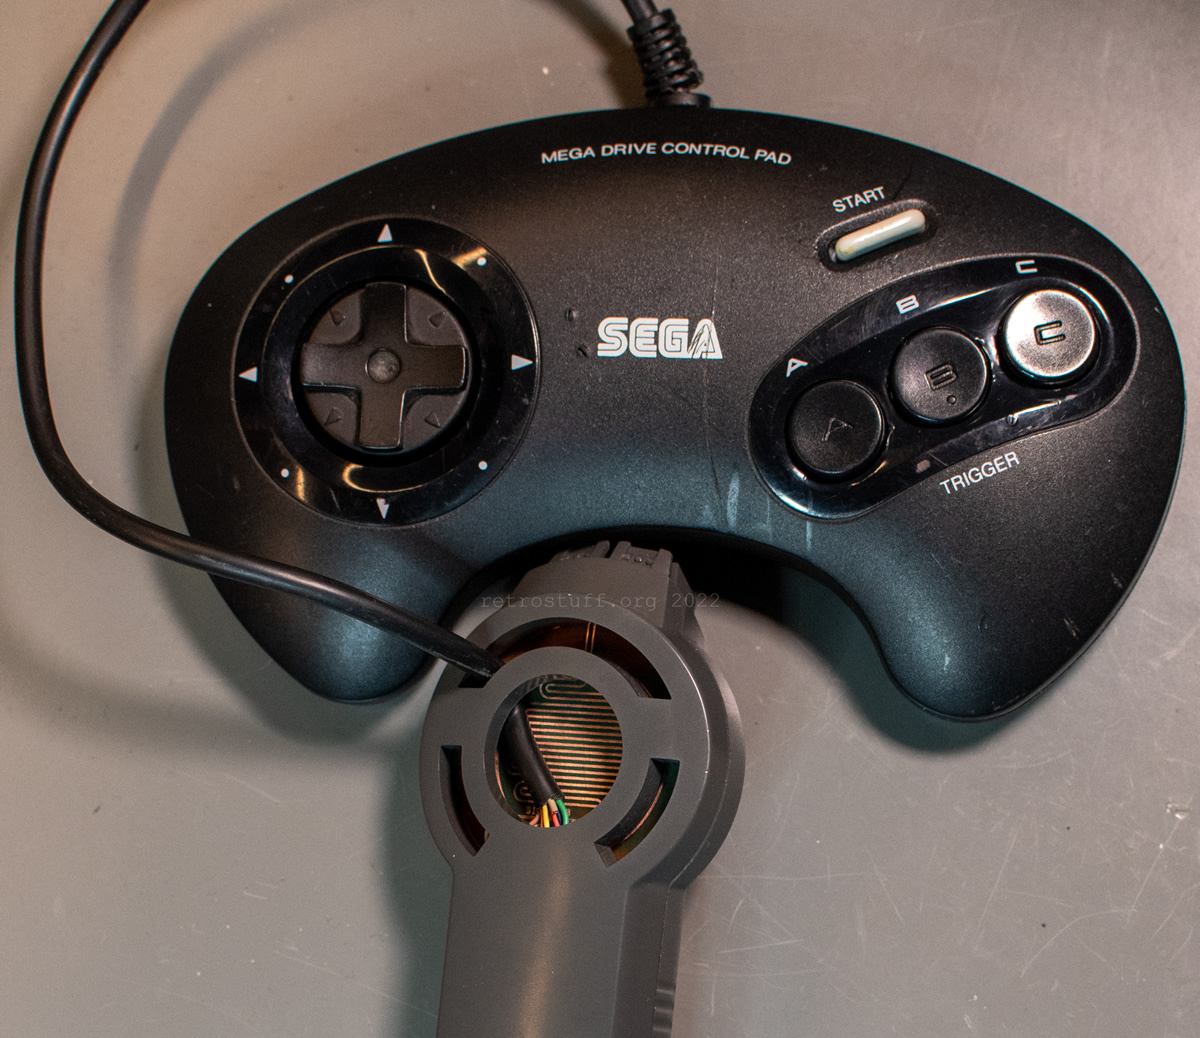
All in all, a not-so-pretty-looking but very comfortable and responsive game controller for CD-i players. I tested it for a while and beat the first stage of The Apprentice with ease.
Hi. Do u have a commander remote that works for sale?
Sorry, nothing for sale.
Do you know the specifications of the diodes (next to P1 – P04)?
I have a controller with a broken diode.
Unfortunately, there is no service manual available.
I measured one of the diodes with a Peak DCA75 pro and it is recognised as a simple p-n junction diode with Vf=0,705 V at 5 mA.
Hope this helps.
Thanks, I used a diode with Vf = ~ 0,7… it works 🙂
Btw. I had the same issue with the pressure pad, most likely damaged due to battery leakage. I used conductive silver paste (see aliexpress etc.) to get it working again. The paste is like paint so you can “draw” the destroyed lines.
Great!
Yes, conductive silver paste can be used for repairs. However, the result depends greatly on where and how far the corrosion has spread. It is possible that the controller will not work reliably afterwards or that the directions will have to be pressed with varying degrees of force.