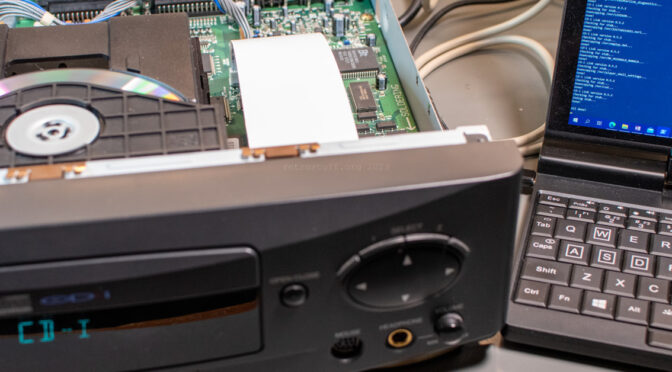
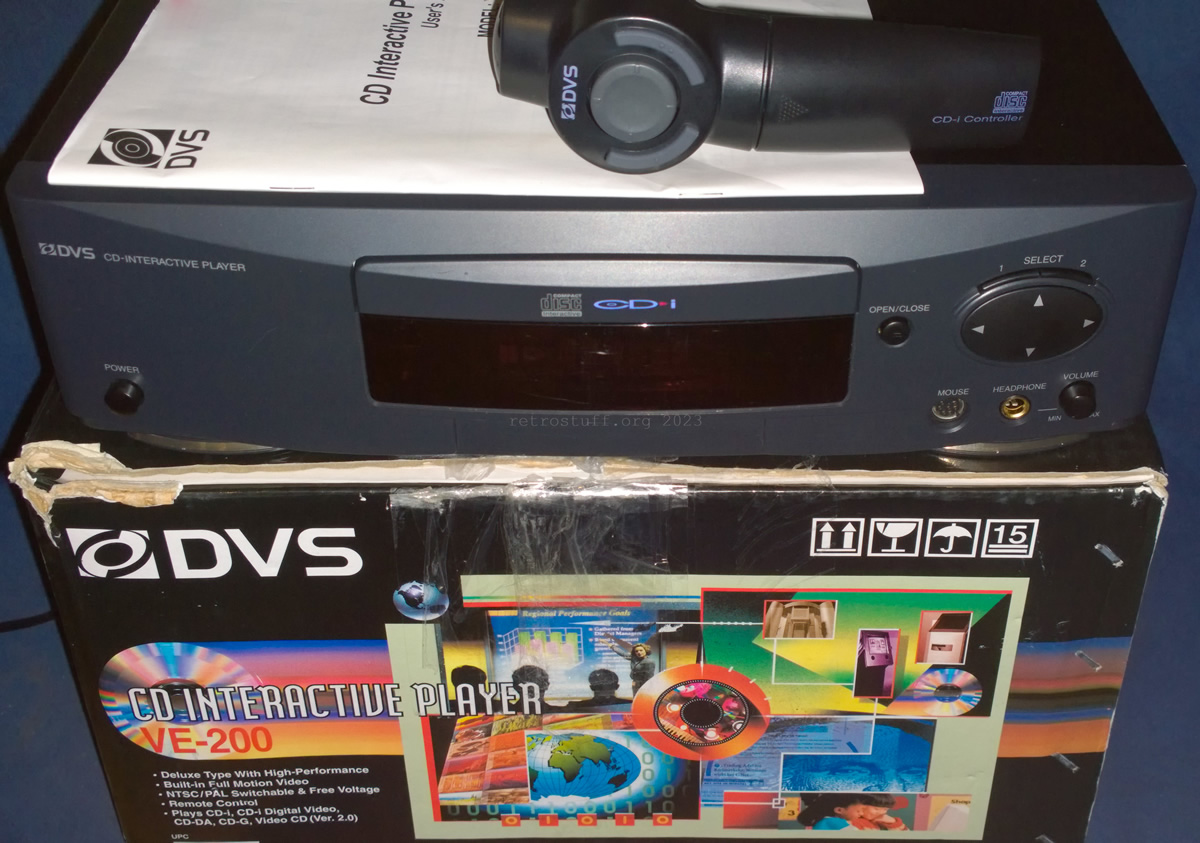
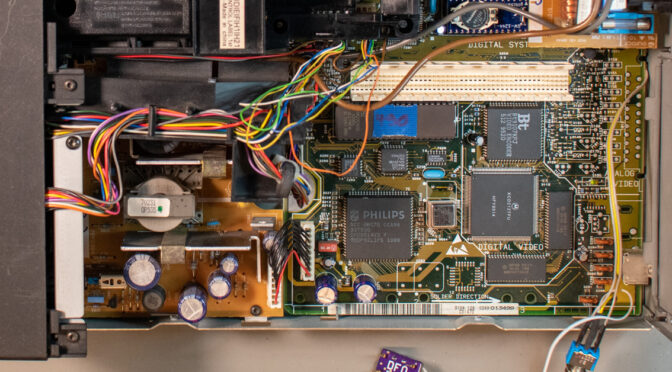
The DVS VE-200 CD-Interactive Player is a CD-i player manufactured by LG. Like other CD-i players, it contains a battery-backed NVRAM and real-time clock. In this article, I will take a look inside and show how the battery can be replaced while making sure that the NVRAM data won’t get lost in the process.
The production number on the label contains the year and calendar week (example: 1A 00 9447). This applies to almost all Philips CD-i players and accessories. So far, only the white mice for the professional players didn’t follow the year code. A full production number has 8 or 9 digits and an additional 5-6-digit serial number at the end. But most accessories are only labelled with simple 8-digit production numbers and that’s why you find so many accessories with the very same data on the labels.
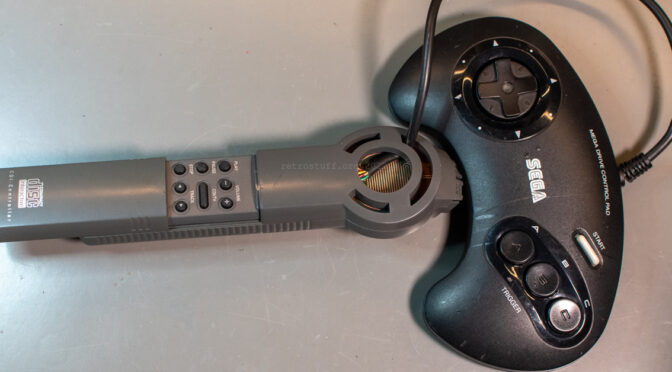
A quick and dirty hack to save a broken Philips CD-i RC6 remote control with a Sega Mega Drive controller.
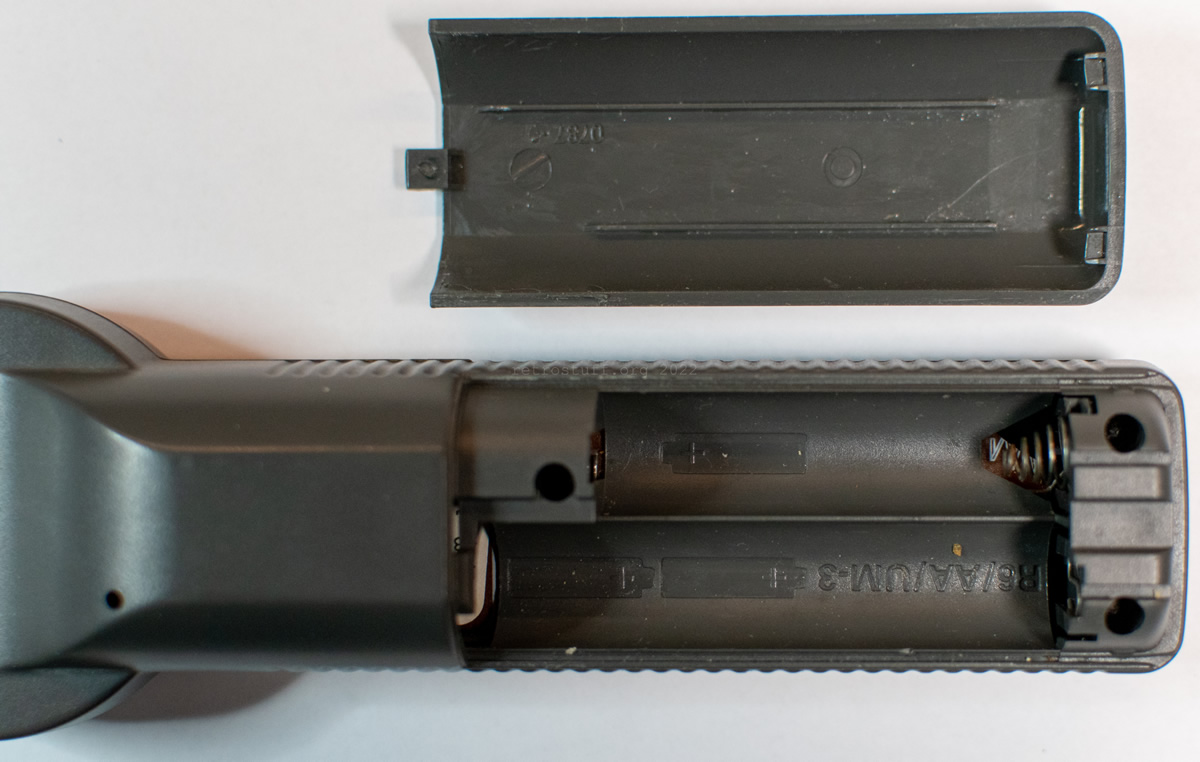
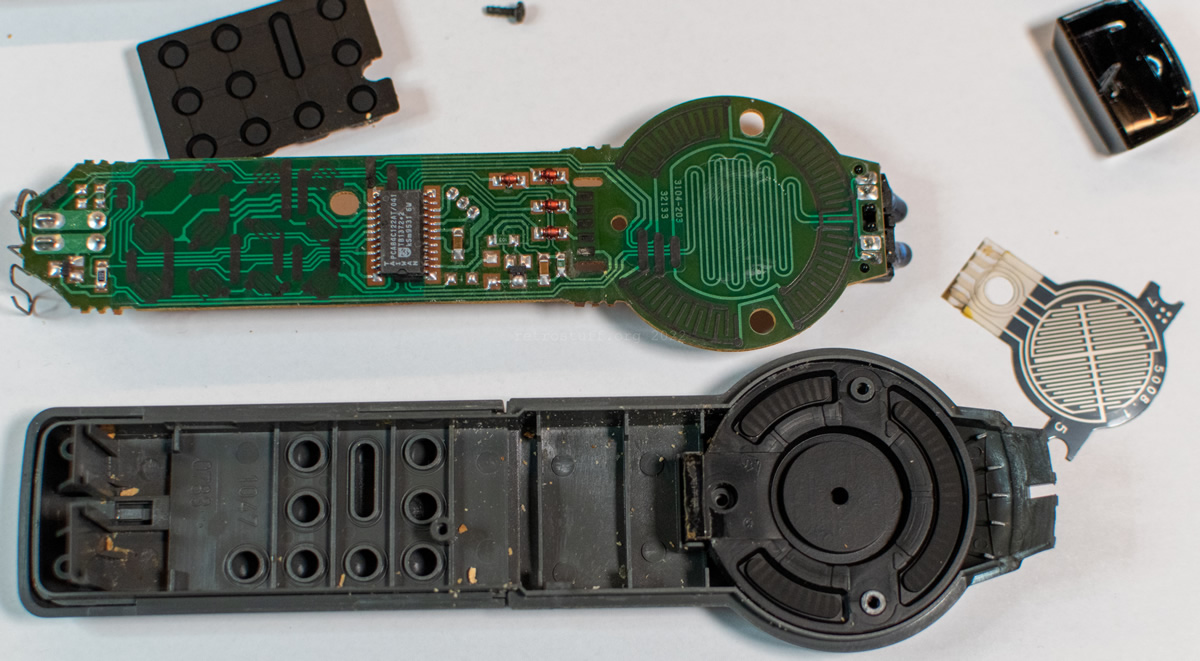
Most CD-i players come with or are compatible with the 22ER9055 CD-i Commander, an RC6 remote control with a pressure-sensitive thumbpad. There are three known versions of the CD-i Commander:
RV 7701 – standard remote for most CD-i Players.
RV 7704 – with additional stand-by button for CDI660 and 670.
RV 7706 – with additional controls for CDI740.
When buying a used remote control, your first action should be to check the battery compartment for obvious leaking damage and also take it apart to find hidden damage. You never know if there were accidents in the past and previous owners just cleaned out the battery compartment without looking further into it.
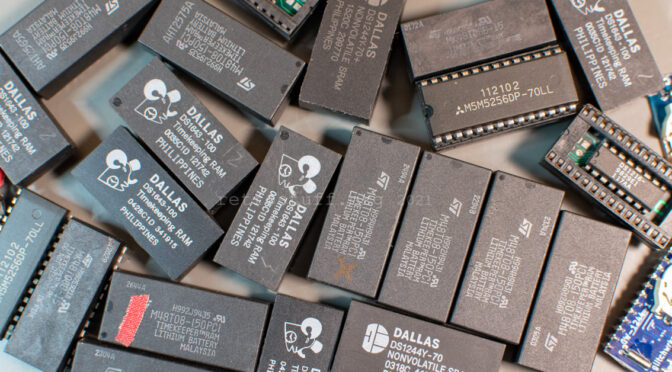
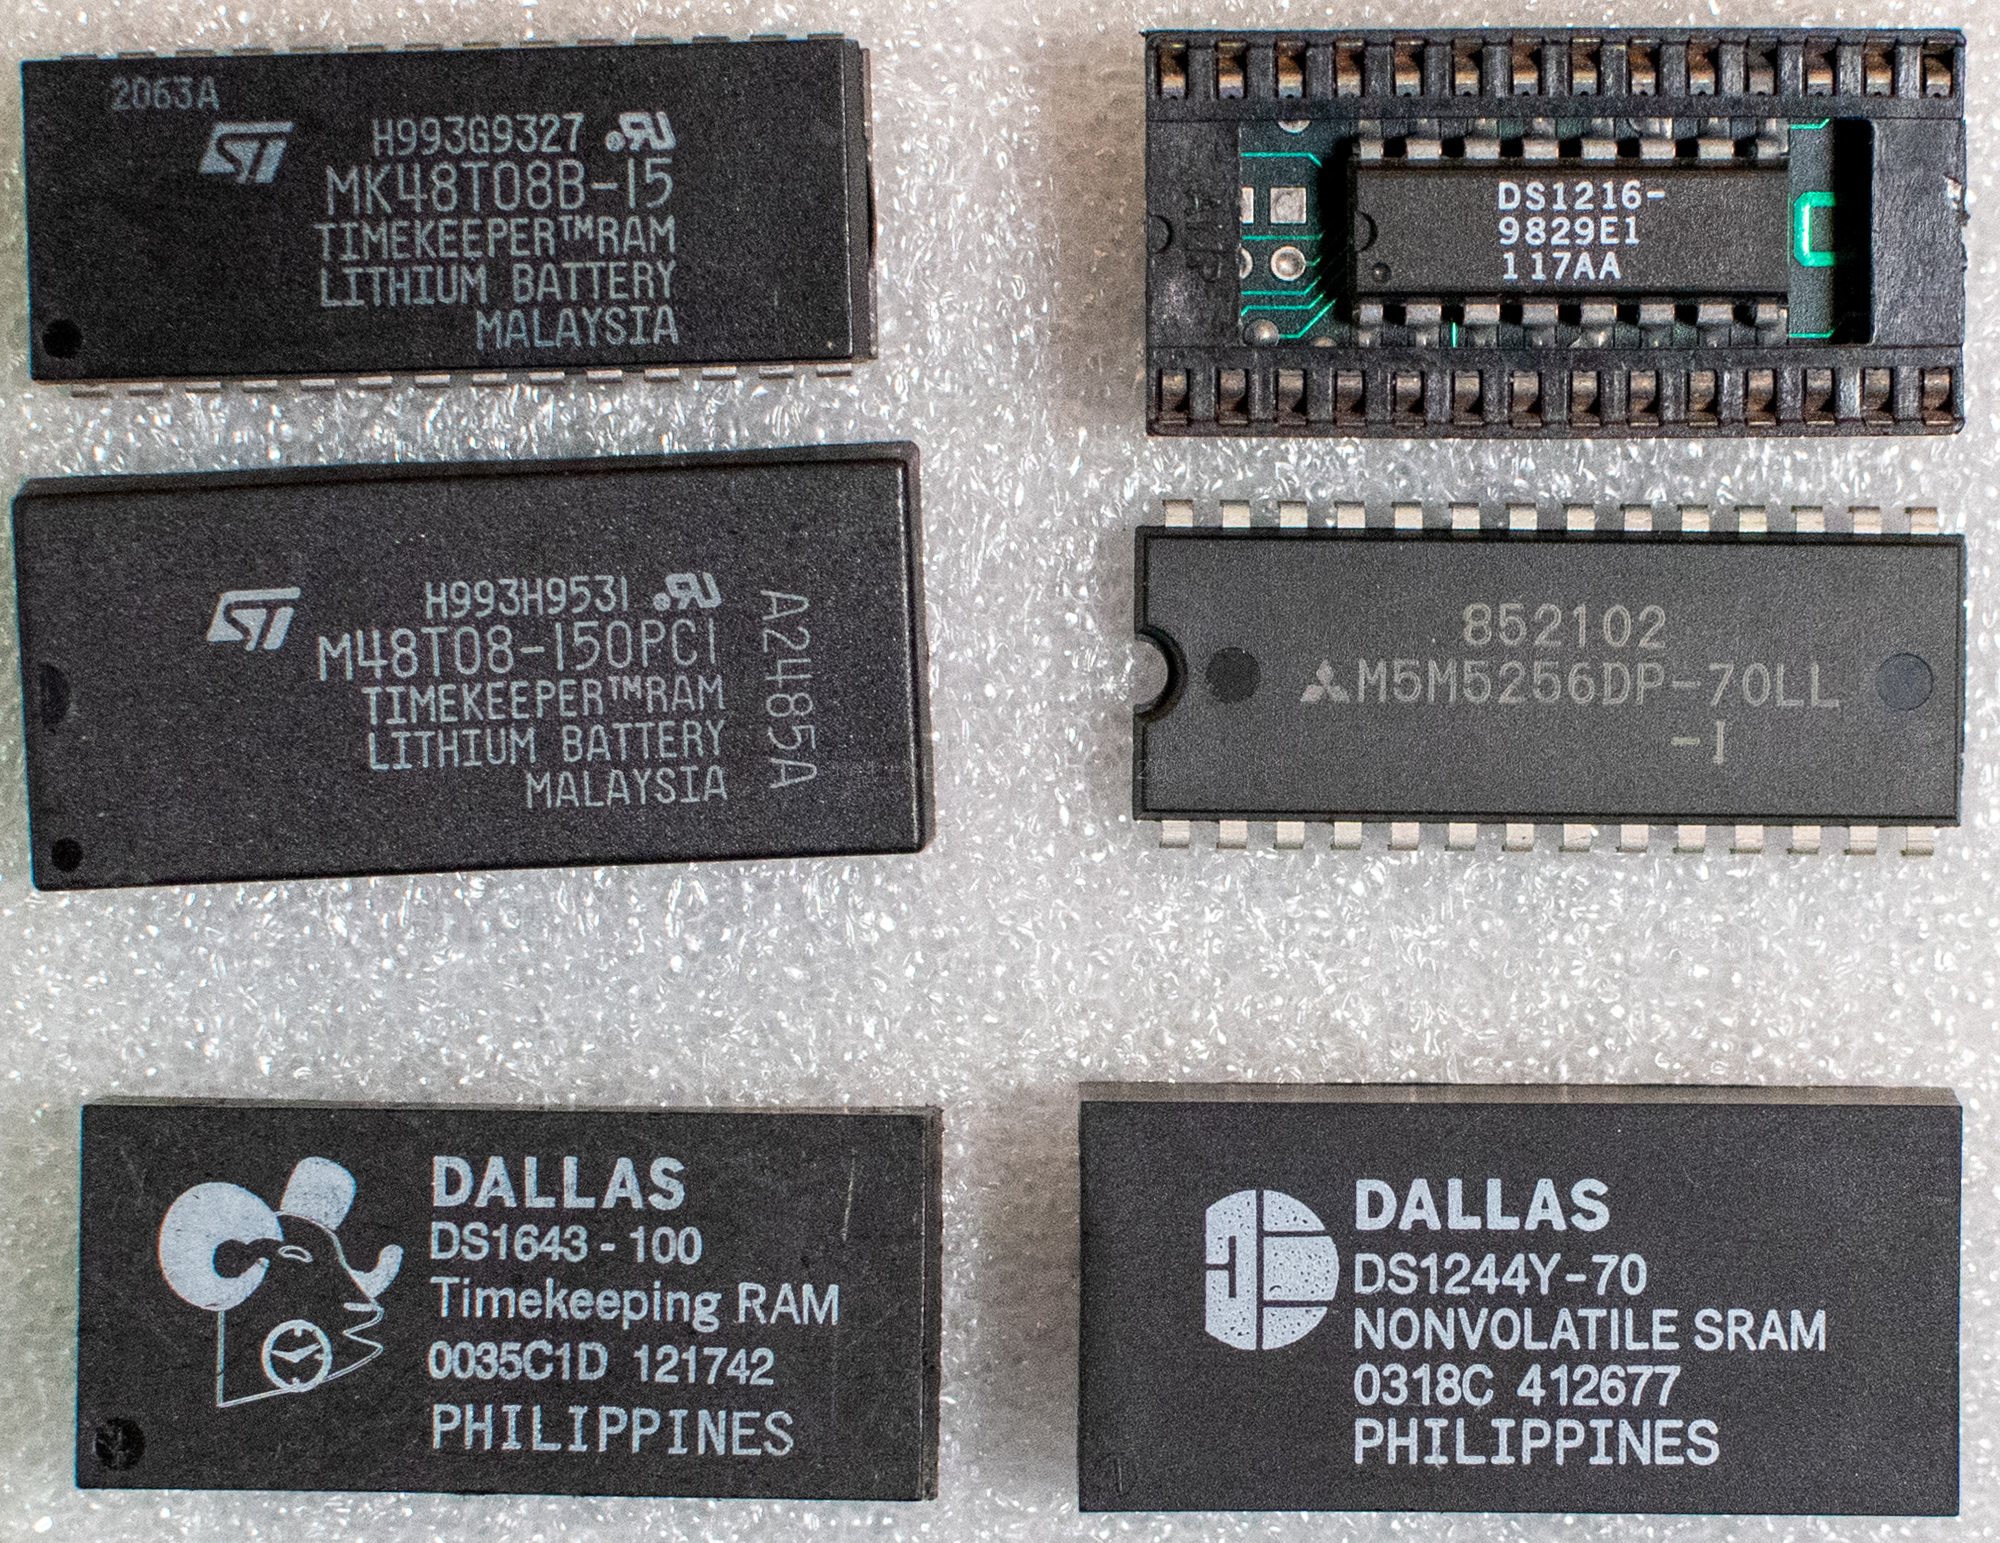
There are two main types of NVRAM+RTC solutions for Philips CD-i players to store user data and settings: 8 KB and 32 KB. They have a built-in battery that powers the non-volatile memory and the real-time clock. These two types are not compatible and thus cannot be replaced with each other (at least, not without hardware and/or ROM modifications). There are other types, also 8 KB and 32 KB, but they concern only very few and rare devices. I point them out when necessary.
In this article, you’ll find information about the different NVRAM types and their alternatives. You’ll also find tips for repair and upgrades. If this looks familiar to you then you have probably read parts of it in my Modifications for Philips CD-i Players article before. Since the NVRAM section grew so large, I’ve completely rewritten it and will continue to update it in its own article.
Replacing blown fuses in Philips CD-i players with Mono III and Mono IV mainboards – sounds too simple to write an article about. That’s why I’m going to dig a bit deeper into the topic. An important fuse sits on the mainboard and protects the -5 V rail. I tripped (over) it by accident and was confronted with these weird symptoms that are hard to diagnose:
No video output (well, there is something, but see below)
Service Shell video output with a rolling/flickering image
The disc tray opens on its own (tray loader motor is constantly spinning)
In this article, I’ll upgrade a Philips CDI450 with 32 KB NVRAM. You’ll find all information that is needed to modify the system ROM and the mainboard. If this sounds familiar – yes, it does: In 2019, I explored the possibility to upgrade a CDI470. Even though patching the system ROM failed back then, the experiment was still a success. The final solution to access 32 KB NVRAM was to use the ROM of a 490. As it turned out later, this was also Philips’ solution for the 470/85 model, but that is a topic for another article.
With the 450 (and all other top-loading players with Roboco mainboard) it is a bit different: It’s a low-cost model with 8 KB NVRAM only. The mainboard was neither prepared for a bigger NVRAM solution nor is there a similar advanced model that I could borrow the system ROM from. This time, a ROM patch must succeed.
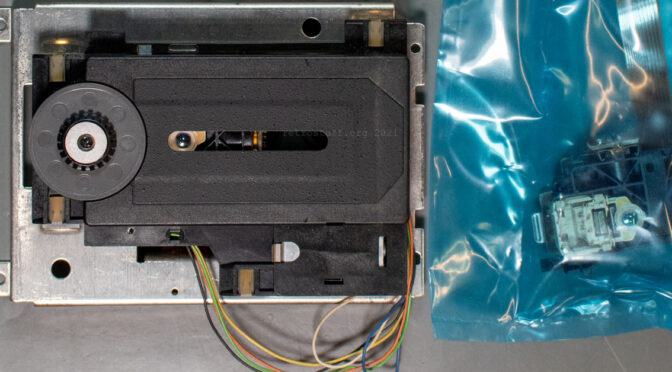
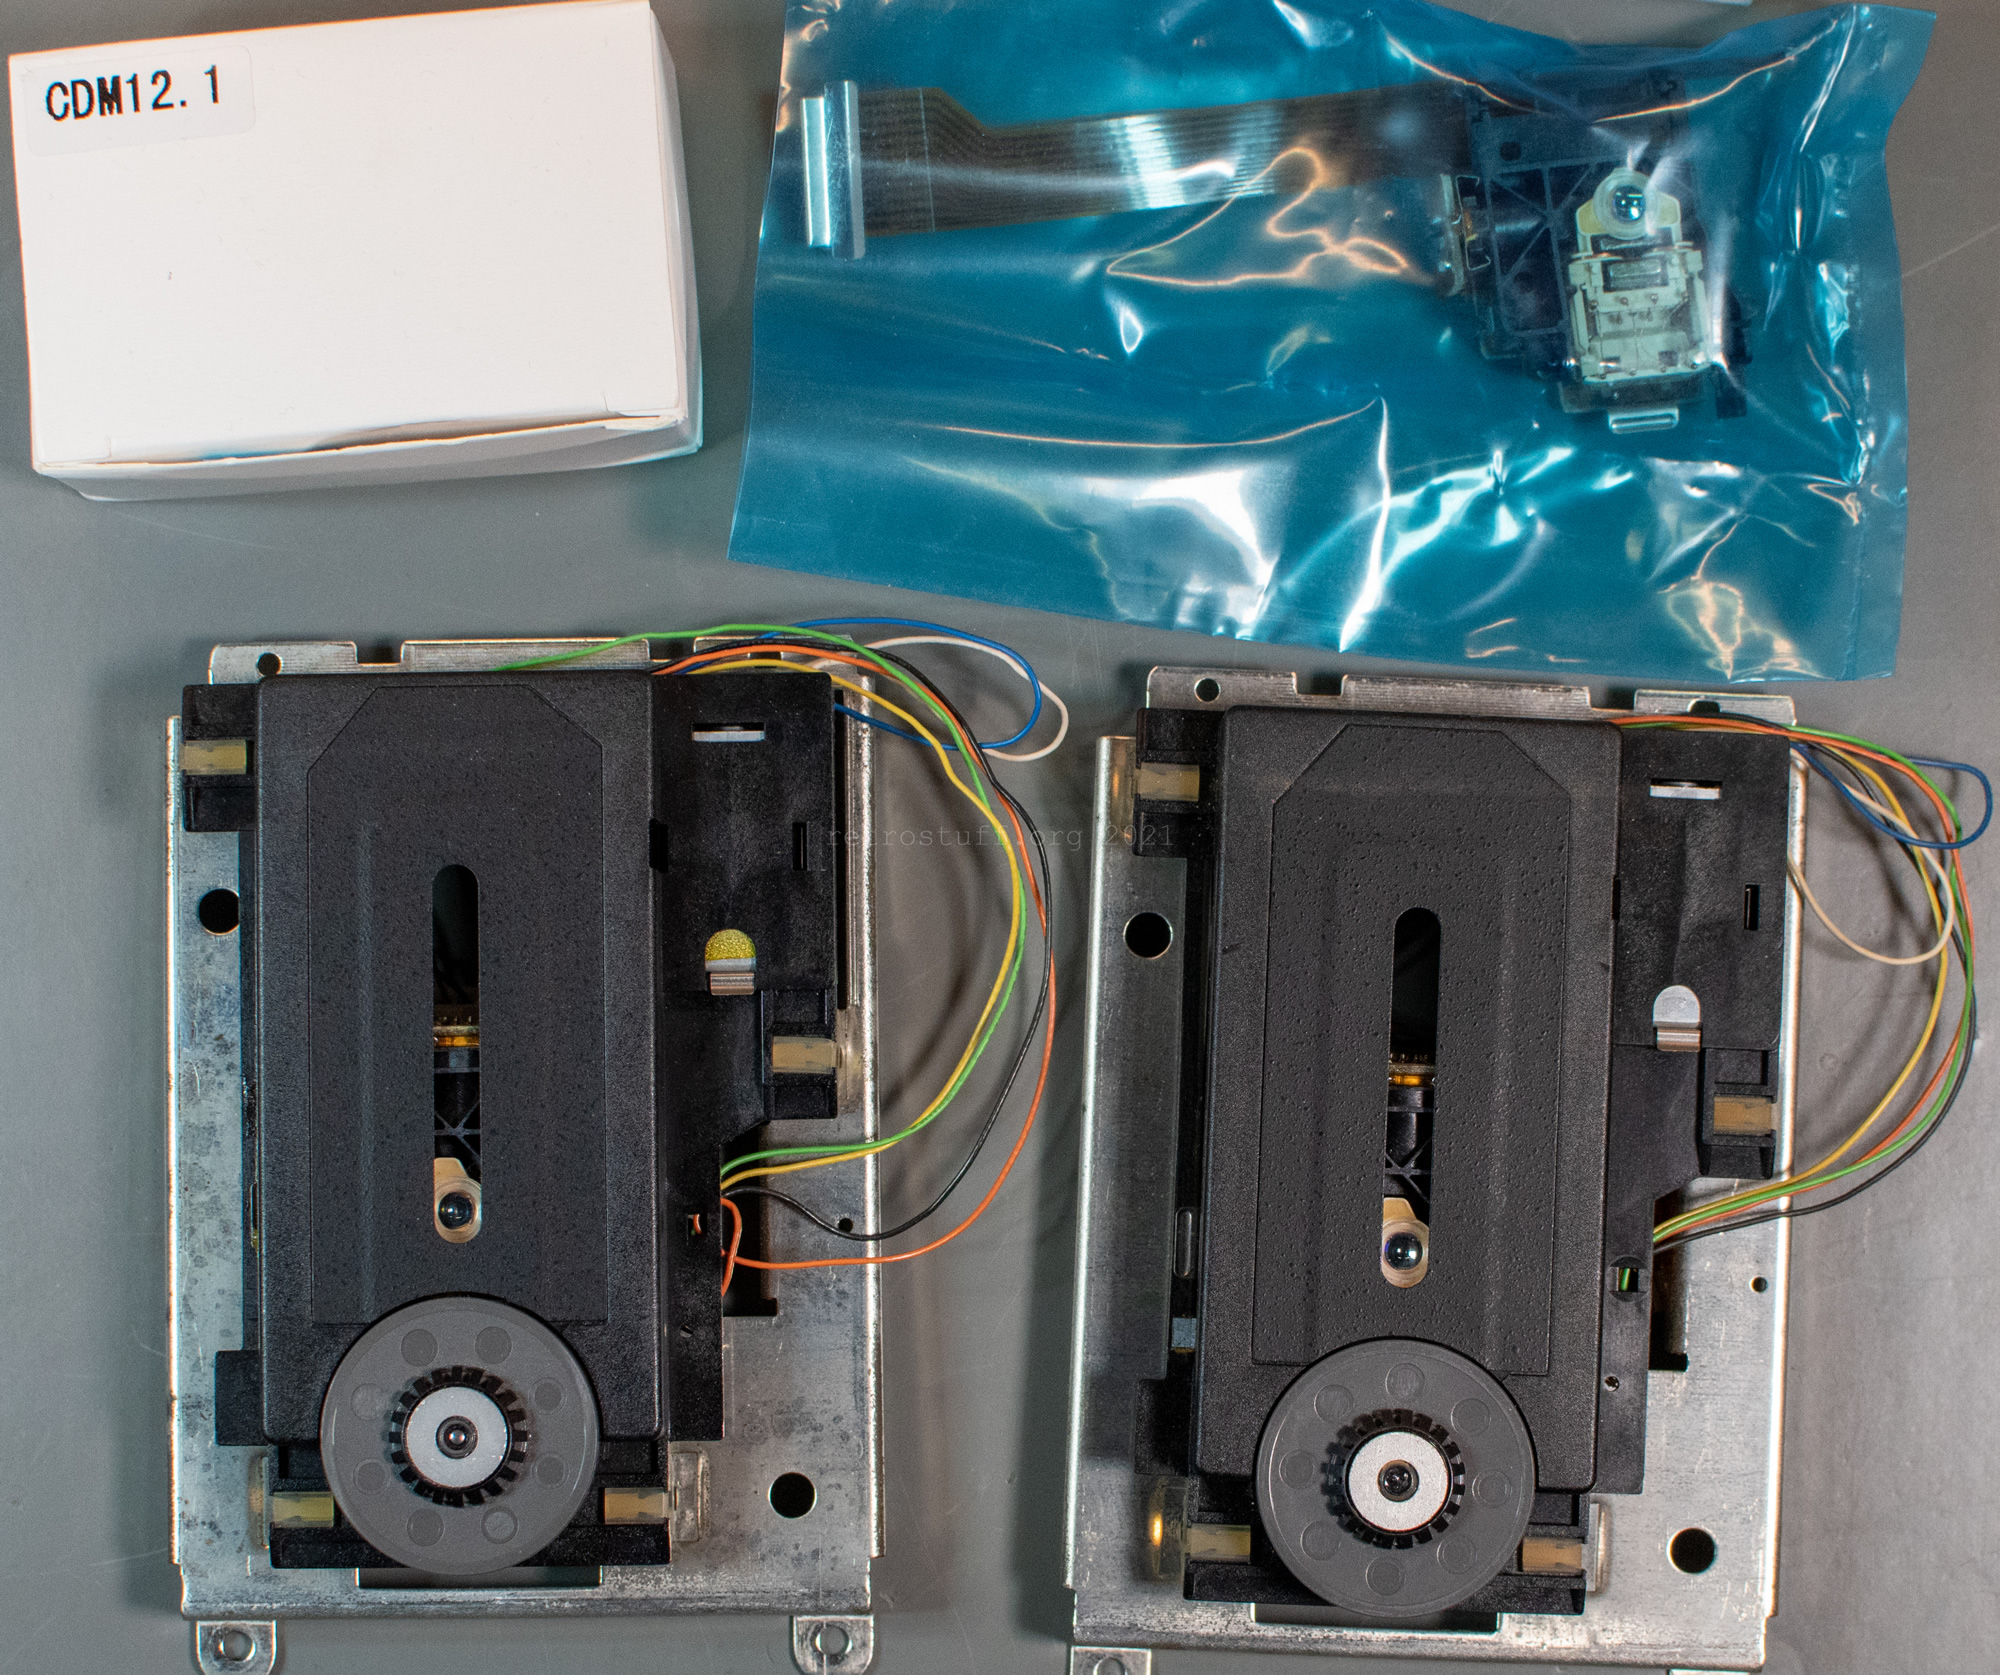
This guide shows the replacement of the laser sledge in Philips CDM 12.1T CD mechanisms. It assumes that you have already cleaned the lens and done the necessary troubleshooting to rule out other errors (see this article for diagnosis with the Service Shell). If you only get dirty disc messages or experience stuttering audio/video from time to time, you can still follow the guide to clean and grease the mechanism.
For documentation, I replaced the laser sledges of two CDI450 players with unreliable or no disc recognition at all. I took different approaches to find the easiest replacement procedure, so don’t be surprised if you suddenly see pictures where things are in different places.
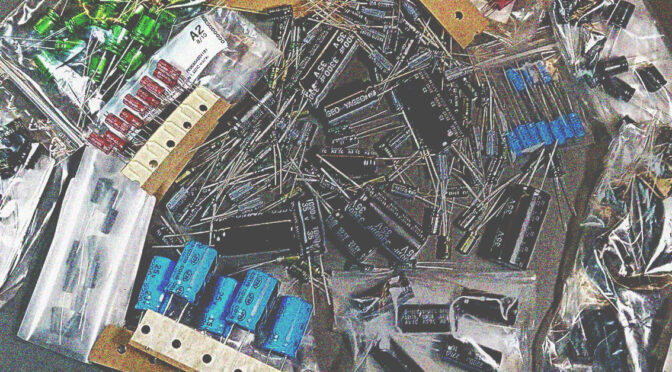
This is an overview of the lists of capacitors and other components that I had to create in order to repair or modify my devices. Currently, all of them are already featured in my repair articles, but I will add further lists that are not featured yet or are a work in progress.
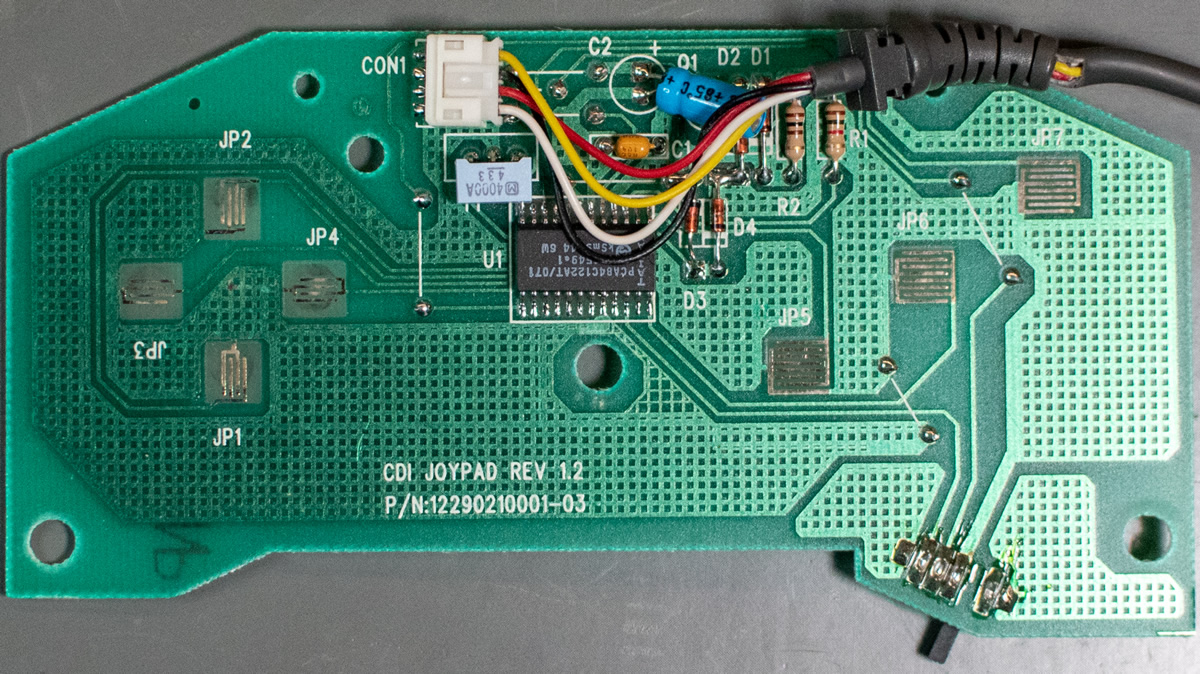
Recently, I acquired yet another CD-i player for repair and it came with a Philips 22ER9021 CD-i Gamepad. The gamepad showed two common signs of usage: Broken cable insulation and an unresponsive D-Pad.
The coating is broken right behind the cable strain relief. I’ve seen much worse cases of broken insulation and even ripped out conductors, but this still needs to be fixed before it becomes worse.
Philips 22ER9021 PCB – front – with broken cable insulation
For quite some time, I was puzzled why my CDI660 was stuck in a reset loop after I inserted the test/dummy plug into Input 1. I expected it to boot into the Service Shell, like most other CD-i players. My solution so far was to use a 490 system ROM in the 660 whenever I needed the Service Shell (the compatibility and also the error were discovered during this experiment). However, this wasn’t a very practical approach because I had to open up the player and dig out the system ROM from underneath the DVC every time.
When CD-i Emulator with -testplug option showed the same behaviour, CD-i Fan figured out what is causing this error: The Service Shell module sv is missing from the 660/670 system ROM. In this article, I will show you a simple ROM patch to enable the Service Shell for the CDI660.