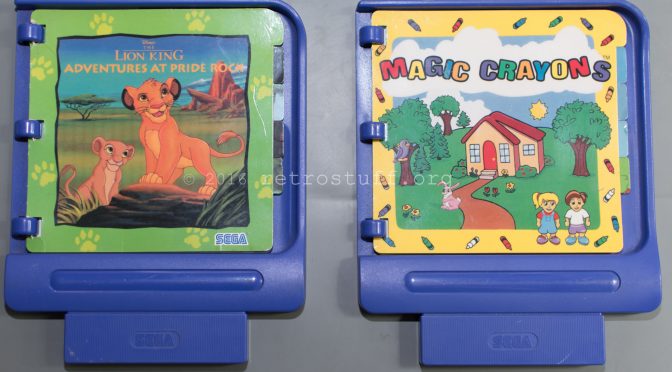
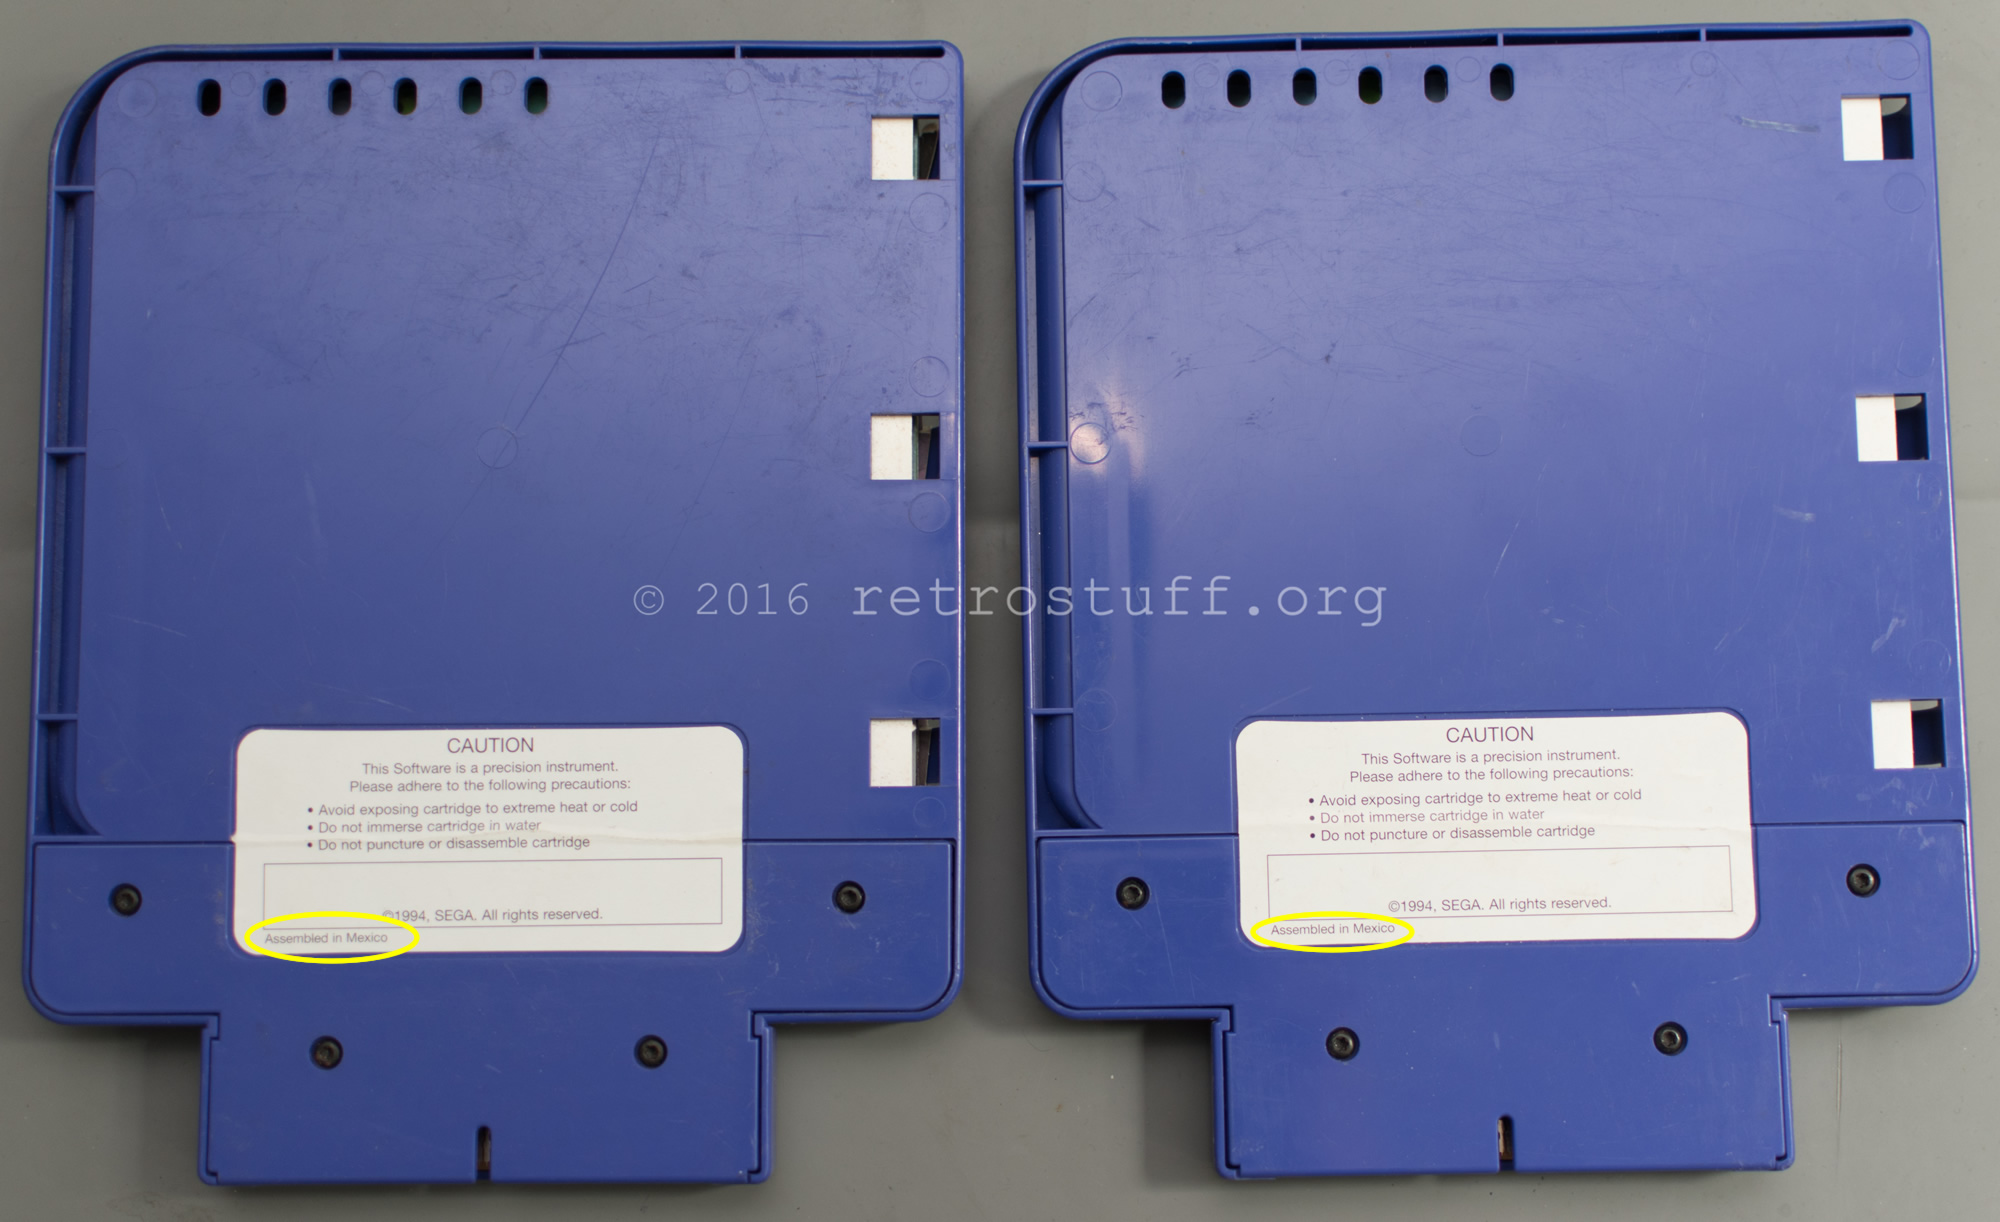
Found two more donor carts for use in a Sega Pico flash cart:
The Lion King: Adventures at Pride Rock and Magic Crayons, both “Assembled in Mexico”.

Disassembly
Found two more donor carts for use in a Sega Pico flash cart:
The Lion King: Adventures at Pride Rock and Magic Crayons, both “Assembled in Mexico”.
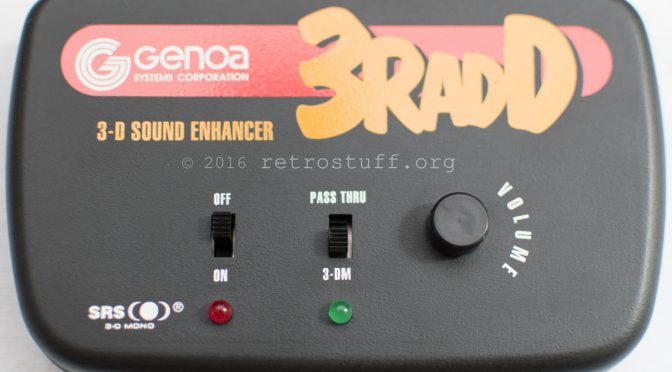
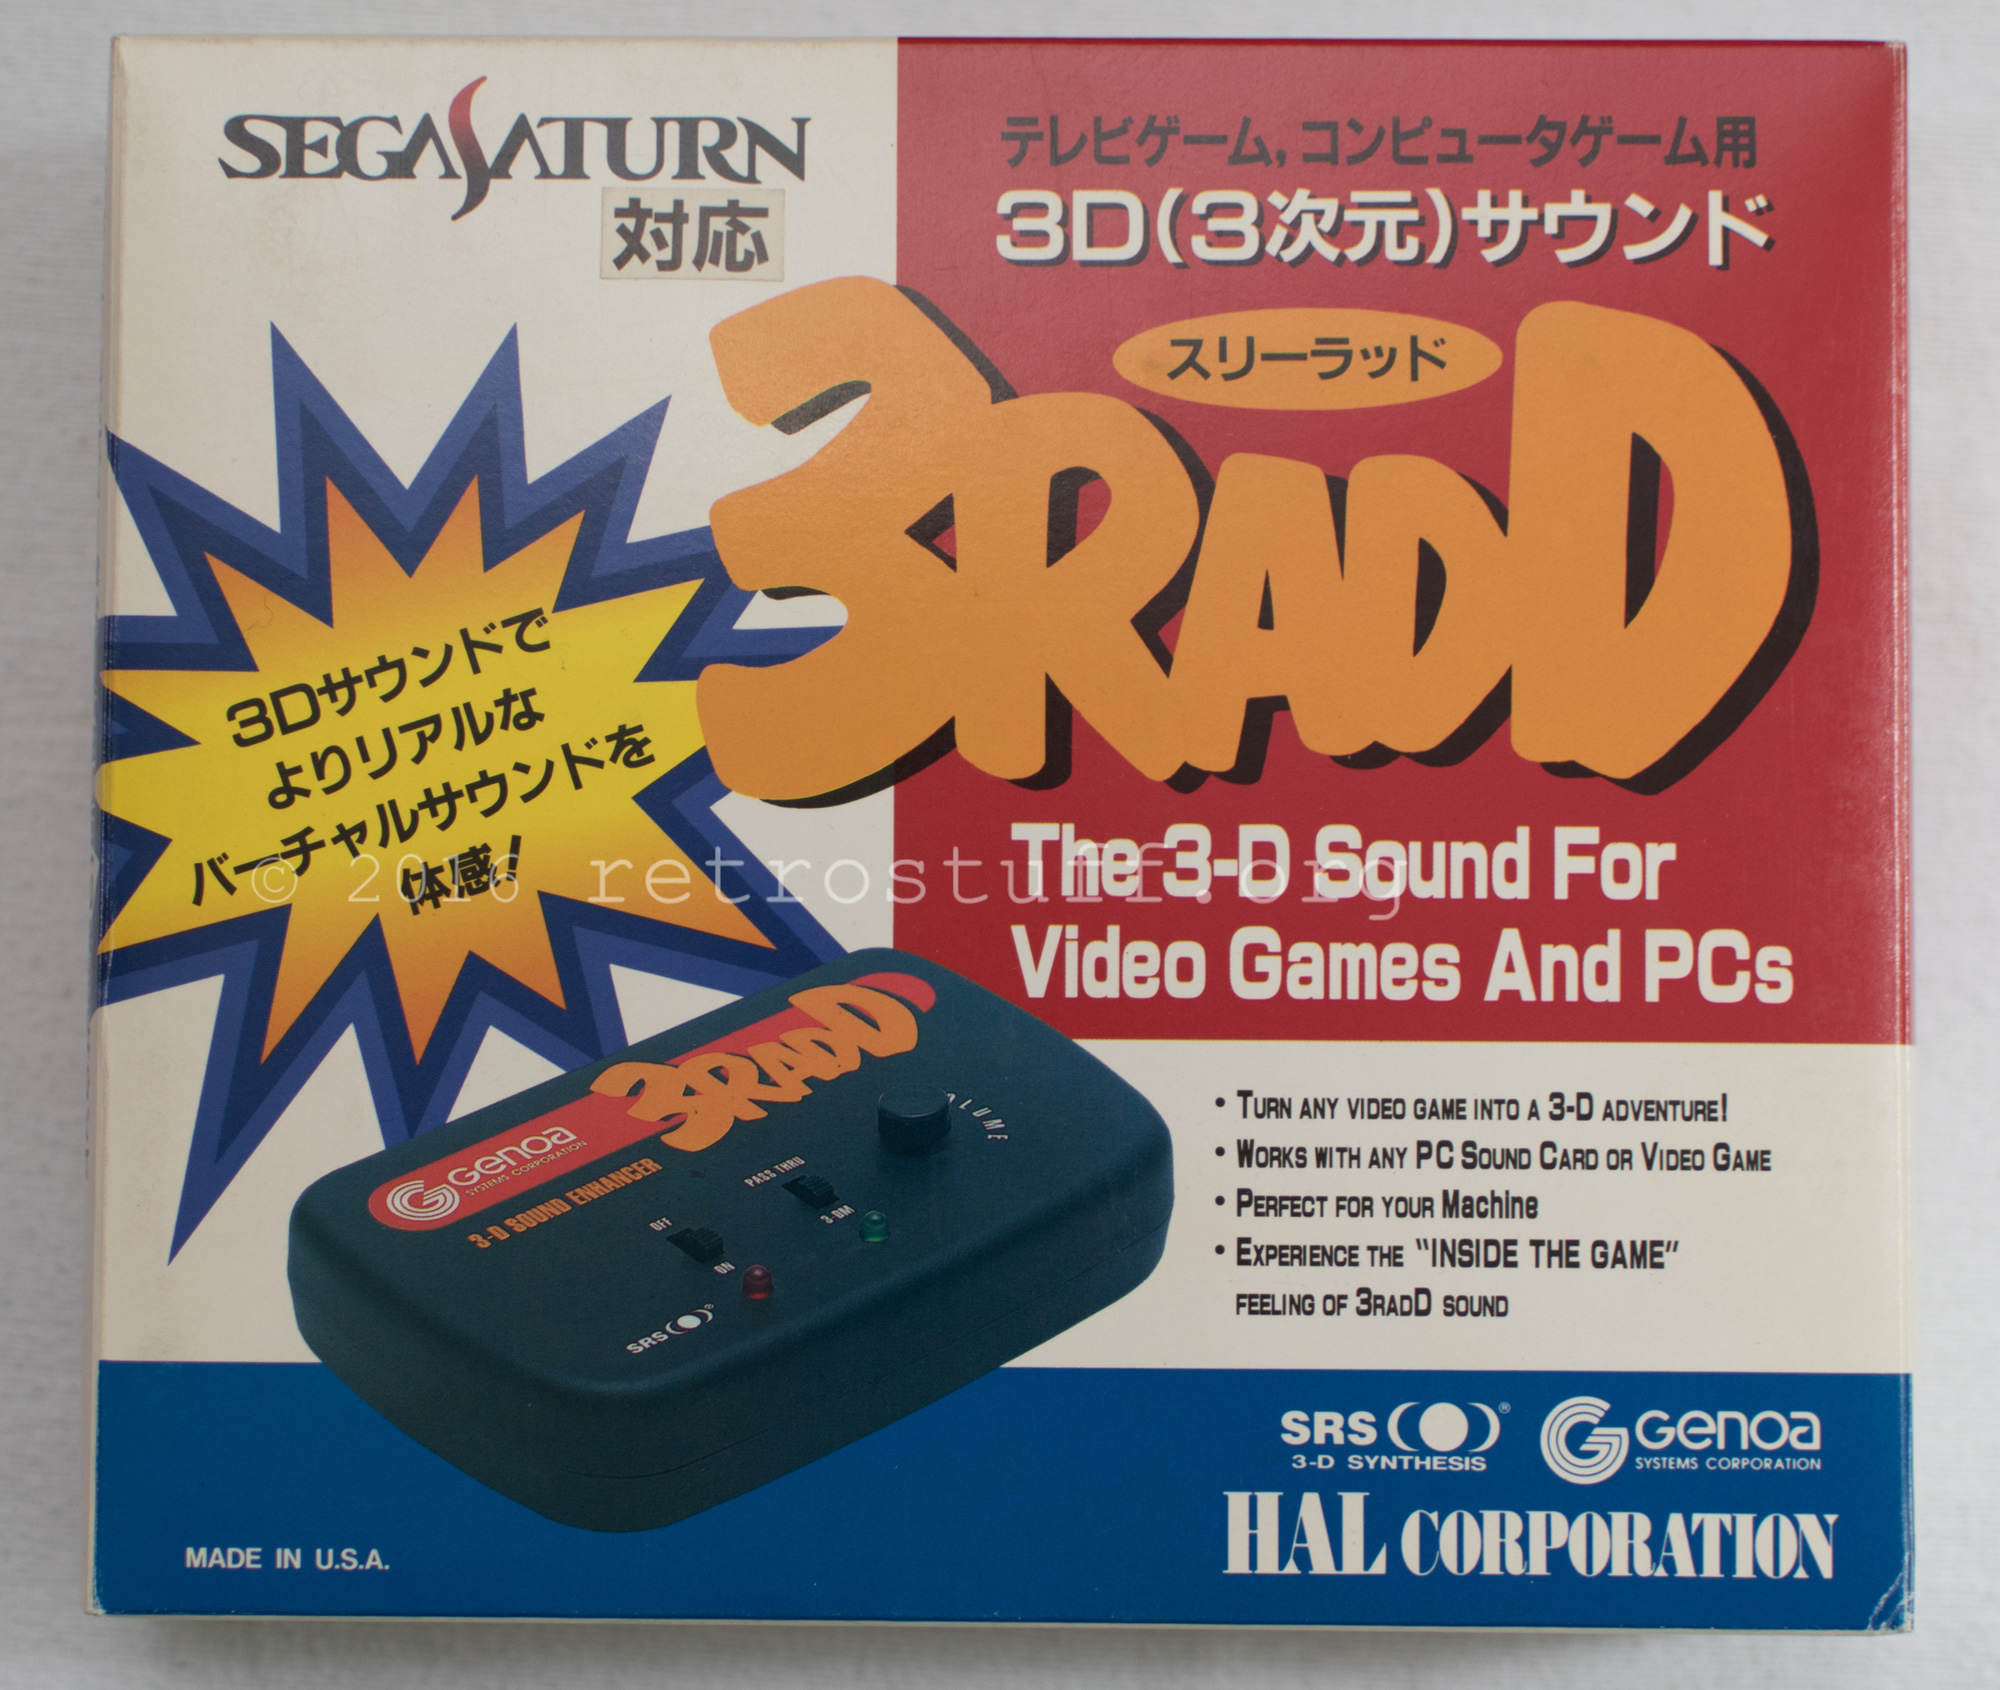
An unusual SegaSaturn accessory: The 3RADD – A sound enhancer with SRS psychoacoustic technology. Read a review on this japanese blog. Here is a scan of the manual.
The effect with audio sources is quite nice, it boosts the sound and positions it around your head. The technology is used in all kinds of devices and software, e.g. the Windows Media Player (SRS WOW).
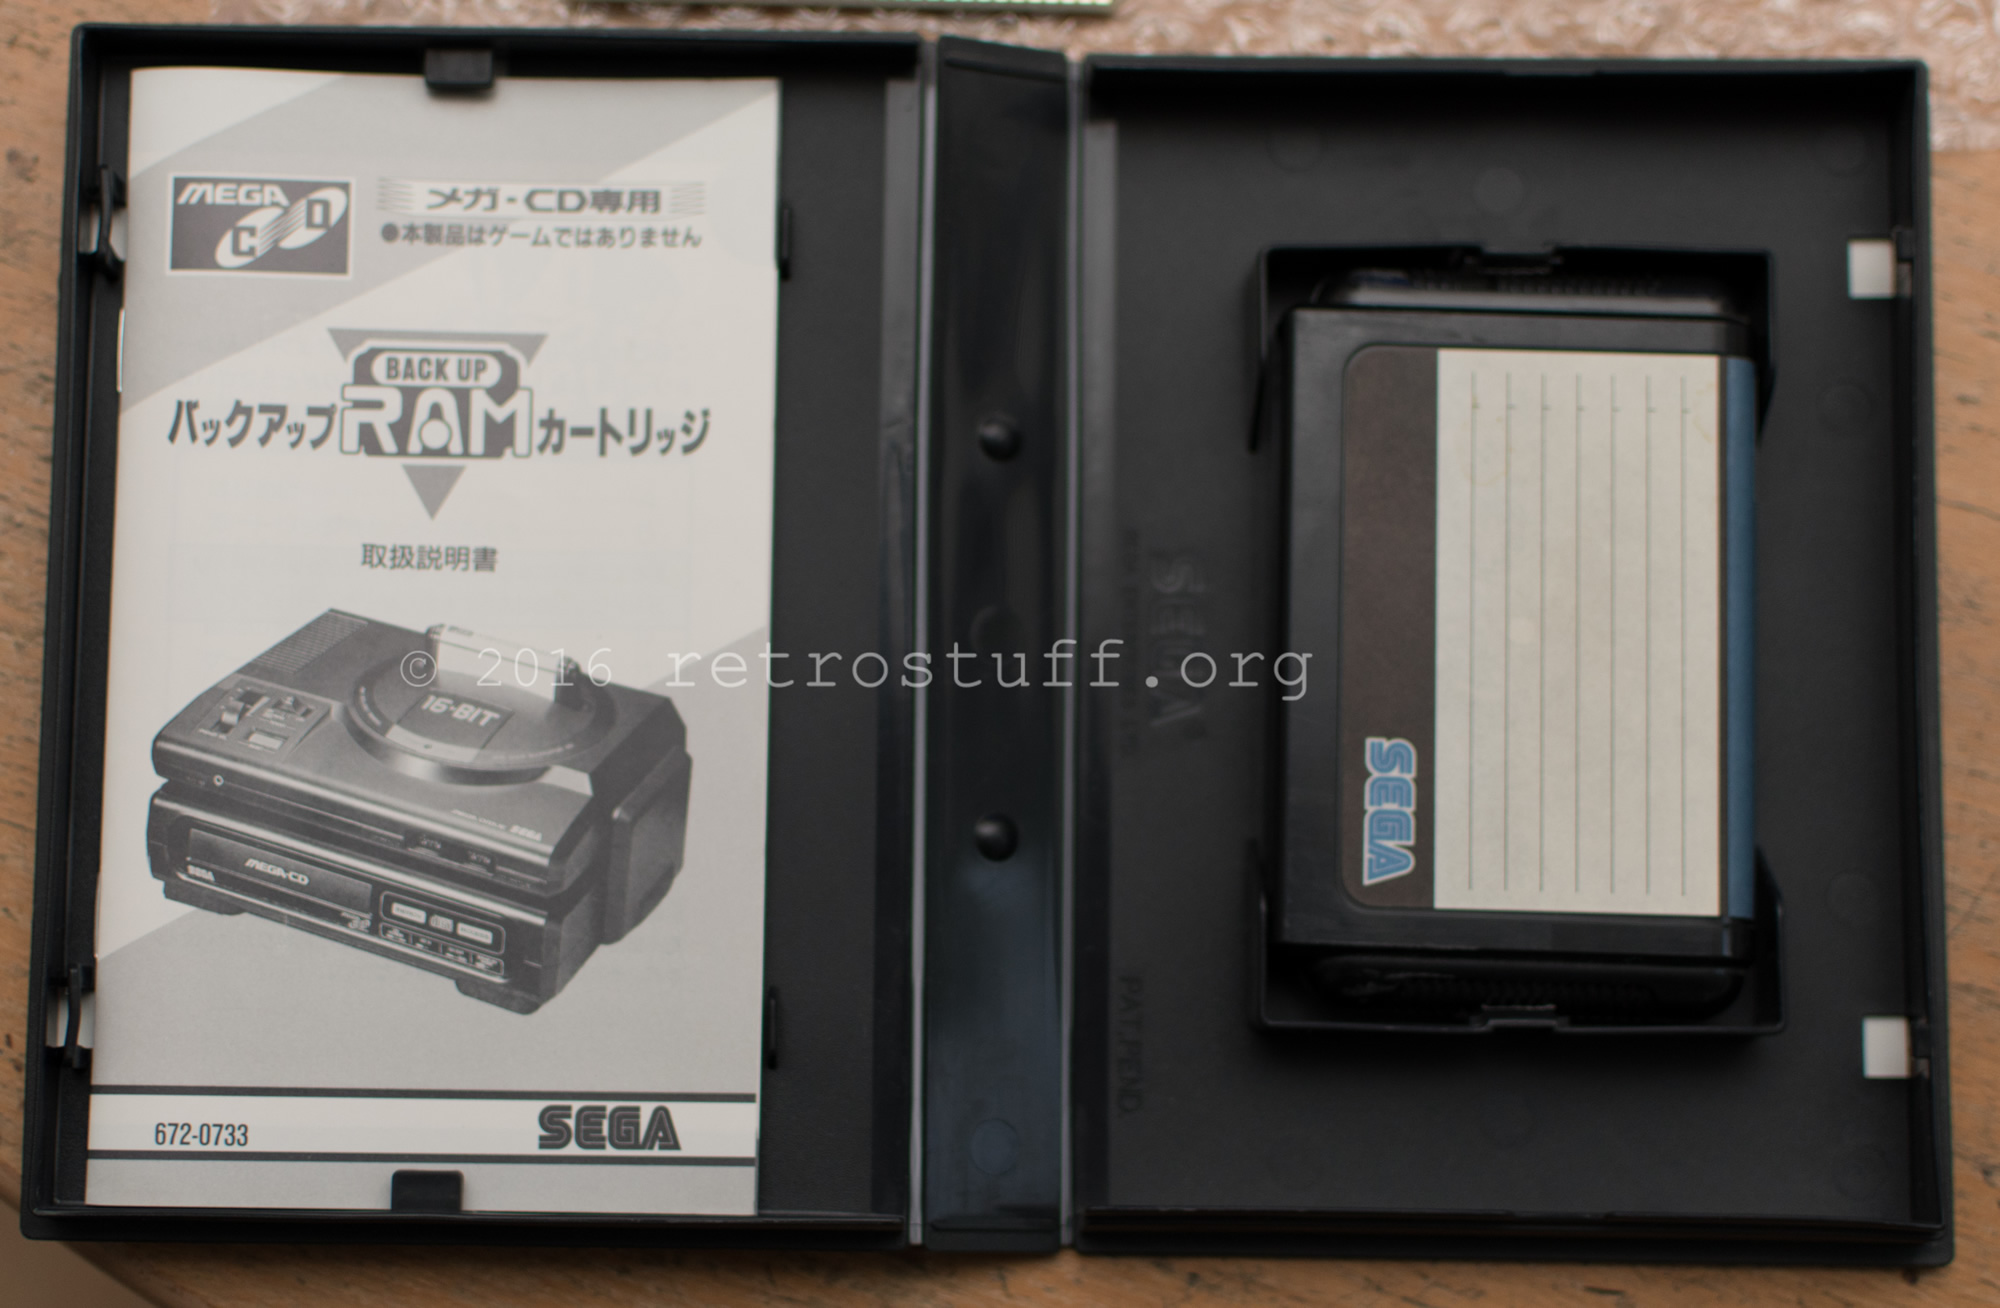
Now that I have an extra backup of my Mega-CD save files on the Sega CD Ultra Backup RAM cart, I can replace the battery of my old CD BackUp RAM Cart without worrying about data loss.
It is possible to do an open-heart surgery to prevent the memory from being erased and replace the battery while the Mega-CD is turned on. I went for that procedure to avoid having to copy all files from one cart to another again.
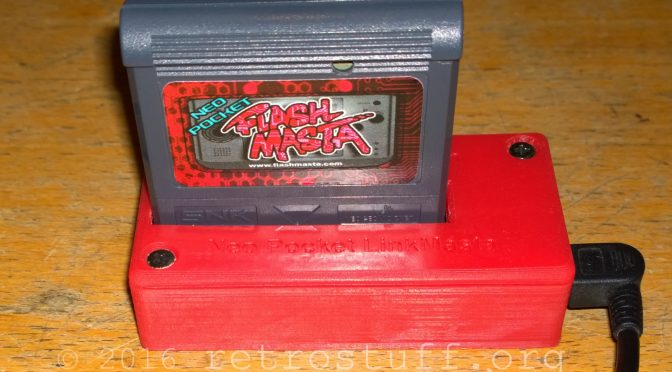
Two days ago Flavor of flashmasta.com anounced the pre-presale of a new WonderSwan flash cart: The WS Flash Masta.
For all Bandai WonderSwan owners this is exiting news as the flash/development carts for this system are very rare and expensive (e.g. the official WonderWitch or the WonderMagic Color).
To give you an idea what we can expect I’ll show you some carts he has made for the Neo Geo Pocket Color:
First there was the Neo Pocket FlashMasta and the Neo Pocket LinkMasta. I’ve used the Blue Version of the LinkMasta since 2011 and bought a new red 3D printed case for it last year.
Continue reading WS Flash Masta and Neo Pocket FlashMasta / LinkMasta
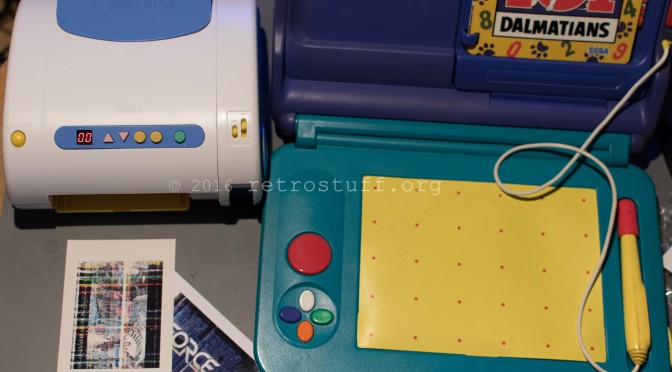
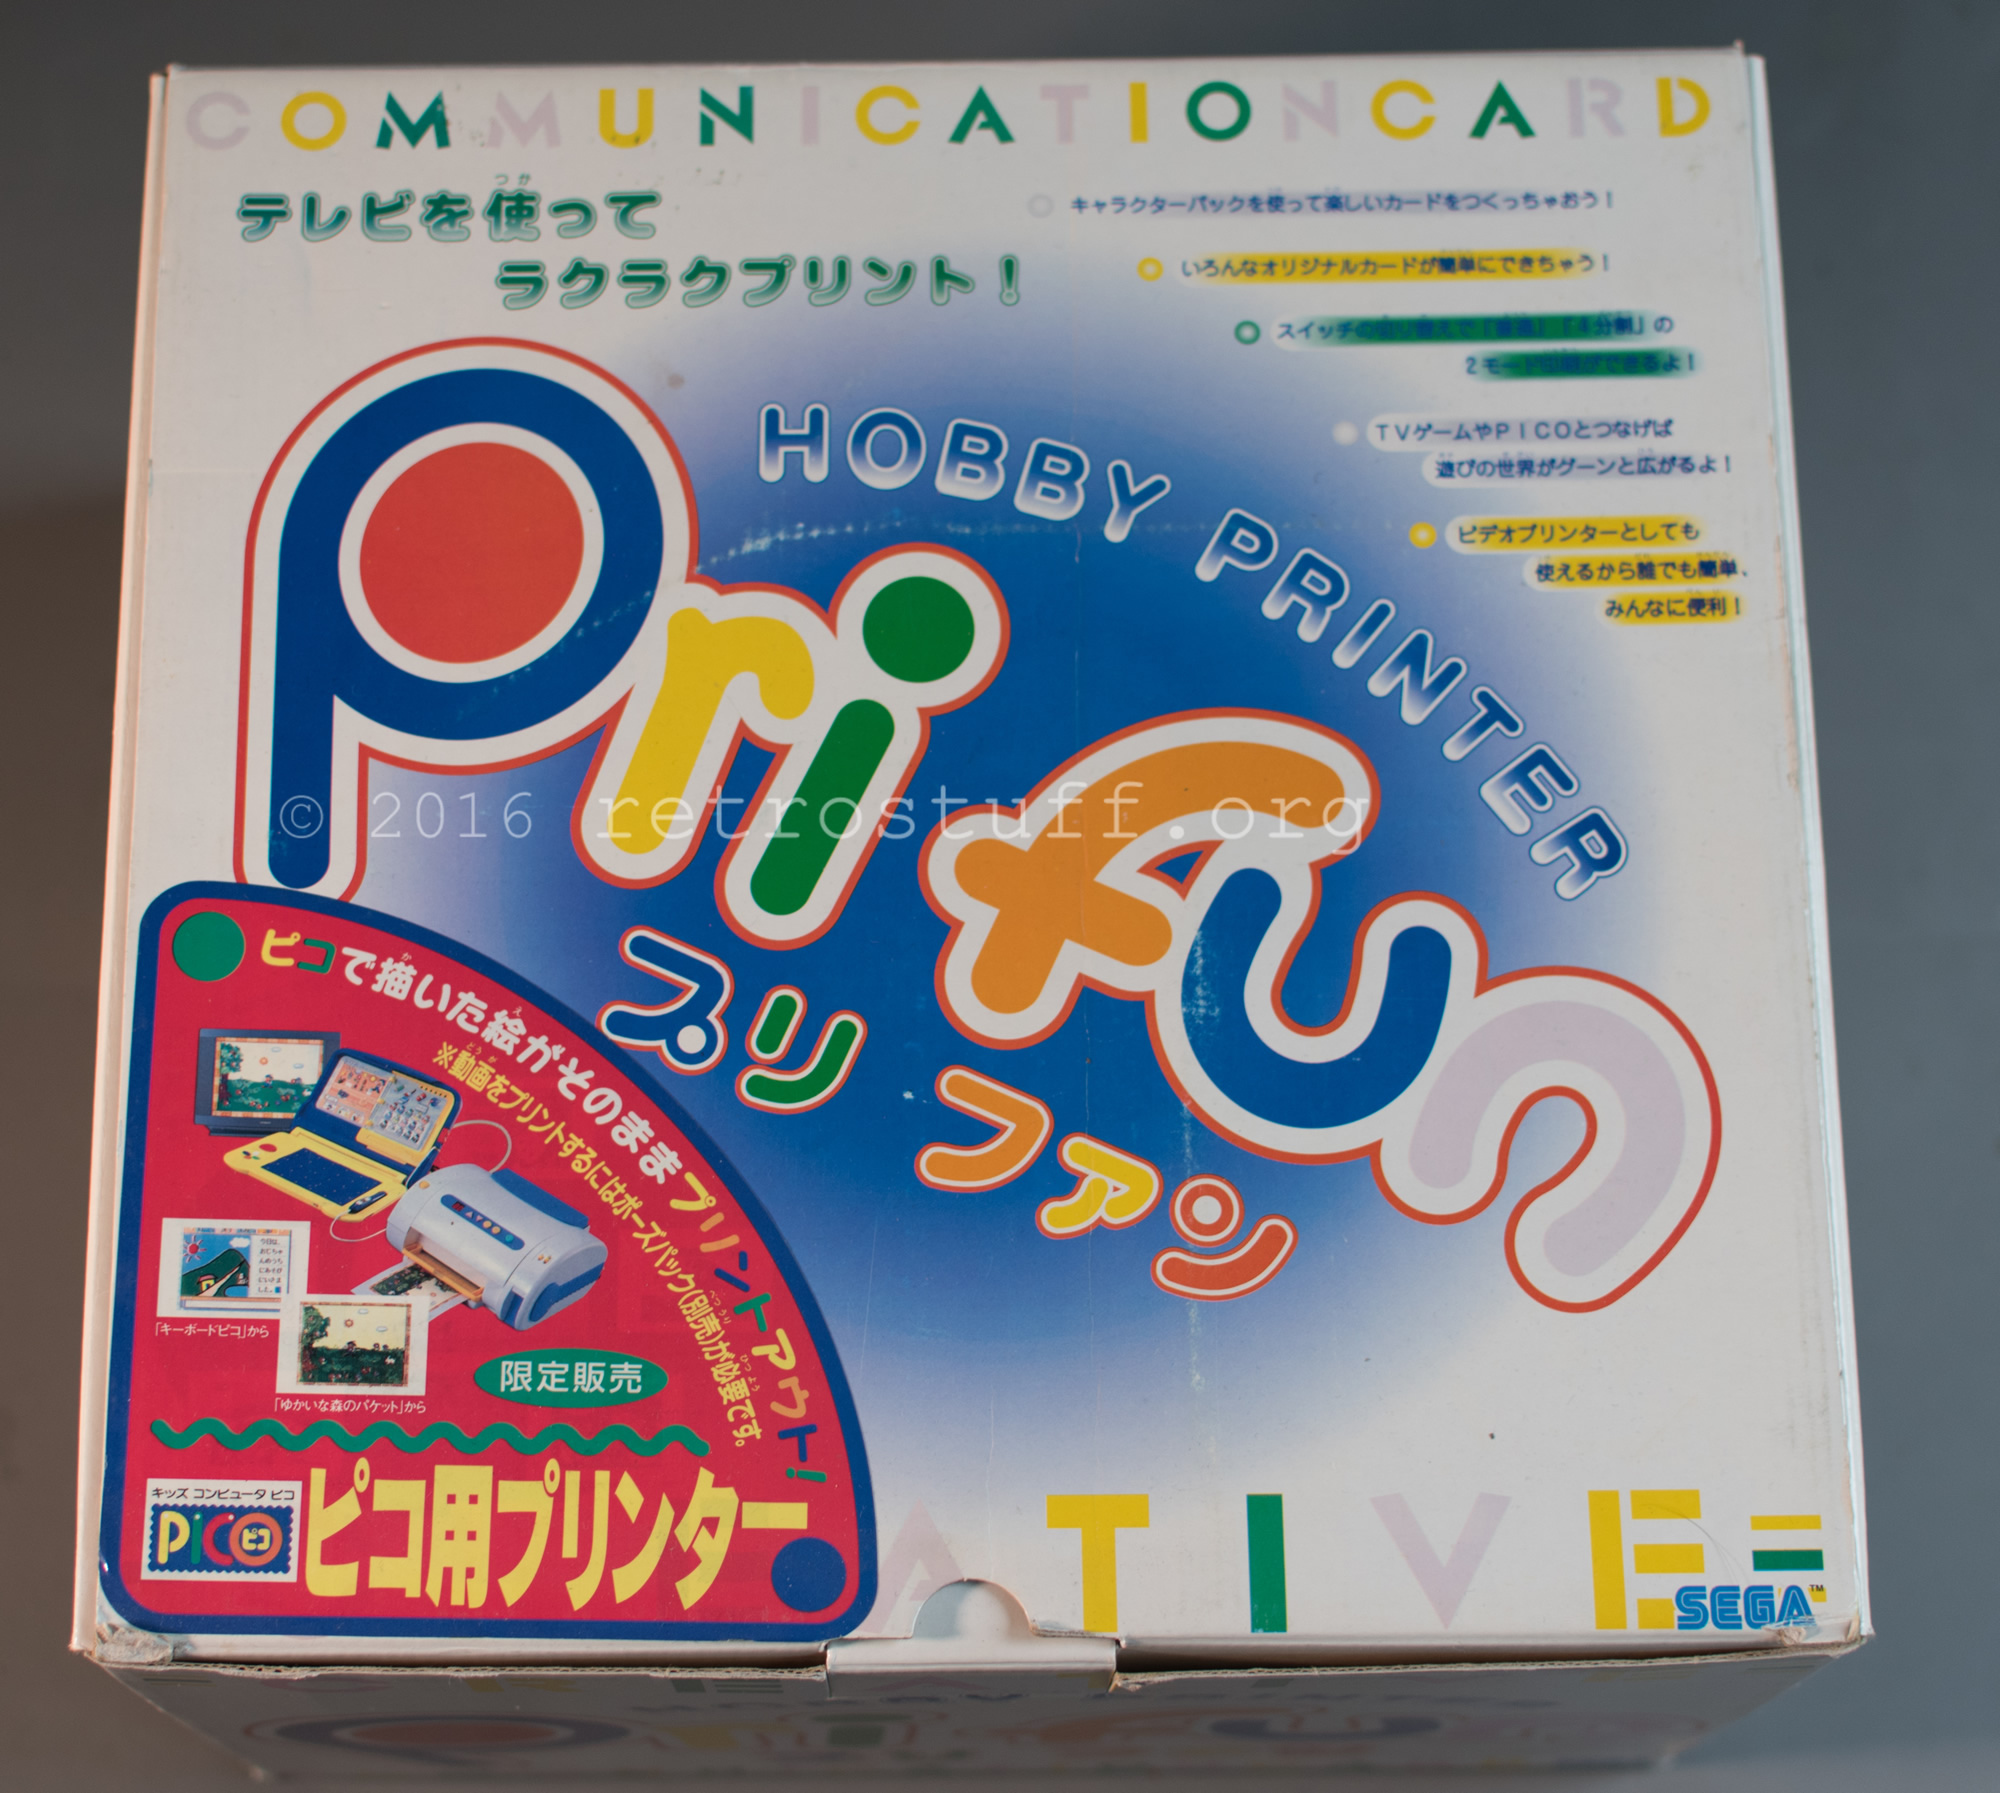
Today, I’m finally testing the Sega Pri Fun printer that I bought 4-5 years ago. Back then, it was still sealed.
The printer was marketed by Sega in 1995 as an add-on for the Pico and Saturn game consoles. You won’t find much information about it on the WWW except a small article at Sega Retro and a commercial on YouTube.
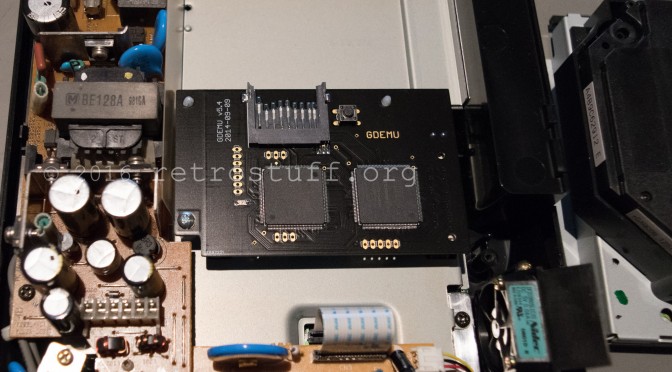
Just recently my GD-ROM drive stopped reading Discs. It’s time to try something new: GDEMU
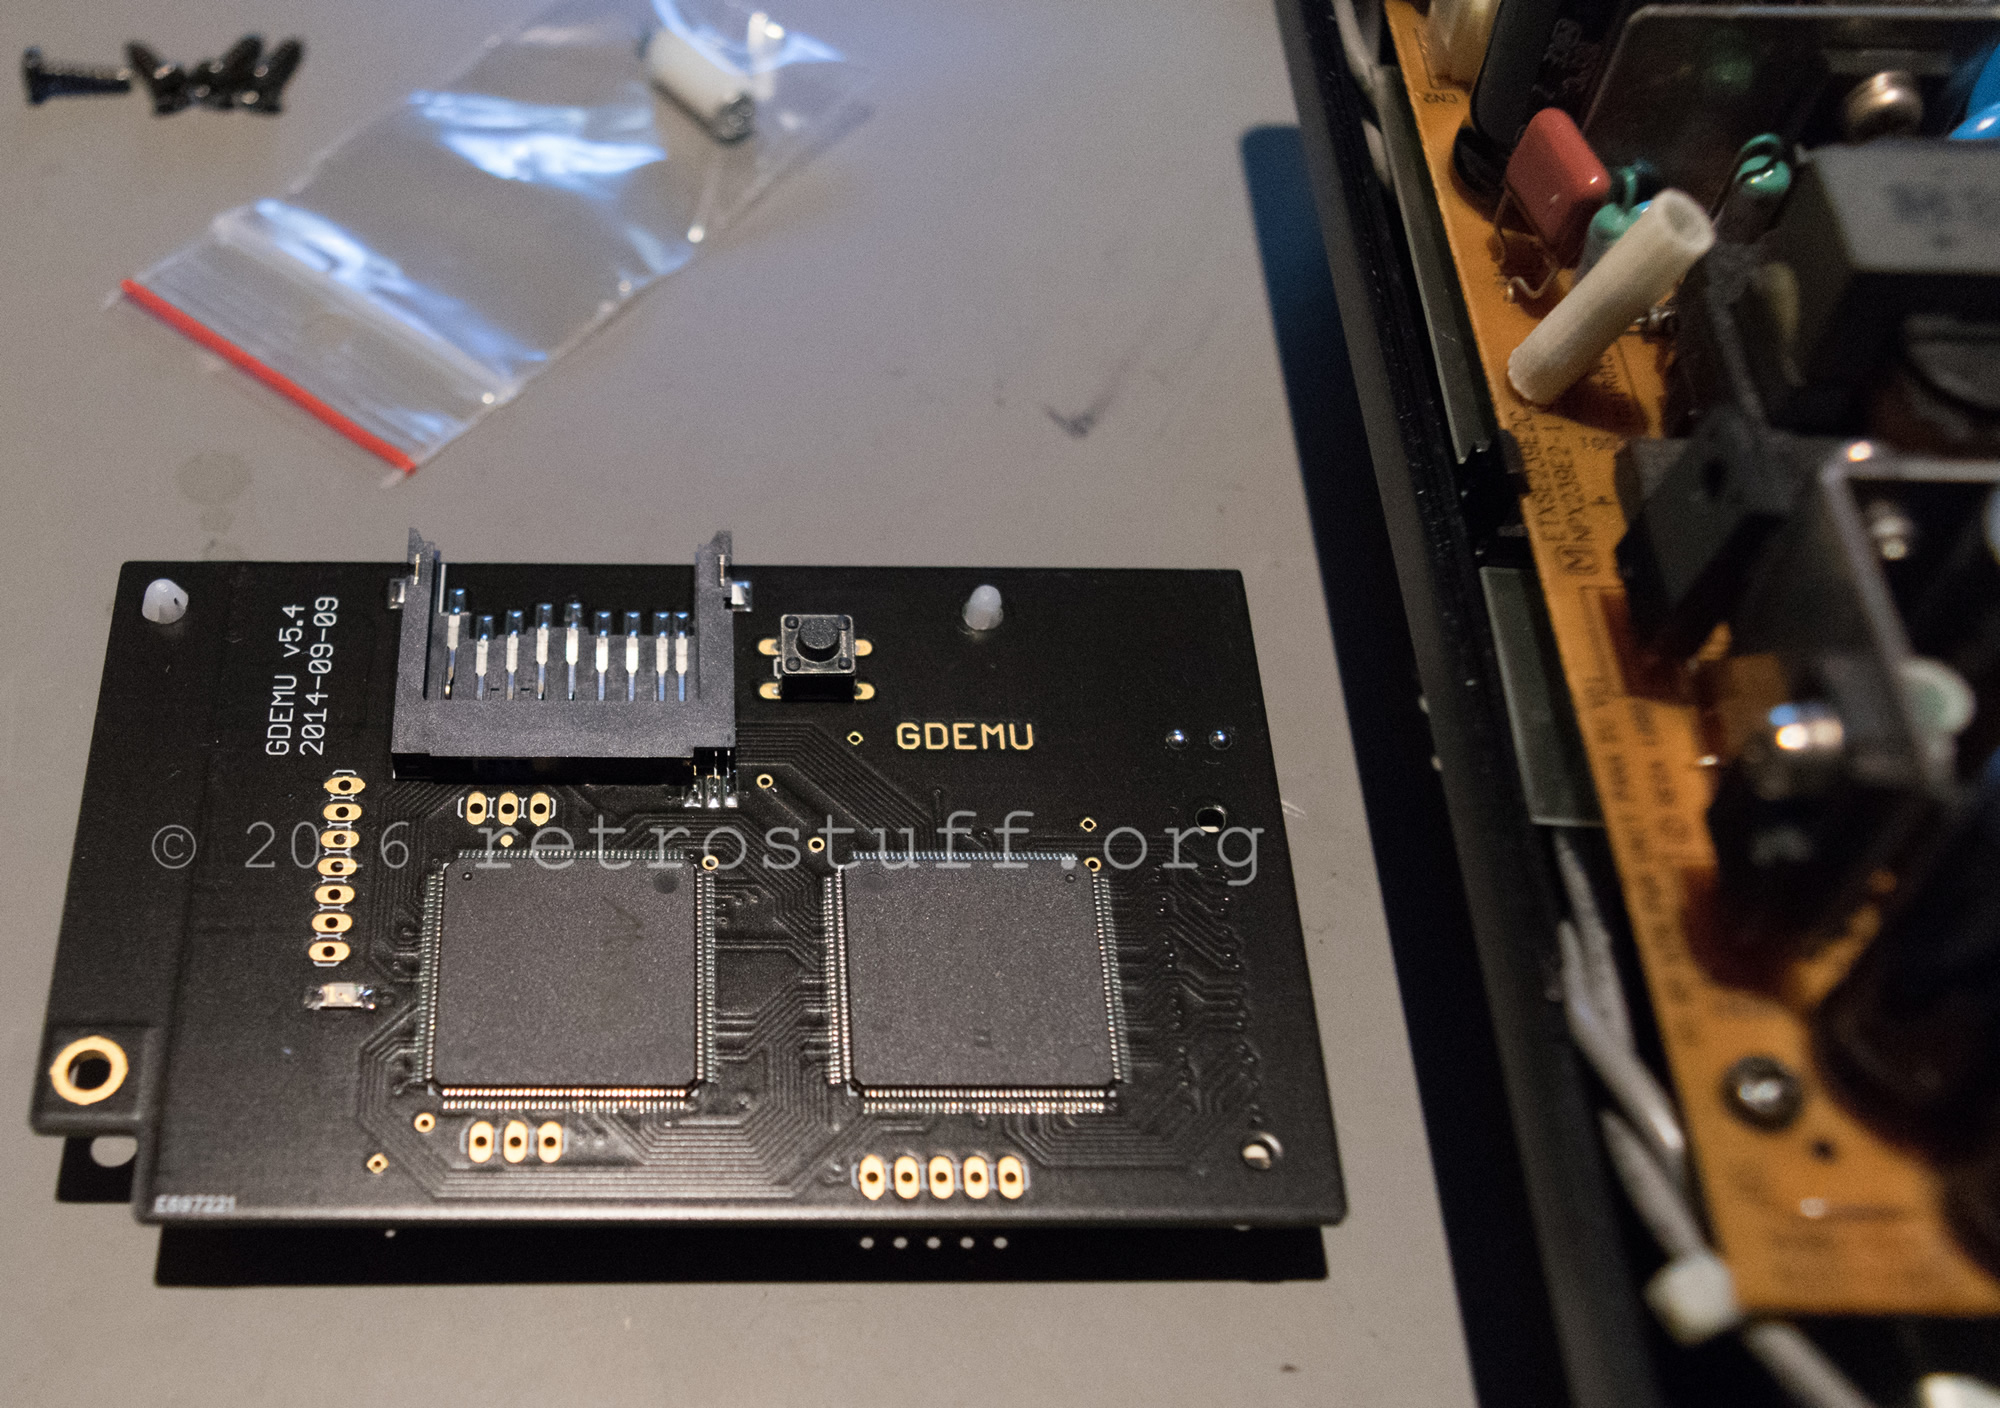
Continue reading Sega Dreamcast repair With GDEMU, PSU and Battery Mod
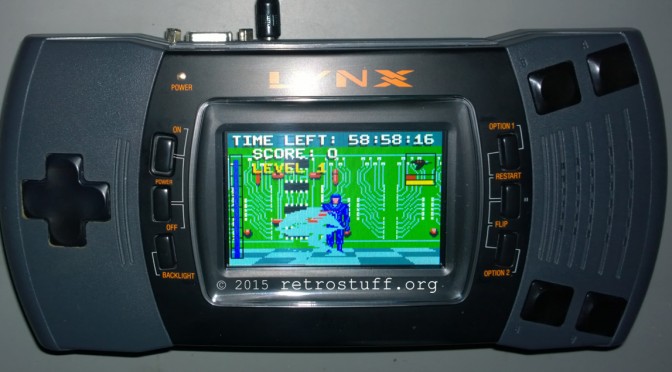
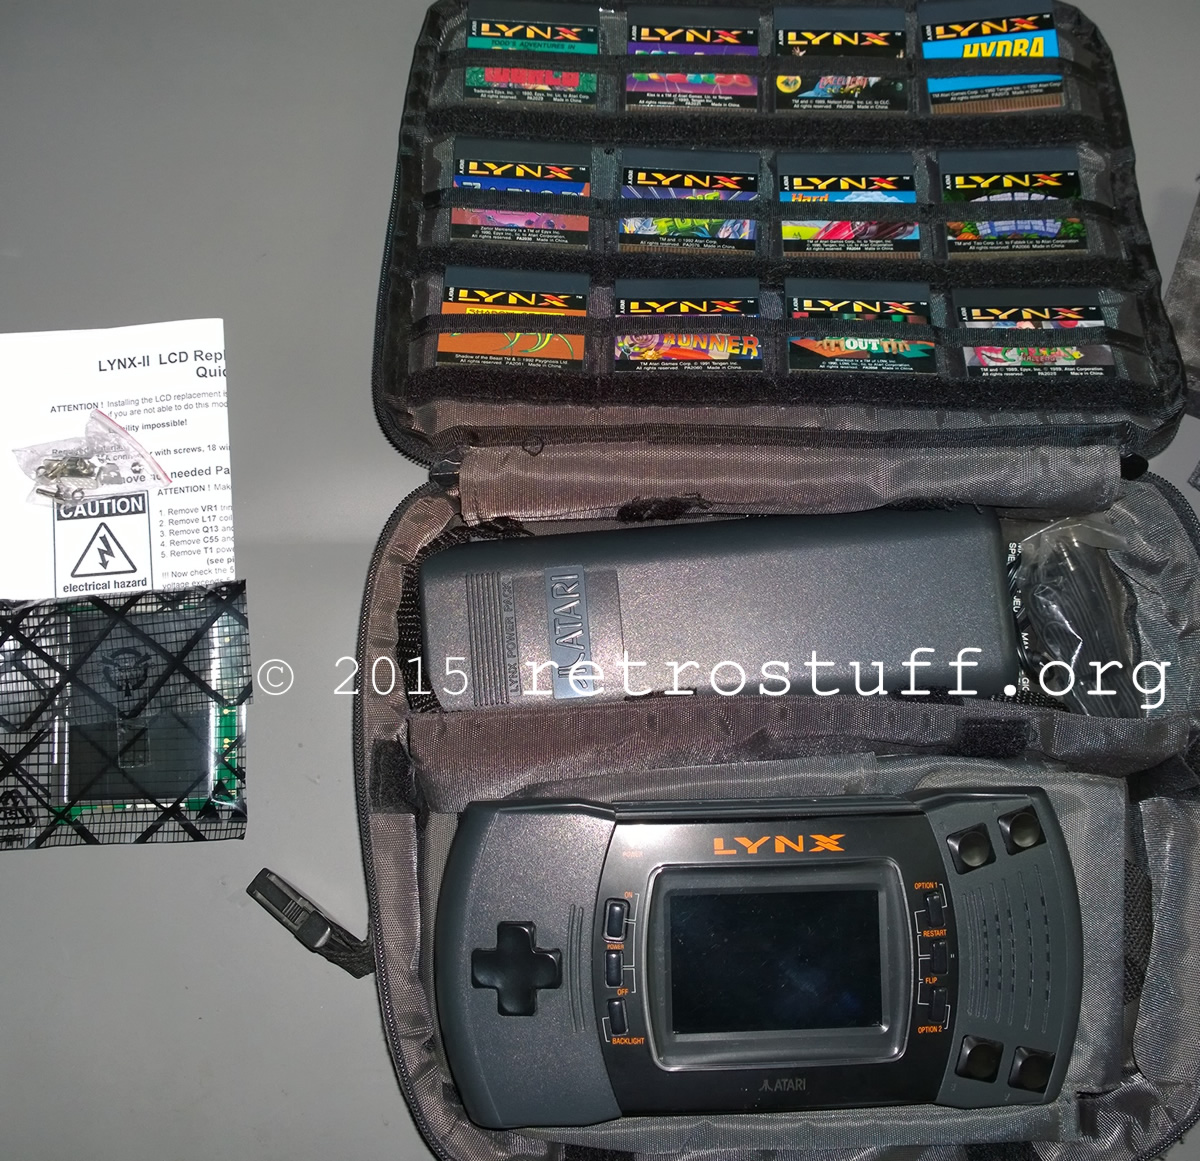
Replacing the aged Lynx screen with a new LCD screen is simple. All you need is an Atari Lynx II and the LCD screen kit by McWill (and optionally, a 5 V regulator).
Recently I found a CDI 220/00 with Mini MMC mainboard. It’s a heavy and bulky unit that contains lot of PCBs, wires, screws and metal parts. It’s one of the first consumer CD-i players. Later models have all components on one single mainboard (Mono).
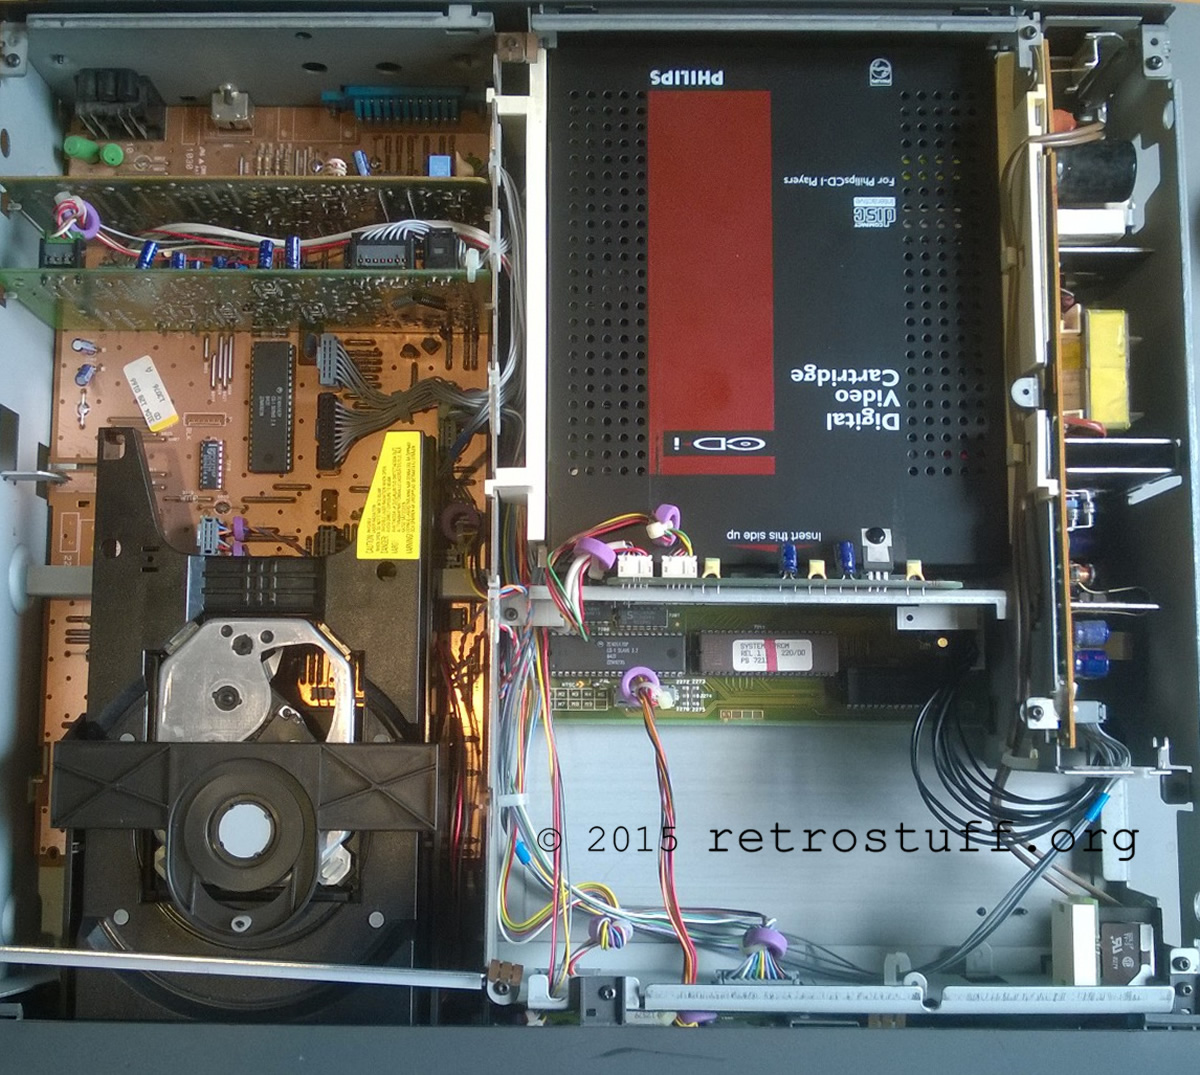
Continue reading Philips CDI 220/00 Mini MMC 60Hz Modification and Timekeeper Replacement
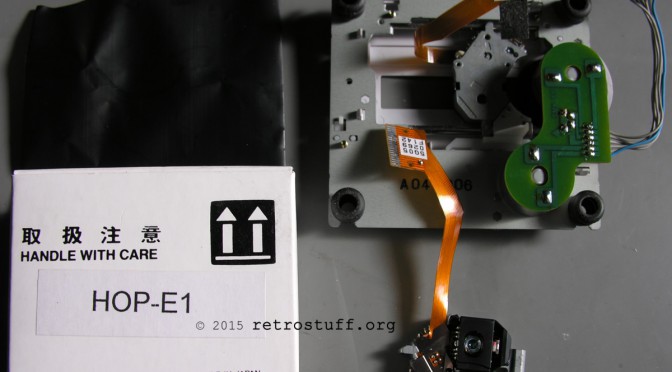
I’ve been struggling with a weak PC-FX laser for quite some time. What kept me from changing the laser or pickup unit was that having to take the PC-FX apart and put it back together later is something you wouldn’t wish your worst enemy. A complete disassembly can be found here. However, getting close to the drive unit is surprisingly easy if you just follow this guide.
First, you need a replacement laser. I chose the complete pickup unit (Hitachi HOP-E1), which was available for about 15€.
Continue reading NEC PC-FX Laser Pickup HOP-E1
While removing the throttle wheel from the stick, unit I noticed two small plastic rings connected by a spring jumping away. It took me quite some time to figure out the correct position when assembling the stick. In case you encounter this problem too, this is how the rings have to sit on the throttle wheel: