
Replacing the aged Lynx screen with a new LCD screen is simple. All you need is an Atari Lynx II and the LCD screen kit by McWill (and optionally, a 5 V regulator).
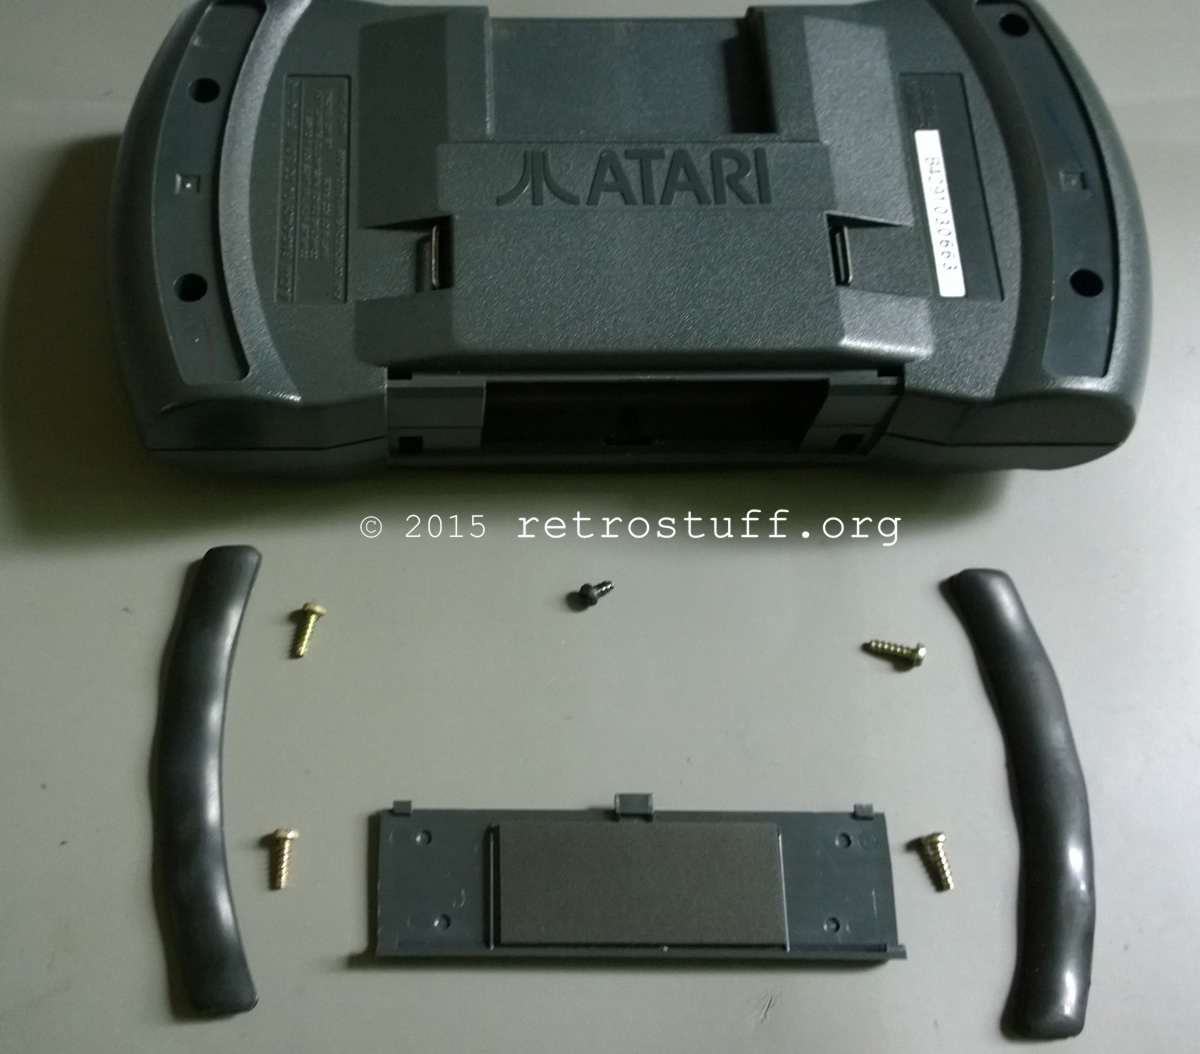
First, remove the two rubber feet to reveal four screws. A fifth screw is hidden in the battery compartment.
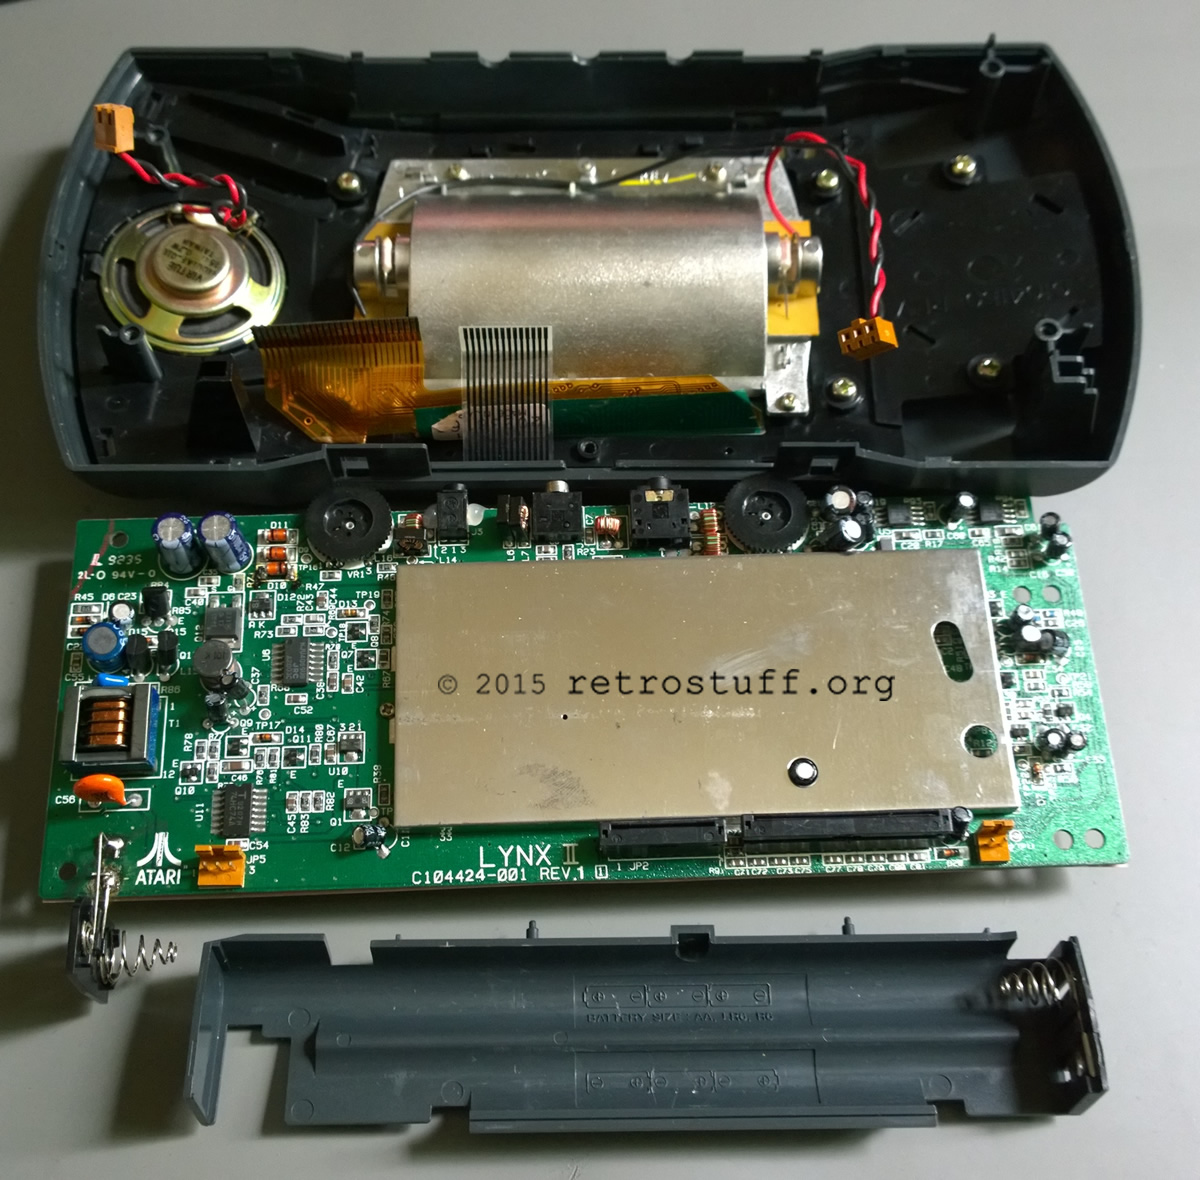
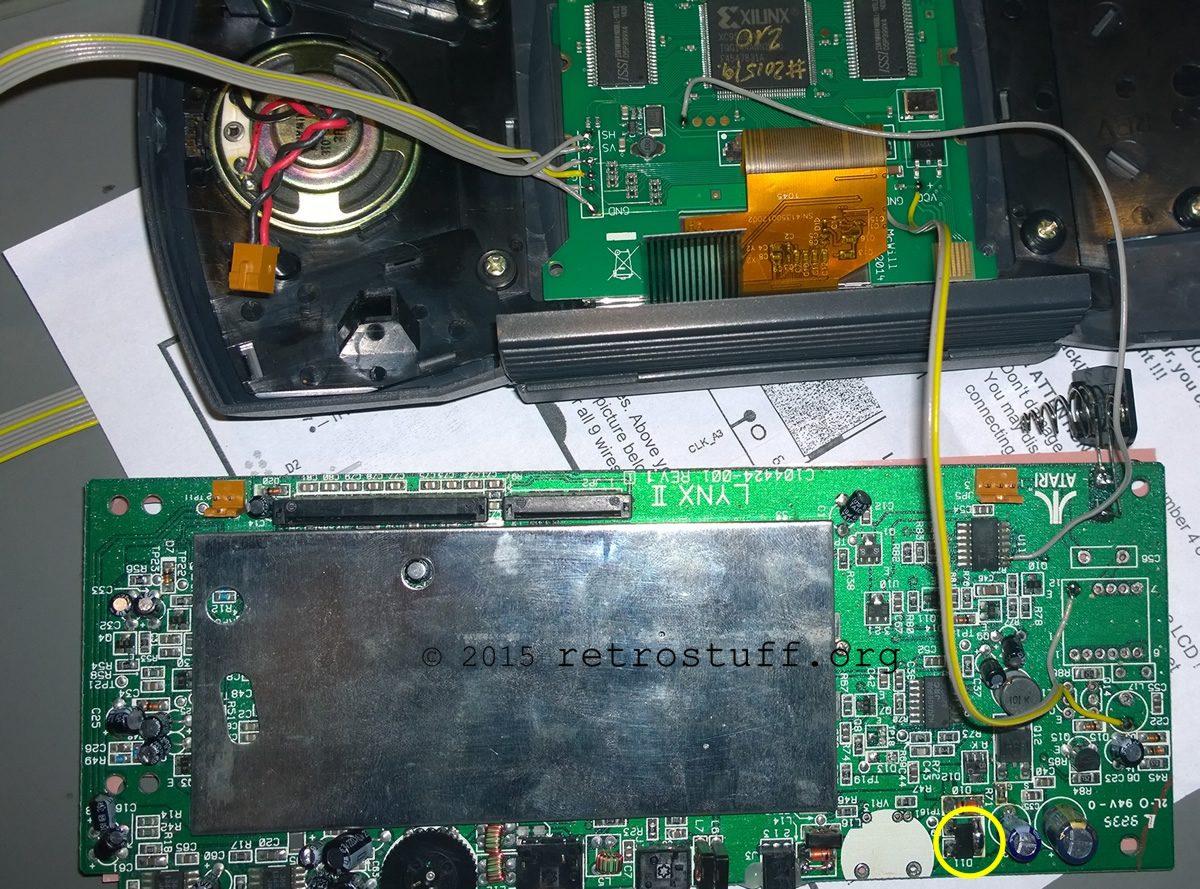
After carefully unplugging four connectors, you’ll reach the mainboard.
Following the instructions by McWill, you will eventually be advised to check the 5 V connection. If you don’t get any voltage then insert a game, as the Lynx won’t turn on without one. If there is still no voltage (or if it exceeds 5,45 V) then the original circuit has failed already and needs to be replaced with a modern regulator.
5 V regulator
Remove the five unneeded parts (yellow circles) and also have a look at possible leaked capacitors (red circles).
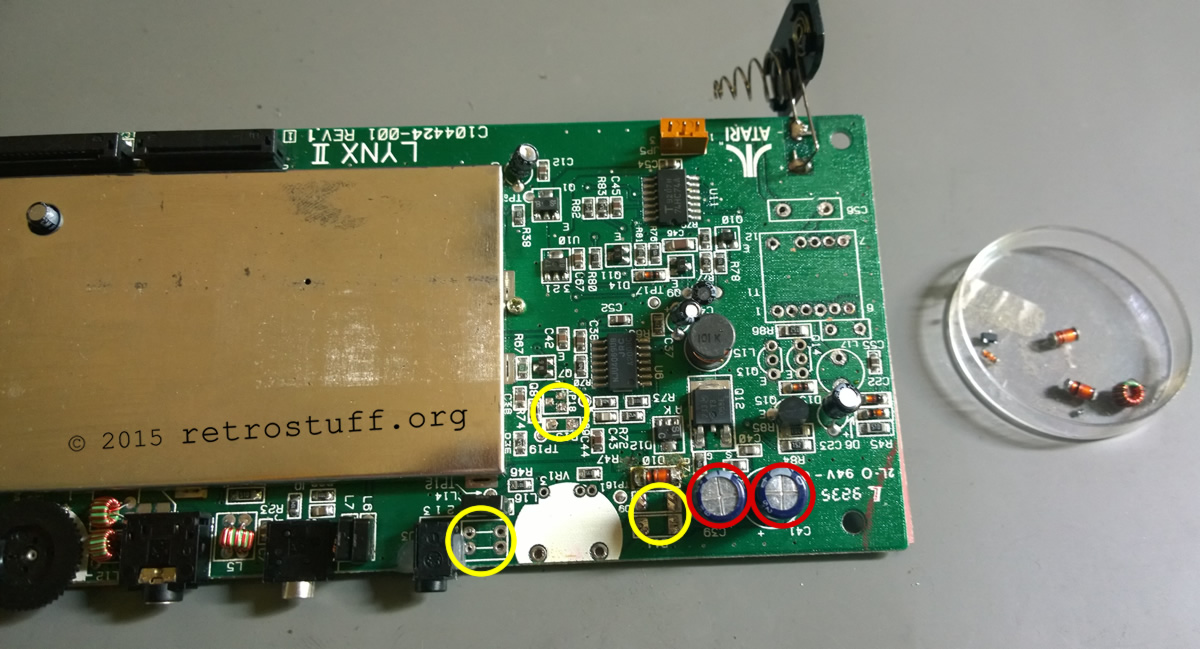
I first went for the instructions with a SMD regulator LD1117S50TR as described here (German).
Well, that was a bad idea. The regulator gets very hot within the first minute and then the game stutters and eventually shuts off.
It only works reliably when the internal screen is turned off and the video is sent through VGA out.
A much better option is a RECOM regulator, as described here.
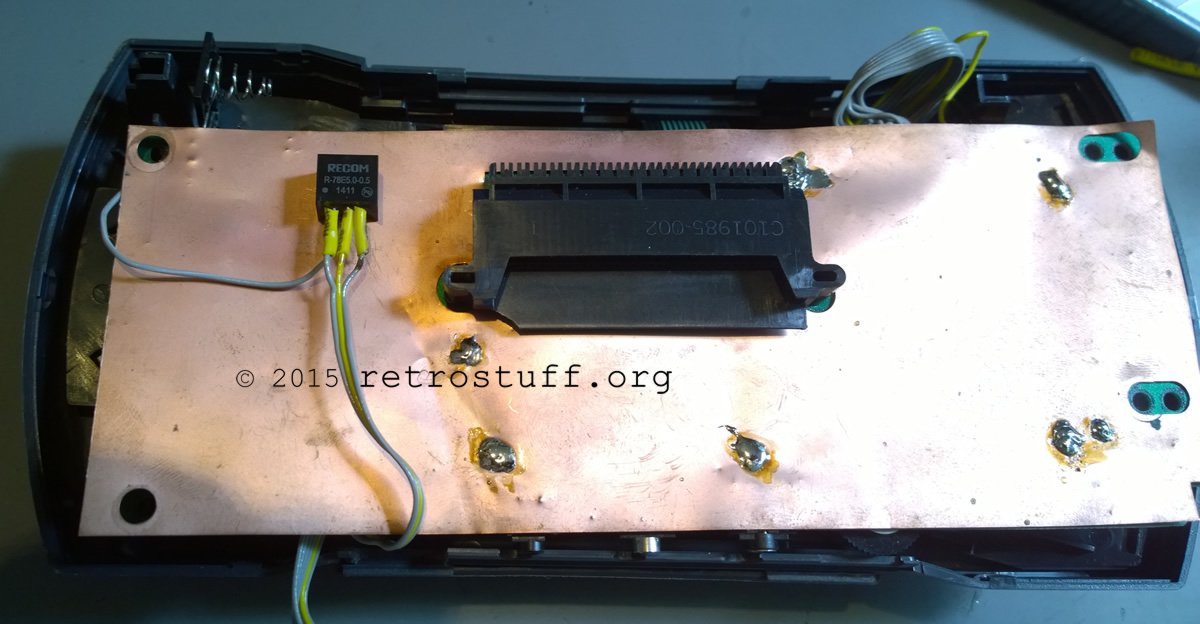
McWill provided me with a RECOM R-78E5.0-0.5 regulator and after it was installed, the Lynx has been running for hours and didn’t fail once.
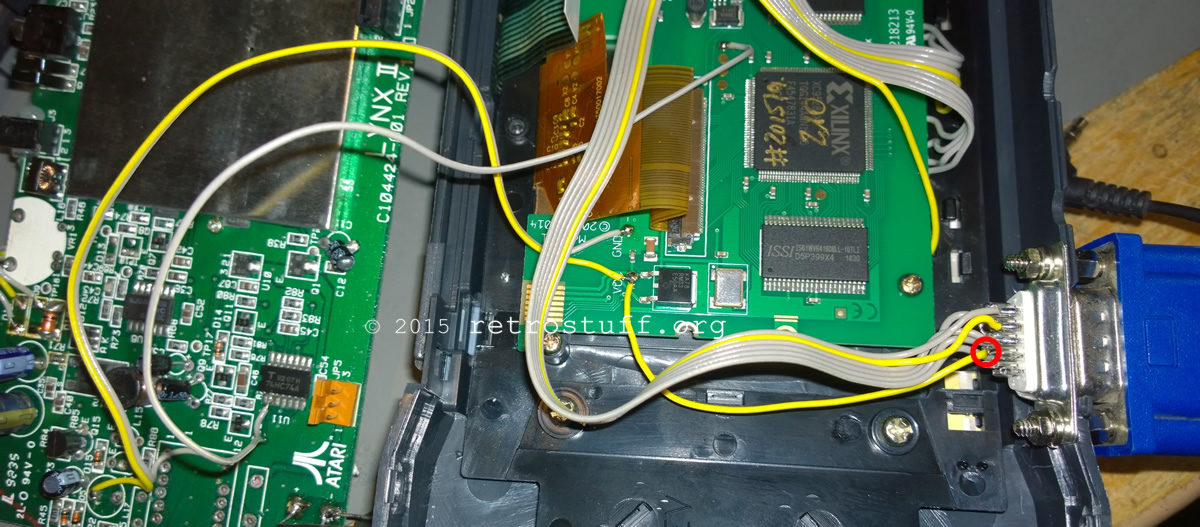
Connection to Framemeister
Then, I was looking for a way to connect the Lynx to the Framemeister. It turned out that the RGB-in port accepts a 31 kHz signal too. To make use of the port, H-sync and V-sync need to be combined to composite sync. Instructions for a sync combiner can be found here and the pinout for RGB-in here.
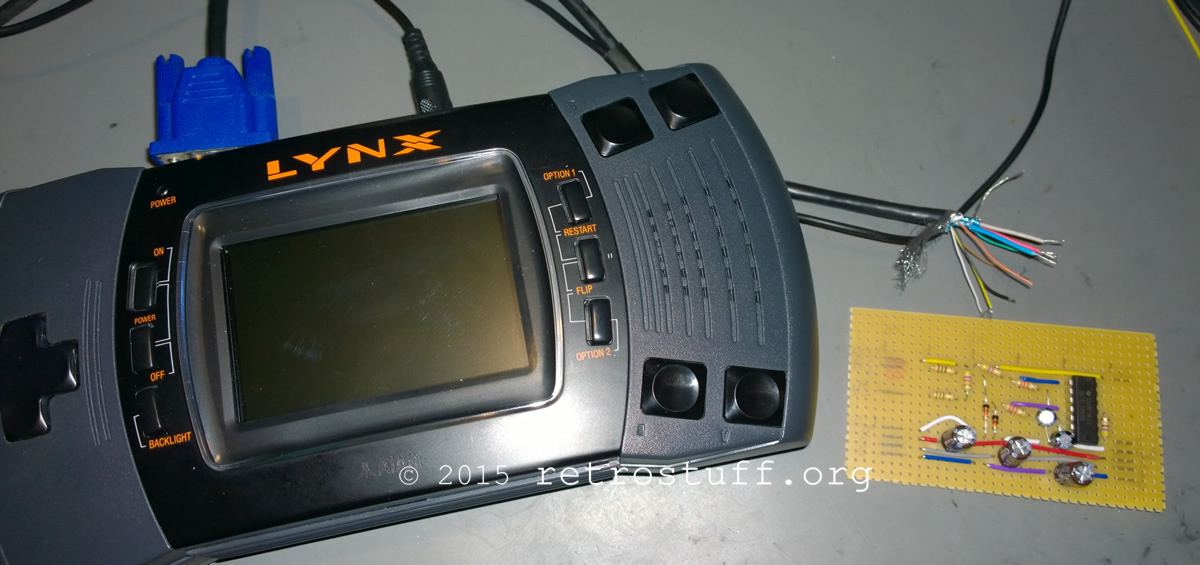
The sync combiner needs 5 V to work, so connect Lynx VCC to VGA pin#9:
Enjoy!
hi
nice mod!!!
But I am asking something:
on atariage they use 7805 0-1 and you use a 7805 0-0.5. Is 500mA is enough for lynx? apprently , yes because you say it works fine now 🙂
Hi, Thanks!
Yes it works fine. I’ve got this R-78E5.0-0.5 from McWill – he should know what’s good for the mod and what’s not.
I mean 7850 sorry