
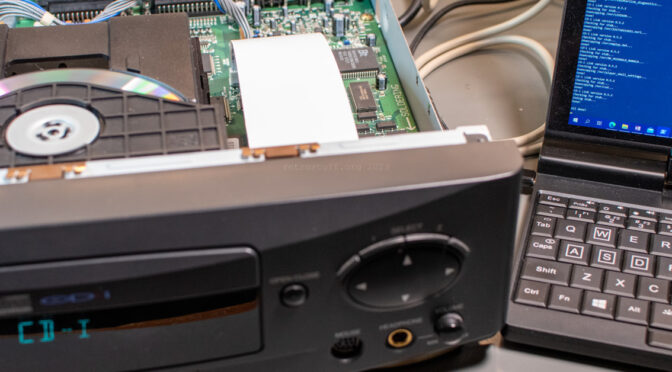
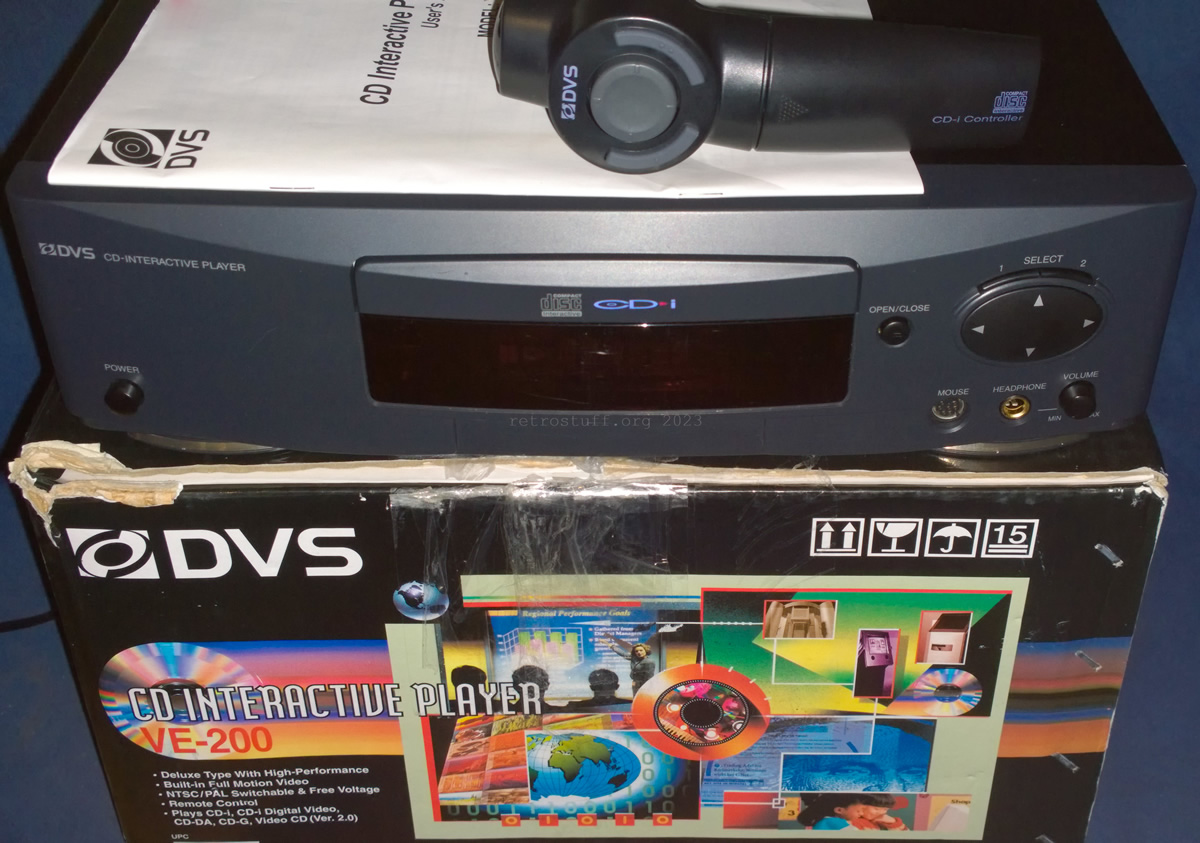
The DVS VE-200 CD-Interactive Player is a CD-i player manufactured by LG. Like other CD-i players, it contains a battery-backed NVRAM and real-time clock.
In this article, I will take a look inside and show how the battery can be replaced while making sure that the NVRAM data won’t get lost in the process.
The player is one of four known very similar models that make use of the GoldStar / LG mainboard (midi-size). The other three models are: GoldStar / LG GDI-700M, GDI-S710 and Knowlogy K2000-MSS. What makes them special in terms of NVRAM and RTC is that they don’t have a Timekeeper or SmartWatch socket, but a different solution:
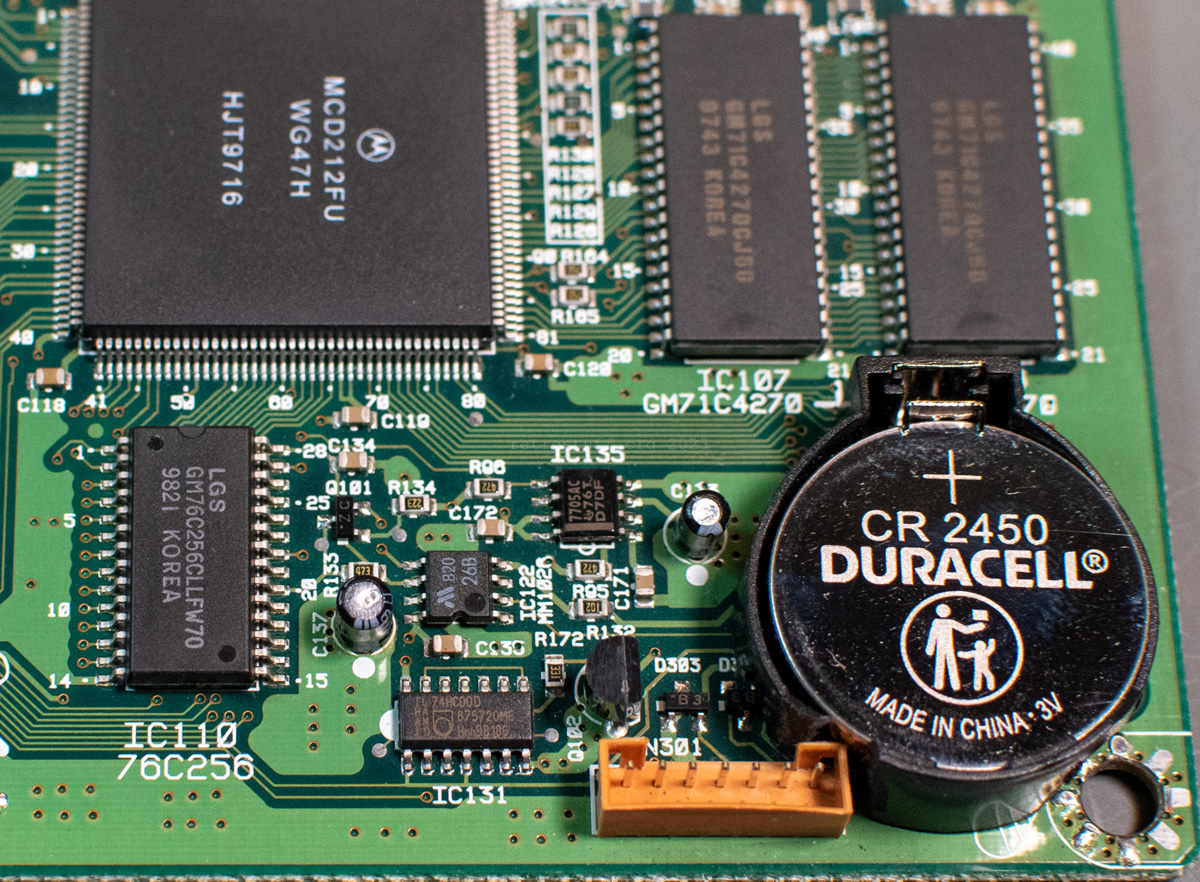
- An LGS GM76C256*LLFW70 CMOS SRAM and an Epson RTC-4513 Real Time Clock Module, powered by a Sanyo CR2450 coin cell battery that is soldered onto the mainboard.
NVRAM backup
The fastest way to back up your precious game save files and other settings is CD-i Link by CD-i Fan; its setup and usage is explained in this article. We’ll take a slightly different approach here to take the hardware differences into account and also make it much easier for you. First, the hardware differences:
- GoldStar / LG players don’t have the download protocol in ROM, so you’ll have to burn the CD-i Stub disc image and play it when CD-i Link is waiting for stub.
- The RS-232 port is a male DB-25 socket called MODEM on the back of the player. A regular null-modem cable is sufficient and there is no need to build a special cable with Mini-DIN-8 plug.
If you only have very few files in the NVRAM then you could continue with the article mentioned above to save them manually. But if you have a lot of them then typing every single file name is a bit tedious.
I’ve come up with a Windows batch script that takes care of backing up and restoring all files for you. Download and extract cdibackupn.cmd into a directory together with cdilink.exe and then either run it from the Windows command line (cmd.exe) or from the Windows Explorer.
Usage: cdibackupn [backup | restore] [COM port number]
Example: cdibackupn backup 1 backs up the NVRAM of a CD-i player that is connected to COM1. These are also the default options and need to be changed to match your system in case you want to run from the Windows Explorer.
The script is tailored for non-Philips CD-i players. If you intend to use it on Philips CD-i players then edit it and switch the comments for set “stub= accordingly.
How does it work?
First, cdilink makes a connection with the CD-i player. Keep the stub disc ready and press play when asked to reset the reset the CD-i player. Next, cdilink saves the directory listing of /nvr to the file cdinvr.txt. And finally, cdinvr.txt is parsed for file names and cdilink –upcopy is executed to copy every single file to the directory \backup.
Warning: Files from a previous backup get overwritten.
This is an example of the start and the end of the script execution. The highlighted part with the system bootstrap message only appears when you reset a GoldStar / LG player when CD-i Link tells you to. It’s not harmful but can be avoided when you just play the stub disc.
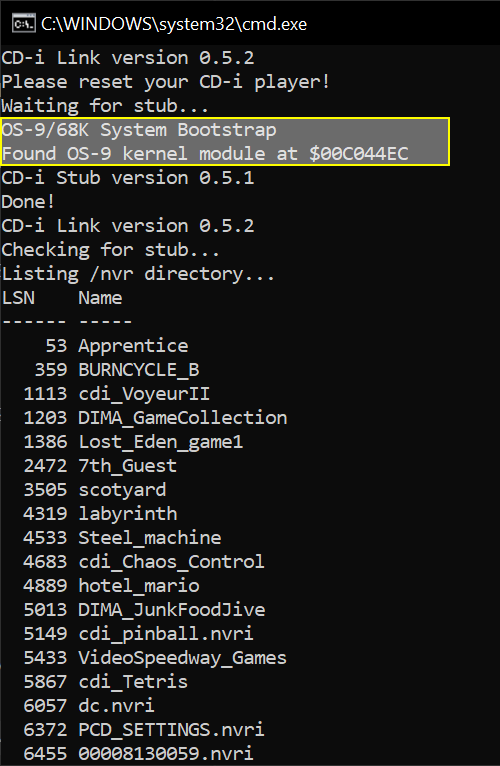

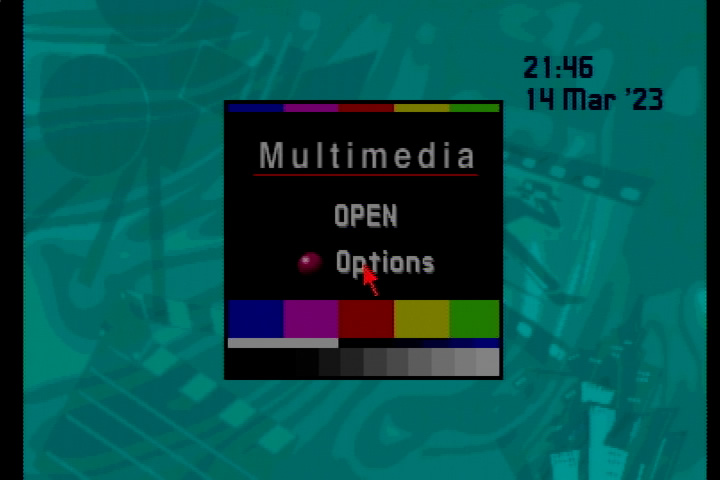
If everything goes as expected then you’ll find a bunch of files in the subdirectory \backup. If you want to double-check then compare them with the list that is displayed when you click on Options and then Storage in the CD-i player shell (you won’t see the two files csd and player_shell_settings on your CD-i player).
Disassembly
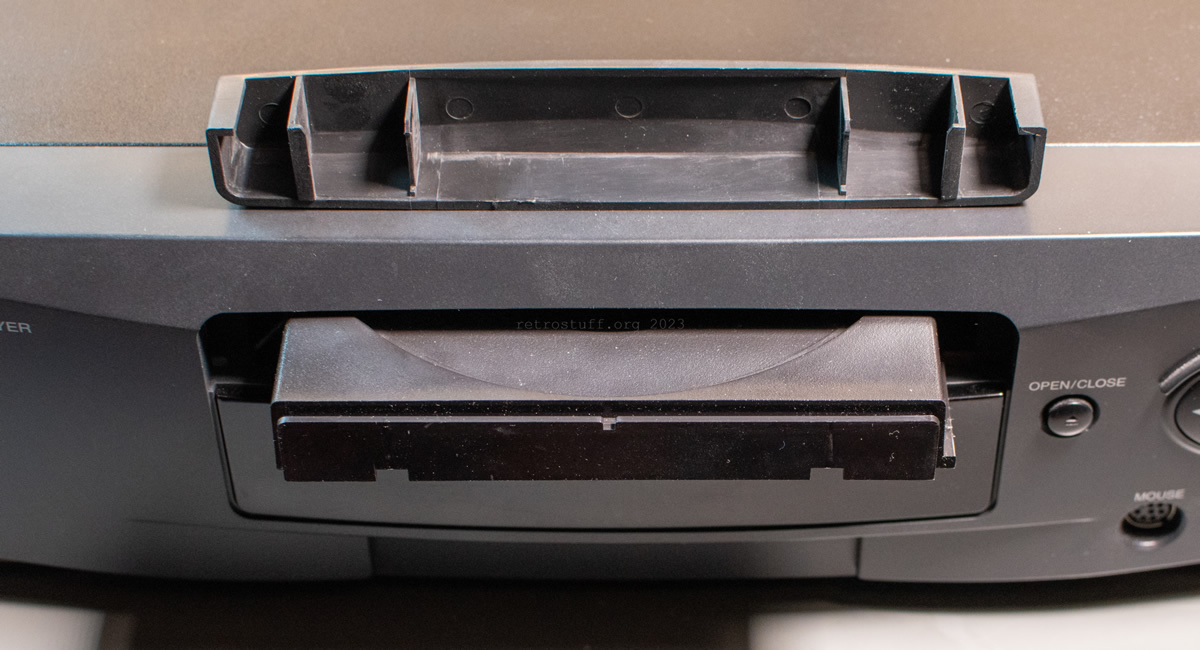
Before you start disassembling, it’s probably a good idea to eject the tray of the disc drive and remove the bezel. This is only to avoid that it gets stuck; removing the disc drive is actually not needed to access the mainboard.
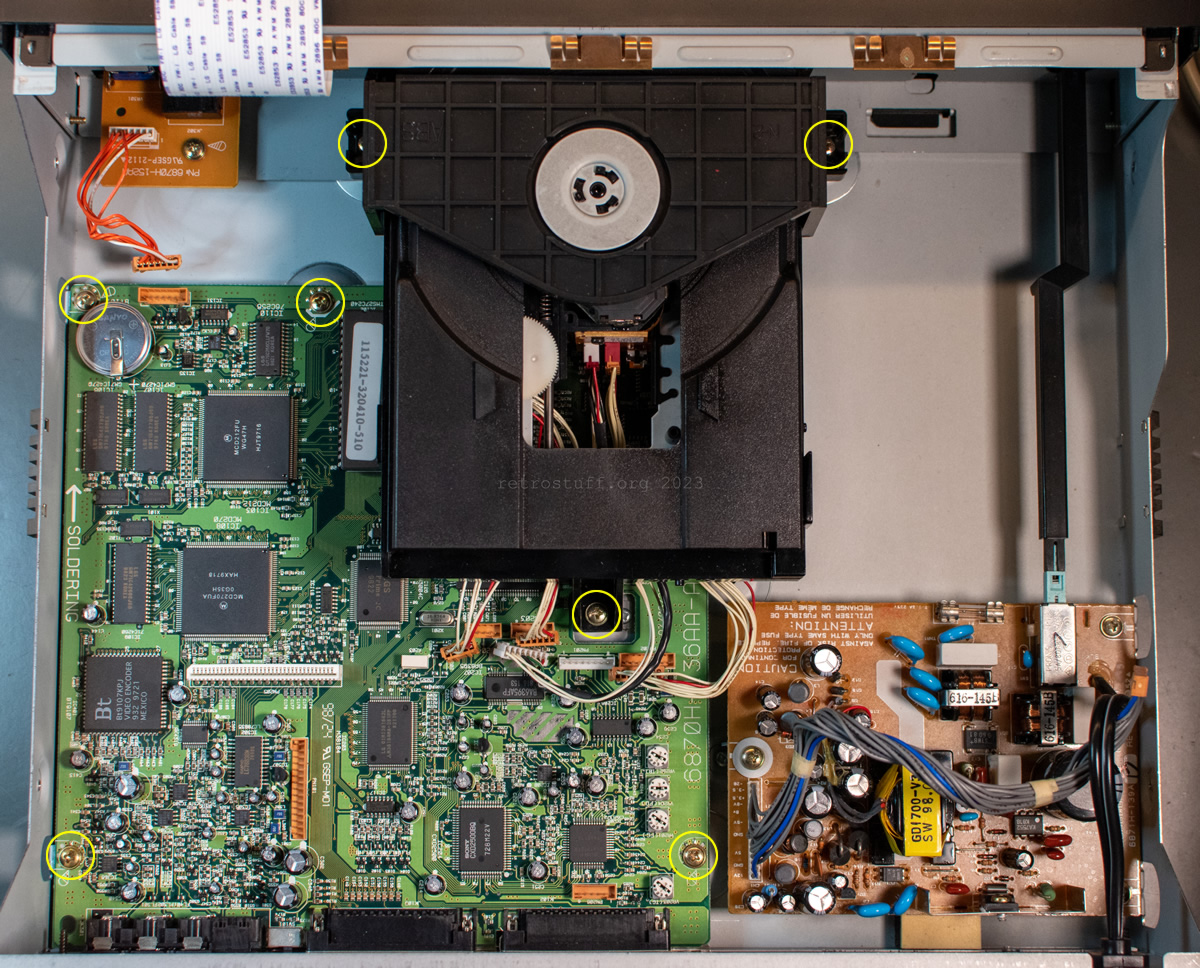
Forget what you know from dealing with Philips CD-i players – this player doesn’t have Torx screws and there are three types of Phillips screws only. We start with two black screws each on both sides and the upper back (yellow circles). Also take note of the two black screws marked in orange circles that keep the mainboard in place as these will be removed in a little while.

Make sure that the power is unplugged and that you are grounded. Open up the player and take your time to familiarize yourself with the layout of the inside, how the cables are routed and connected, etc.
Carefully unplug all the cables that lead to the mainboard and you can see all the screws. Remove the screws that hold the mainboard in place: Inside the bronze screws (yellow circles) and outside the black screws (orange circles, see above). Then, remove the three screws of the disc drive (short bronze in the middle and long bronze left and right).
You should now have three different types of screws:
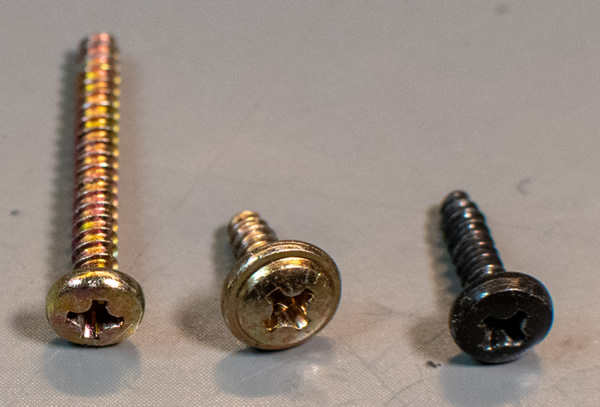
To take out the mainboard, just lift the middle post of the disc drive a bit. In case you ejected the tray or removed the bezel earlier, you can of course also remove the disc drive. Otherwise, it is locked and cannot be opened that easily. See the last chapter of this article for more information about the disc drive and how to unlock it.
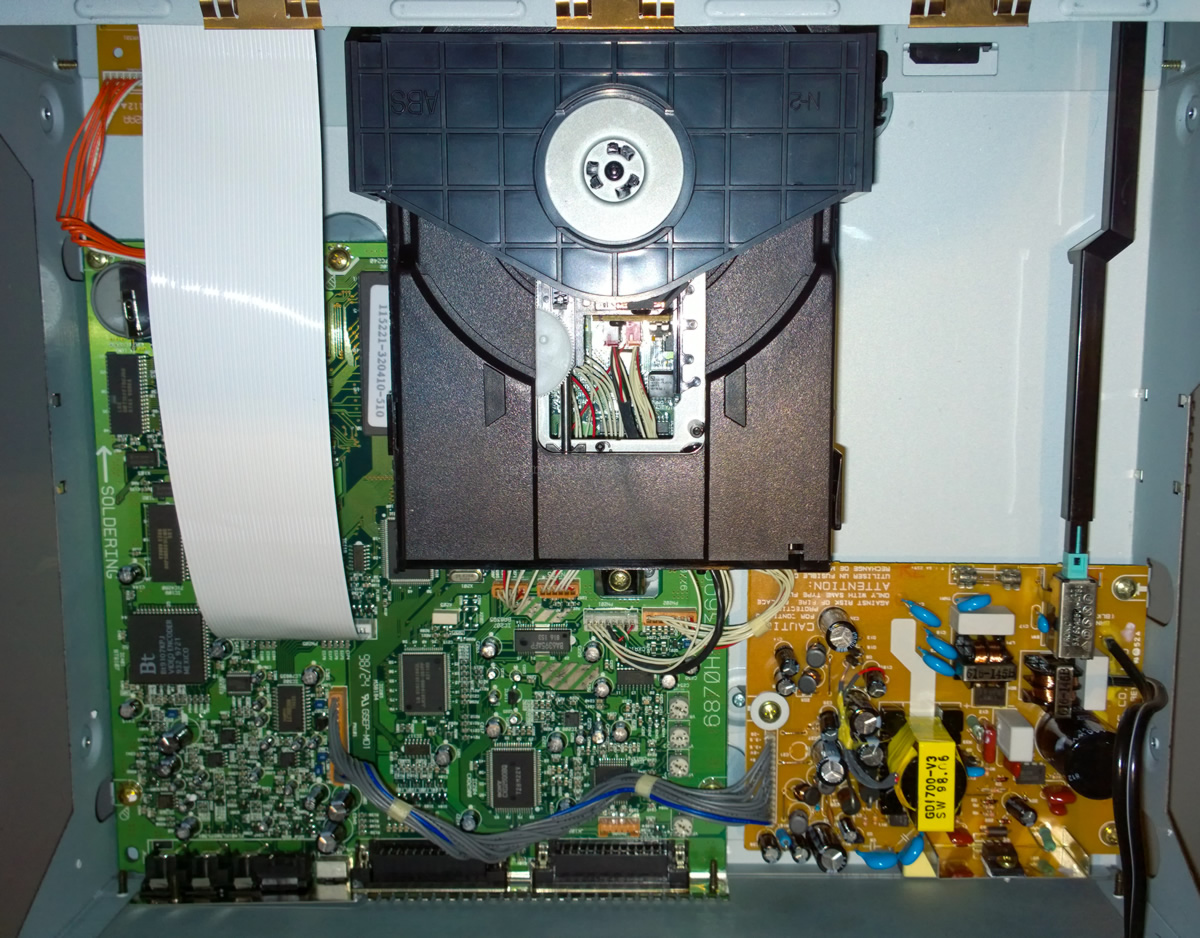
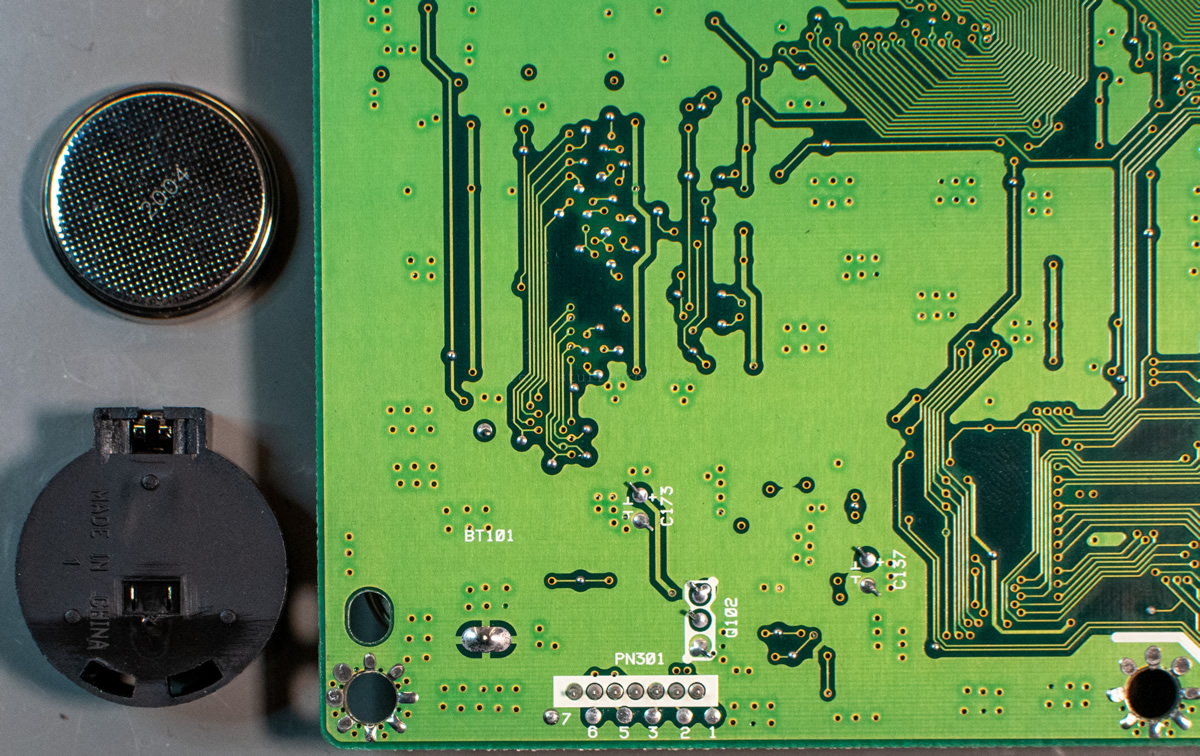
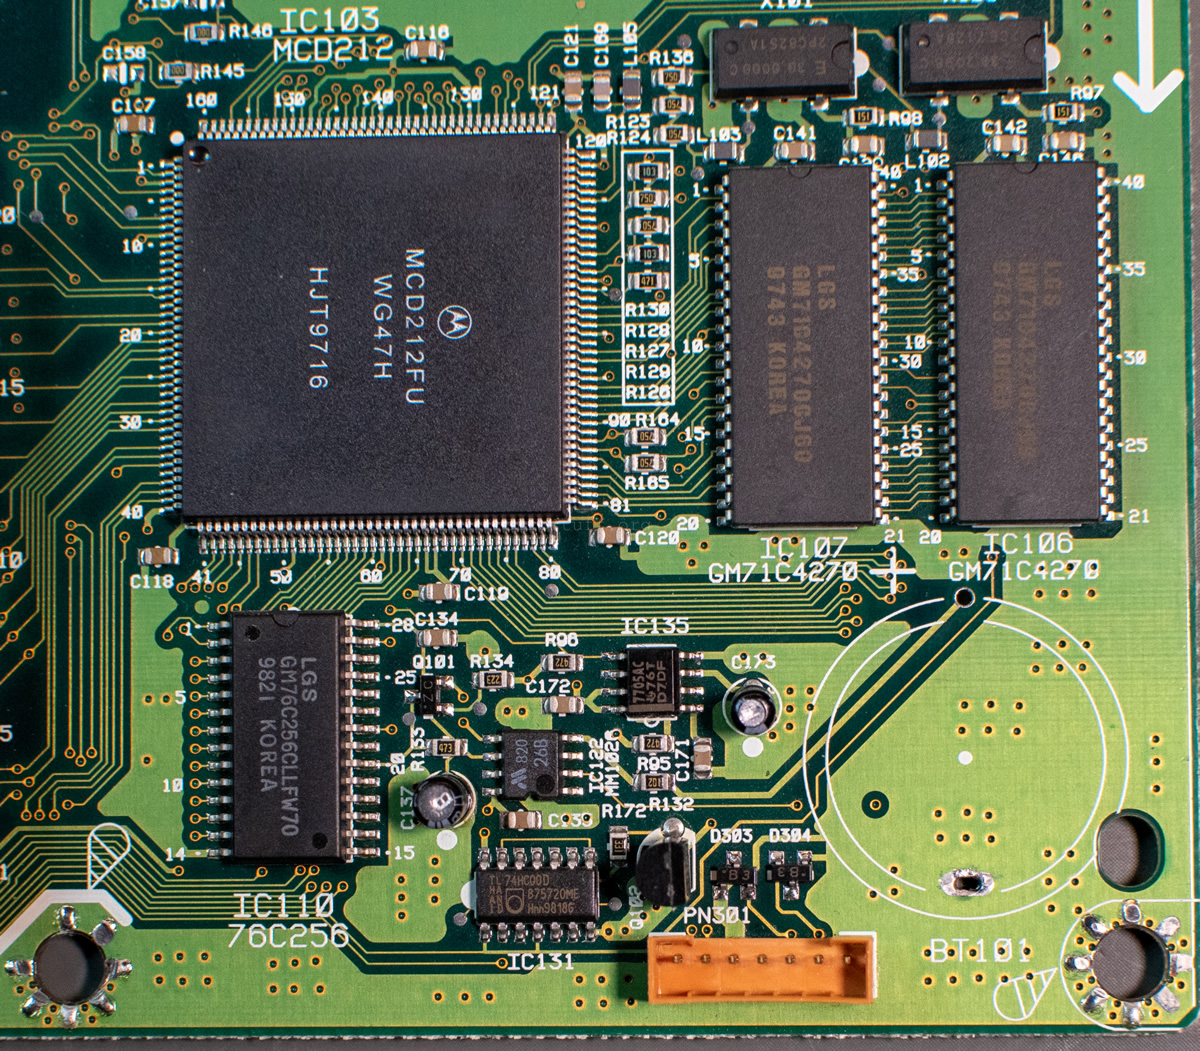
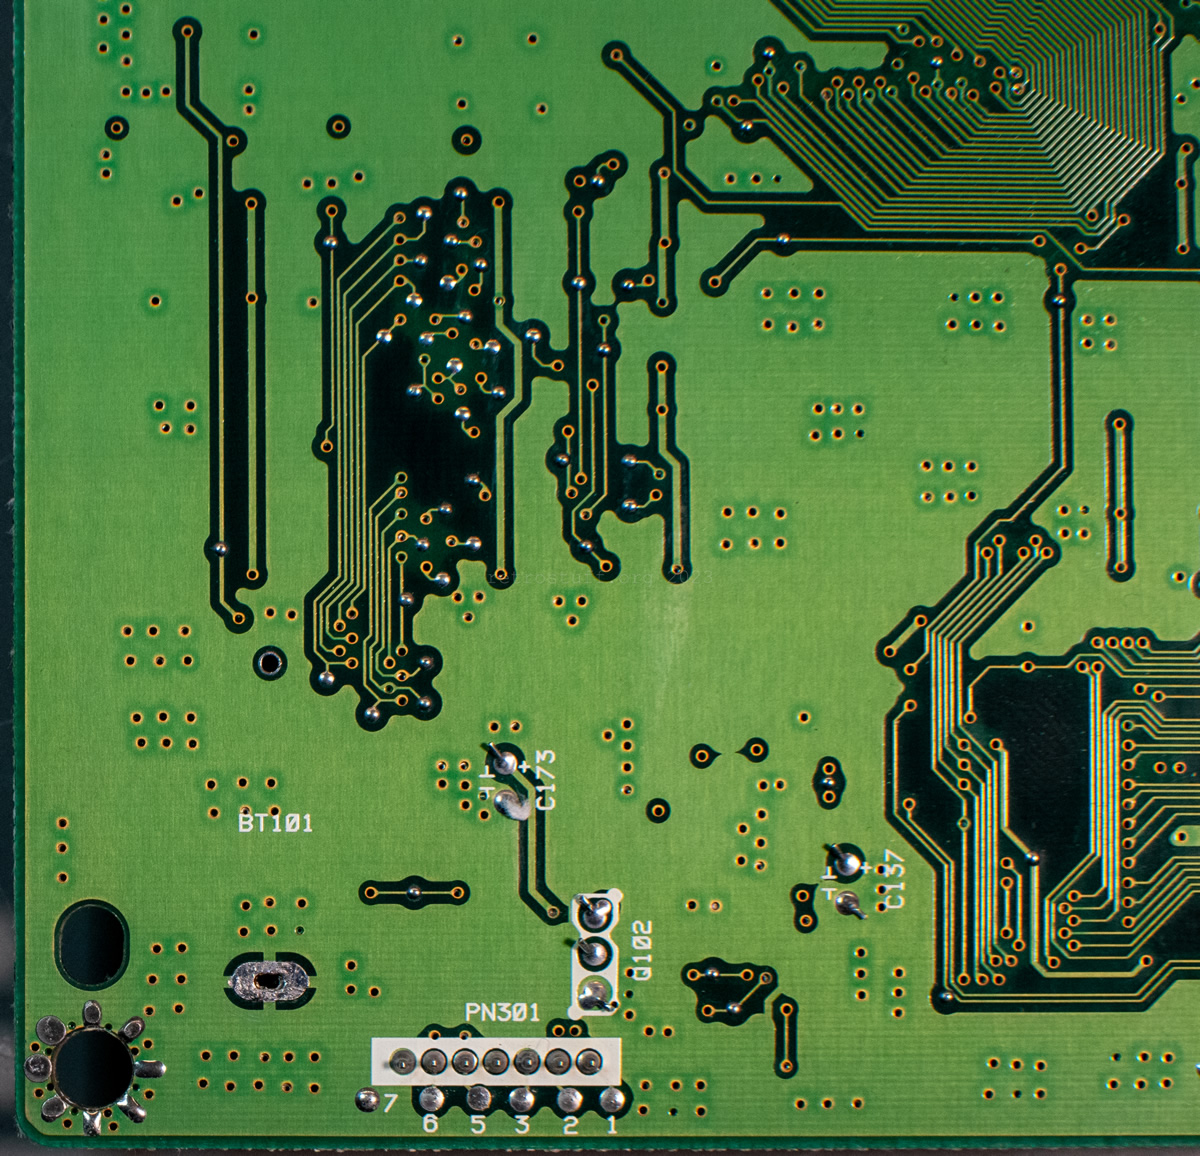
For orientation, both sides of the mainboard:
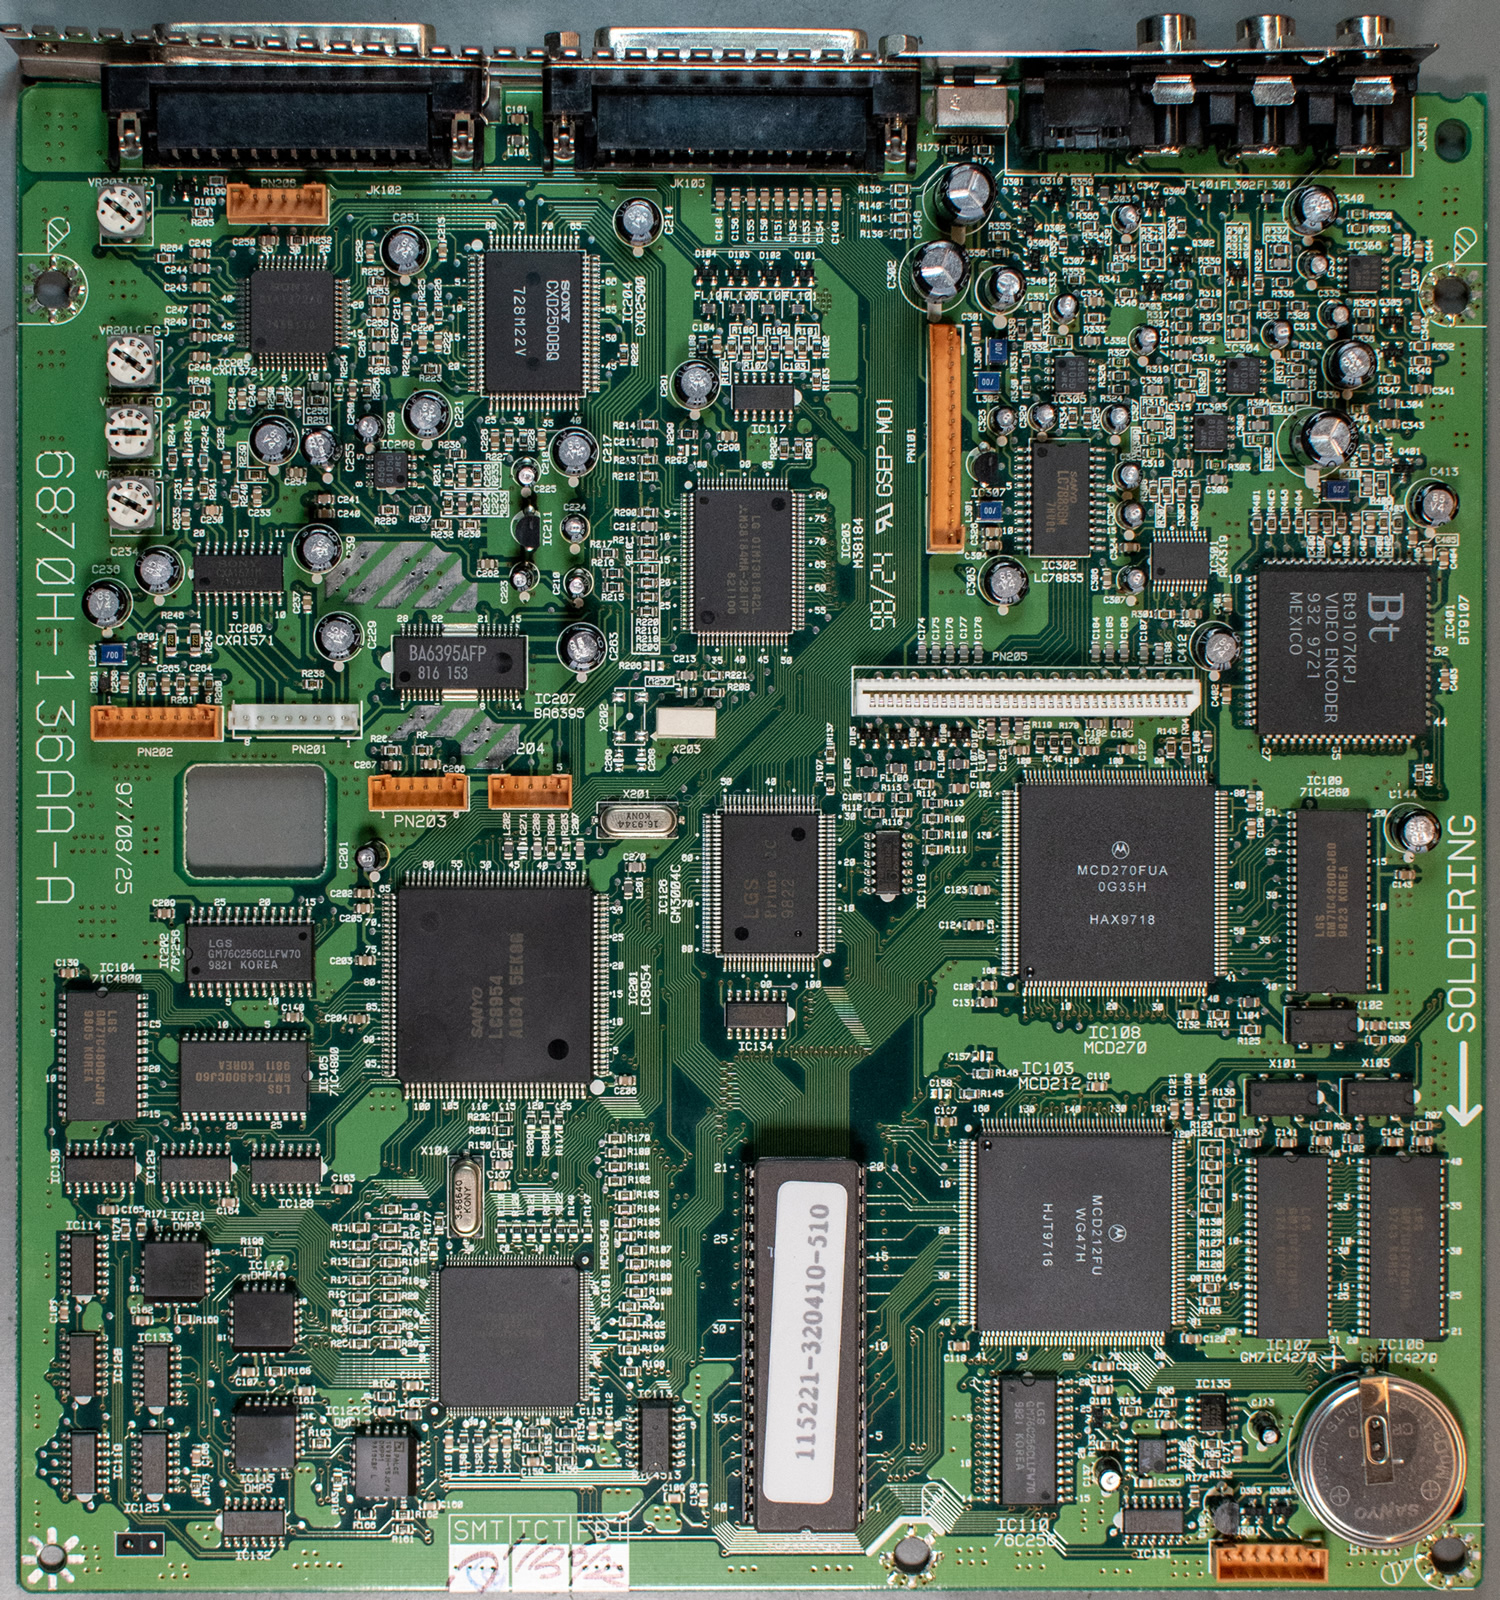
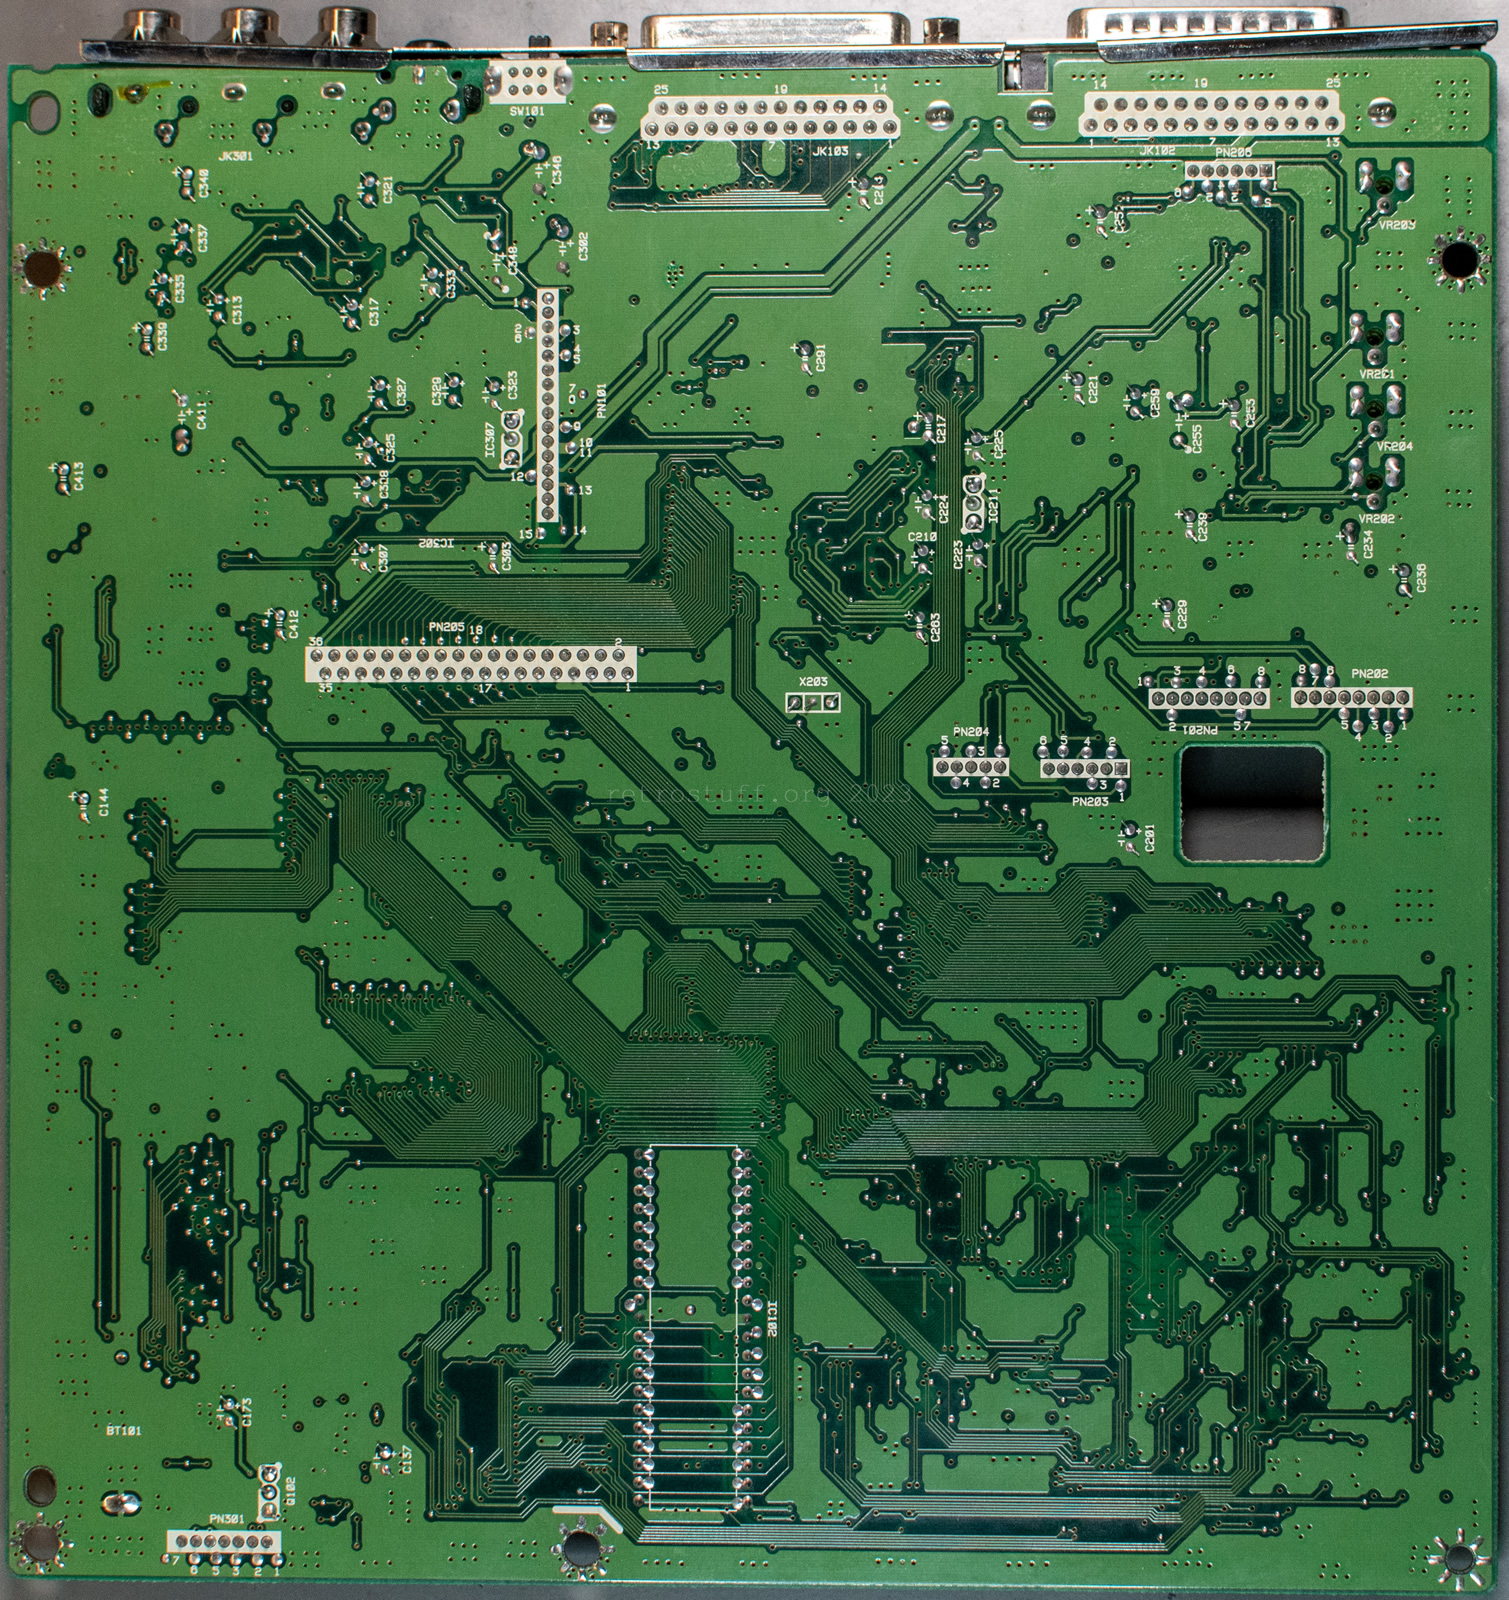
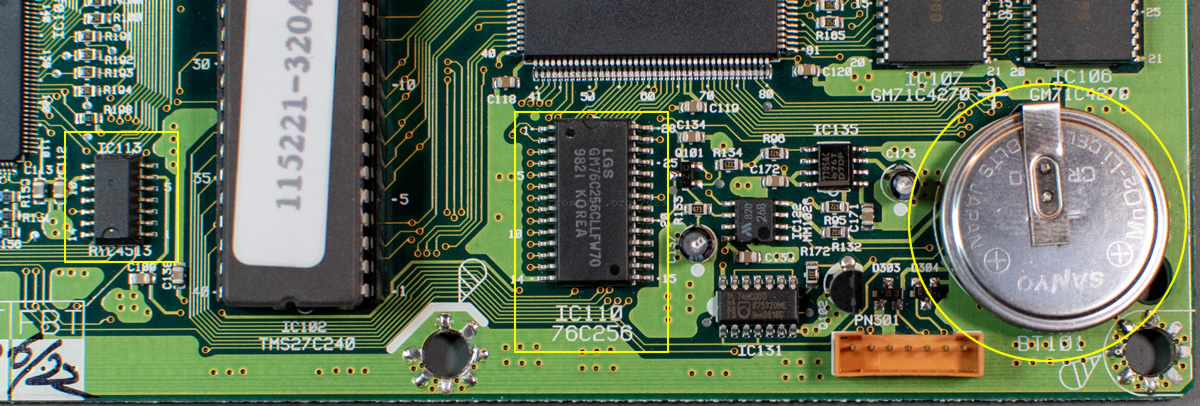
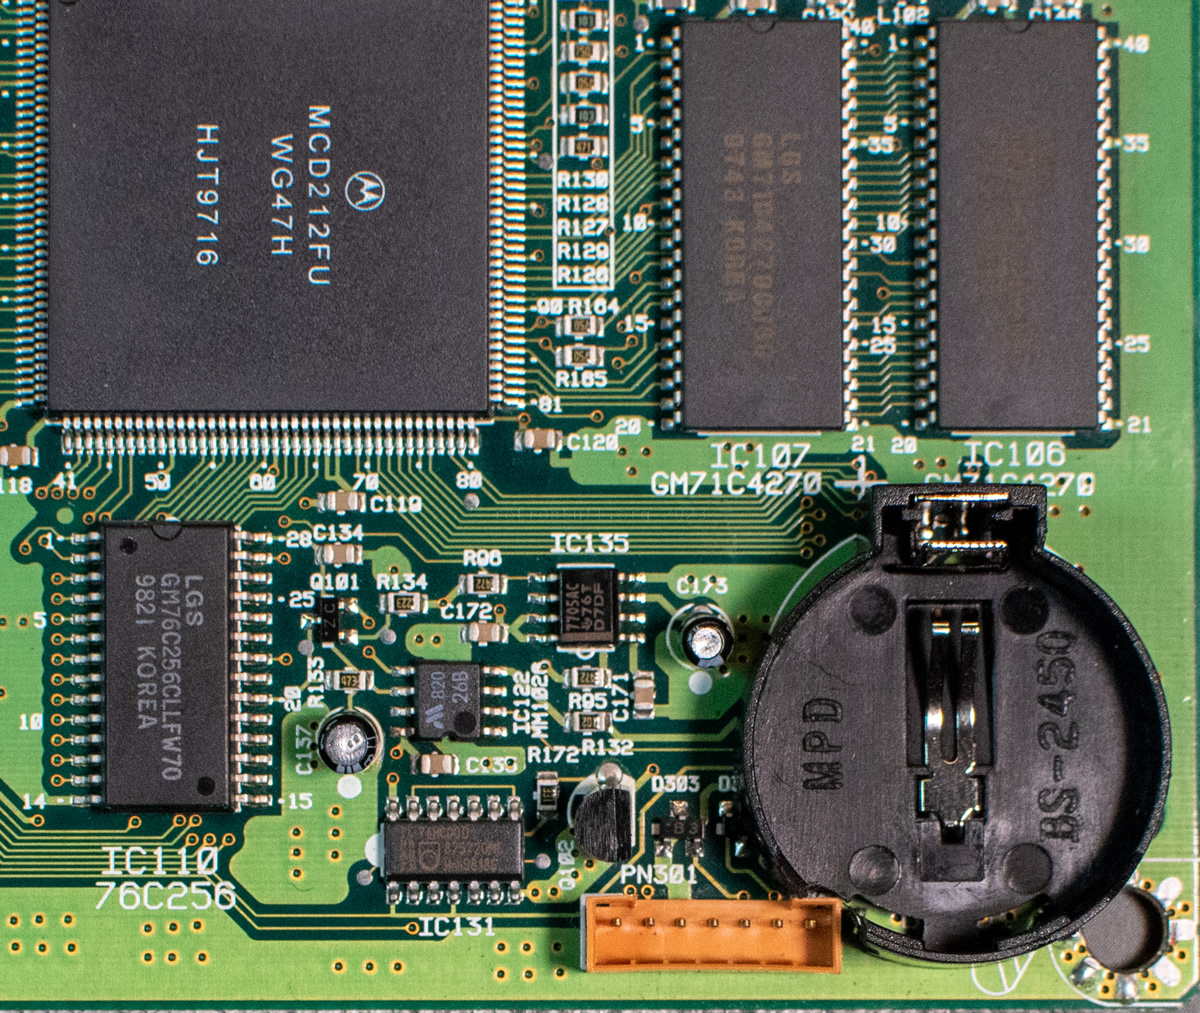
The NVRAM solution is located in the lower left of the mainboard, the RTC is in the lower middle:
Battery replacement
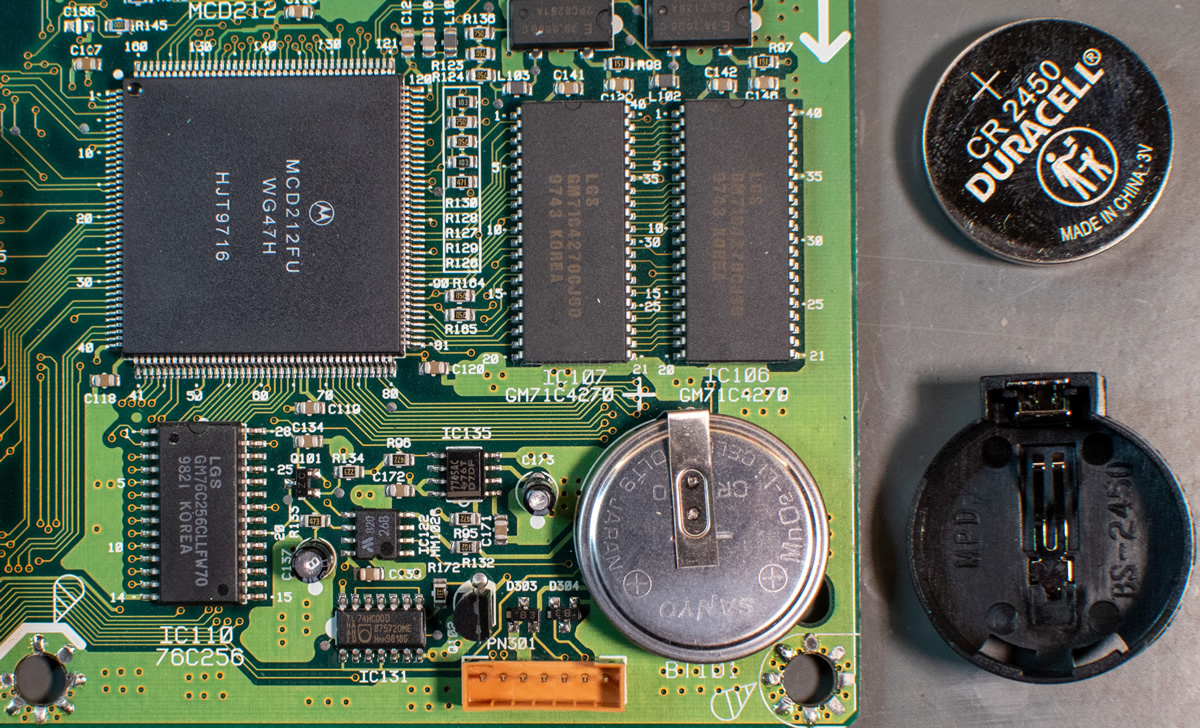
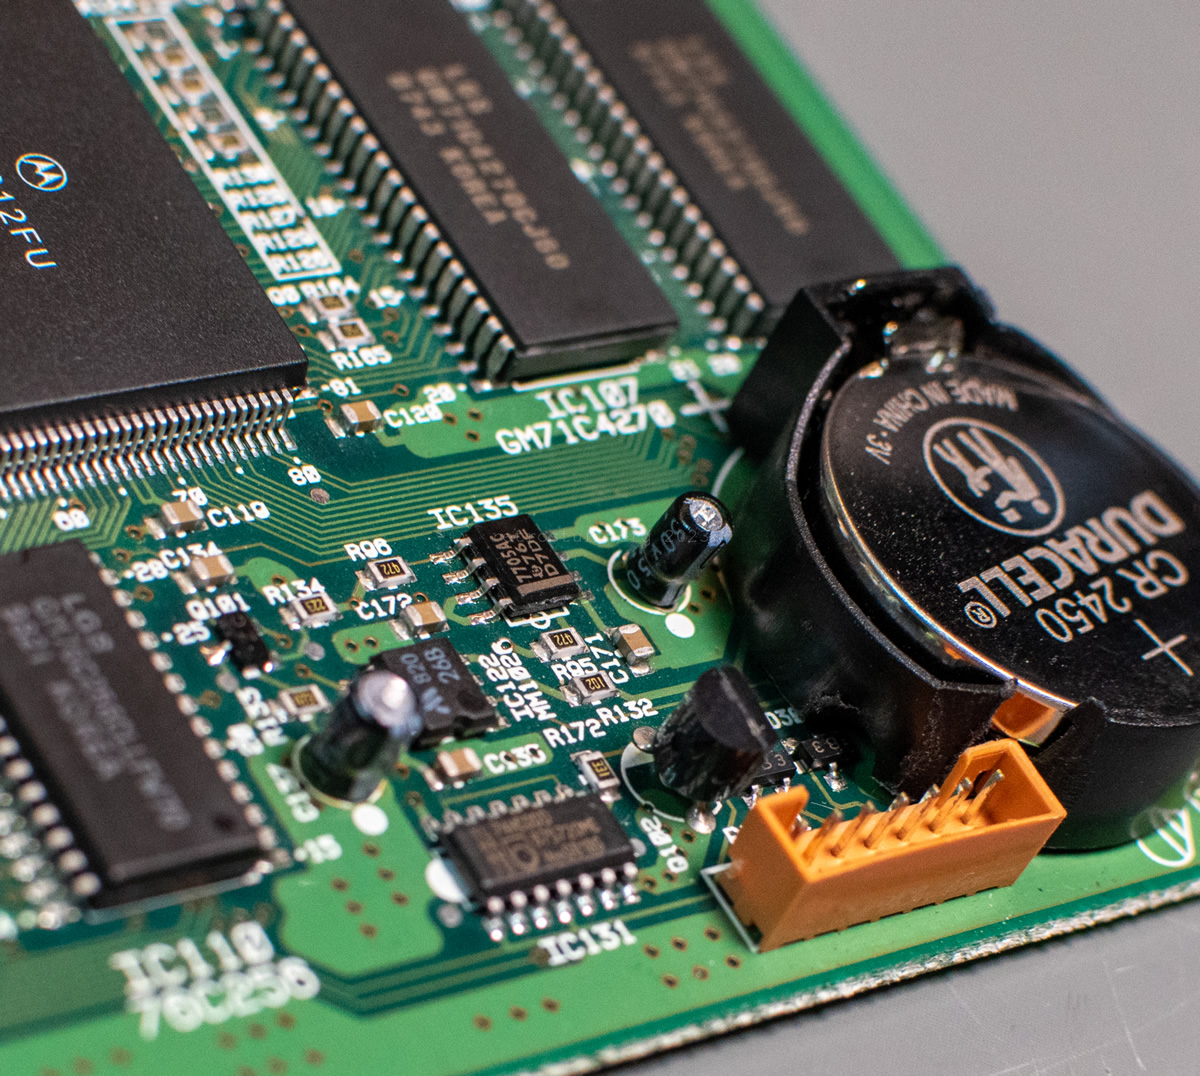
My DVS VE-200 was manufactured in June 1998 and is still running the clock and holding the data just fine. I’ve measured the CR2450 coin cell and it was under 2,8 V, which means that it is in the last third of its life (a coin cell battery tester already showed 0 %, recommending immediate replacement). At first, I thought about replacing it with the same type of coin cell with solder tabs, but then decided against it. Who wants to do the same operation again in 25 years? Instead, I went for a coin cell holder with the same footprint – or so I thought.
The negative terminal is directly soldered to a large GND plane, so you’ll need more heat than usual. Apply extra heat and fresh lead solder first before trying to desolder it.
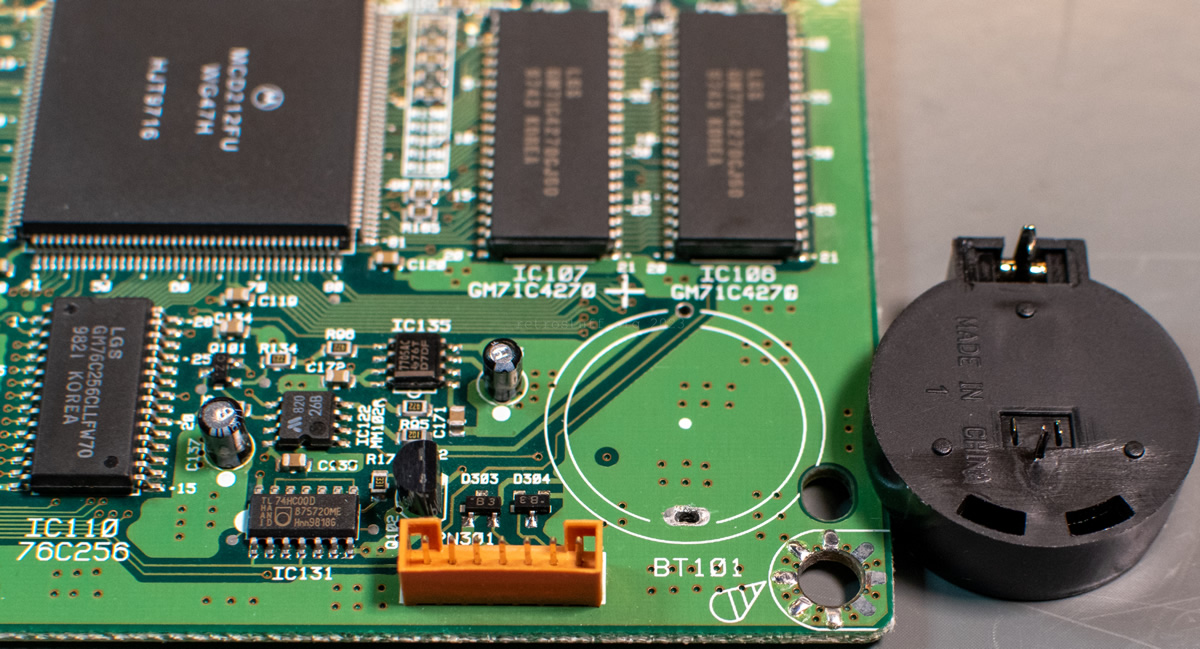
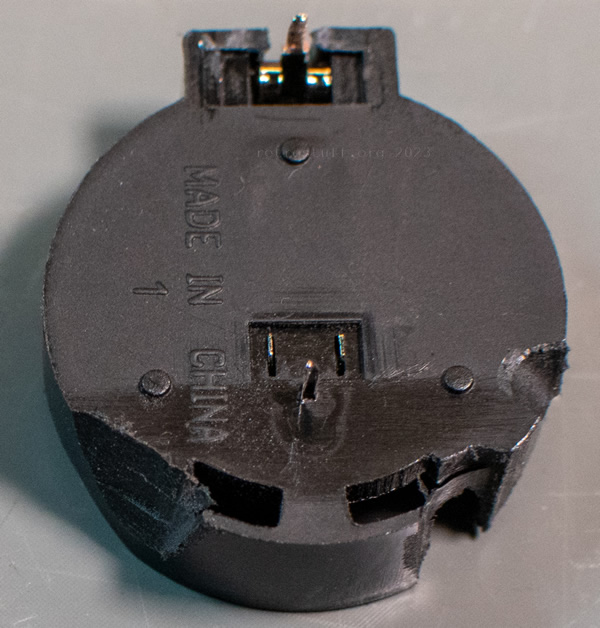
When the huge old battery was gone, it turned out that the even larger socket for the new battery wouldn’t fit without some modification. While the pins had the right distance, they were to far to one side, making the socket bump into the front panel connector. Also, the positive terminal was too wide to fit into the through-hole. For good measure and in case you want to search for a different socket, I took another photo with a ruler.


Since I only had this socket available and wanted to put this player back to work, I filed the positive terminal and also removed some material from three positions with a Dremel until it was able to sit flush on the mainboard. There’s now enough space for the SMD diode and connector on the left and the screw on the right. And the battery fits comfortably too.
NVRAM restore
After replacing the battery, put mainboard back into the case and plug all cables back. If you had to modify the battery holder like I did then remove the battery before you screw the screws back in.
Then, turn the player on, go to Options, Time and Date and set the current time, date and another option, preferably Display time/date to on so you can see it in the player shell right away. Next, unplug the power for a minute or two.

Bring back the power and check if the clock is still displayed and has advanced.
If the clock is fine then you can restore the NVRAM data.
Run the script from above again, but this time with the option restore.
Example: cdibackupn restore 1 restores the NVRAM of a CD-i player that is connected to COM1. (Or change the default options in case you want to run from the Windows Explorer.)
How does it work?
First, cdilink makes a connection with the CD-i player (keep the stub disc ready!). Next, the script checks if the file cdinvr.txt from the last backup is present (along with the \backup directory) and parses it for file names. Finally, cdilink –downcopy is executed to copy every single file back to the NVRAM of the CD-i player.
Warning: Files of the same names in /nvr get get overwritten and touched with the currently set time and time.
When the script is done, power cycle the player and check in Options, Storage if your files are back. Then, unplug the power and check again after a couple of minutes if everything is still there. If this is the case then you can finally close the case for good. You have just started another 25+ years of battery-backed NVRAM + real-time clock.
Disc drive
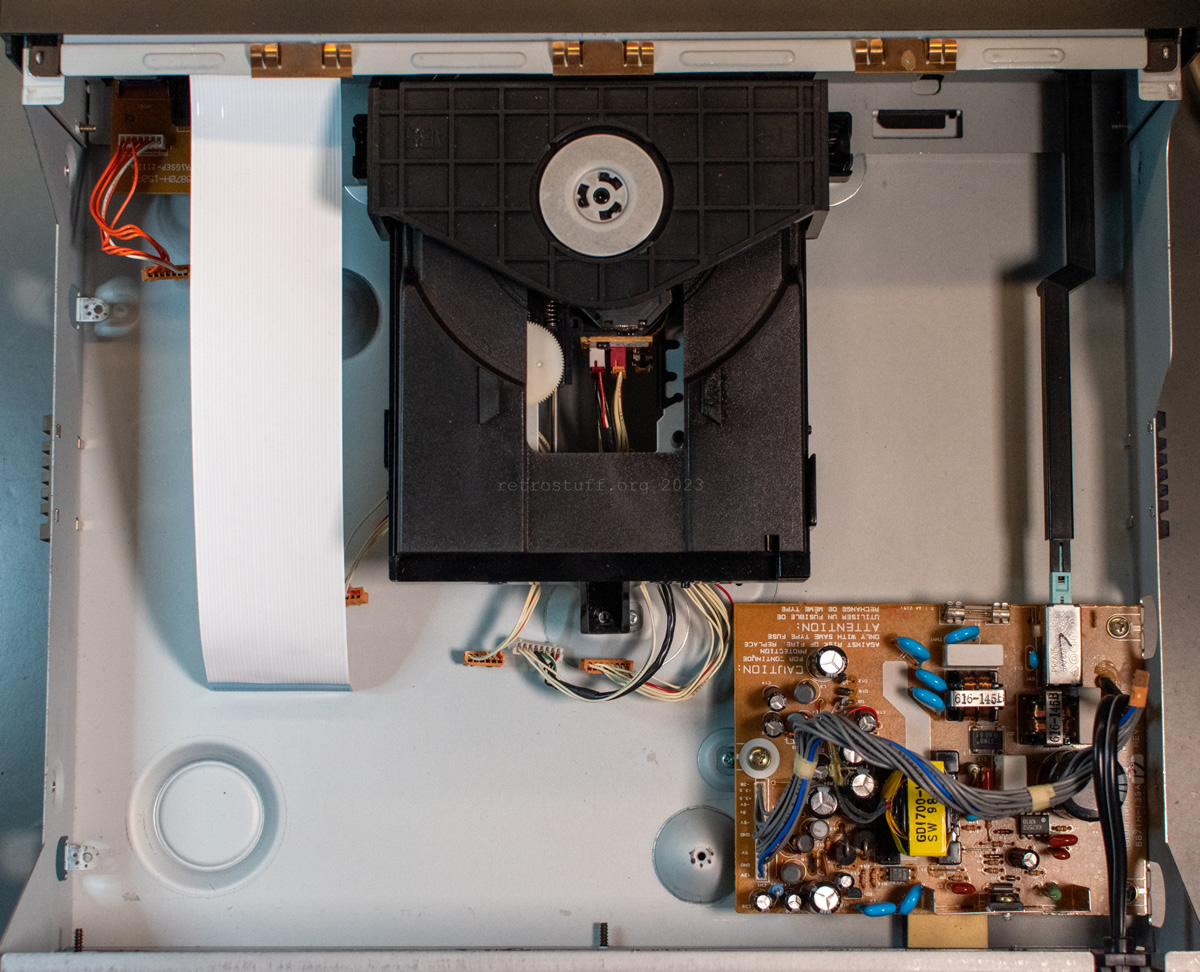
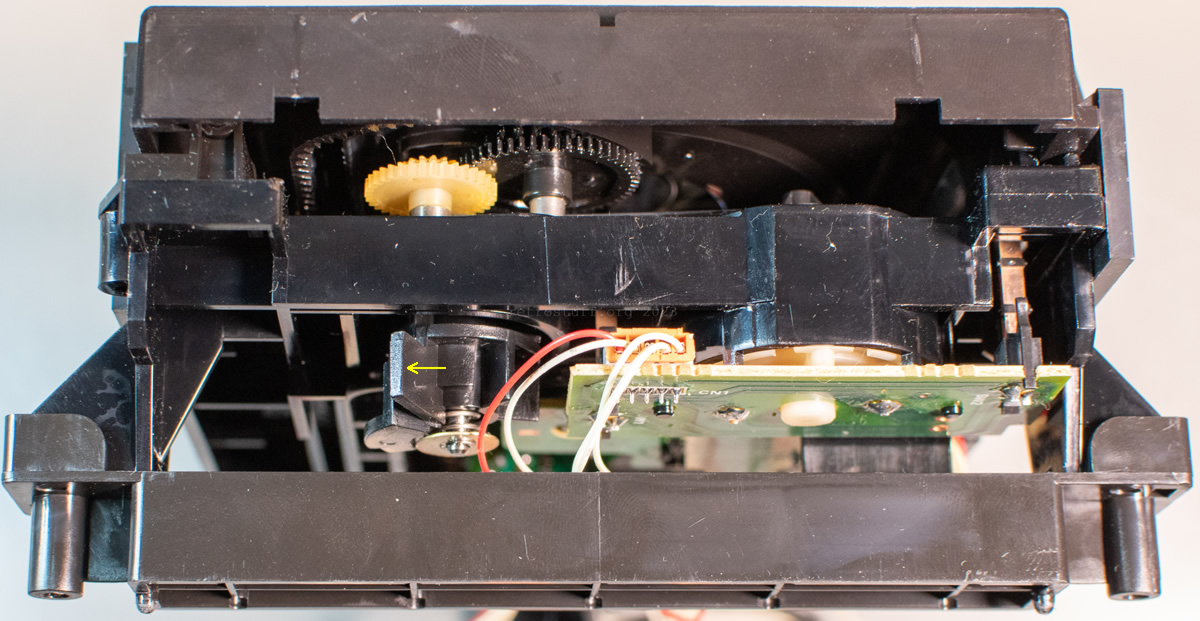
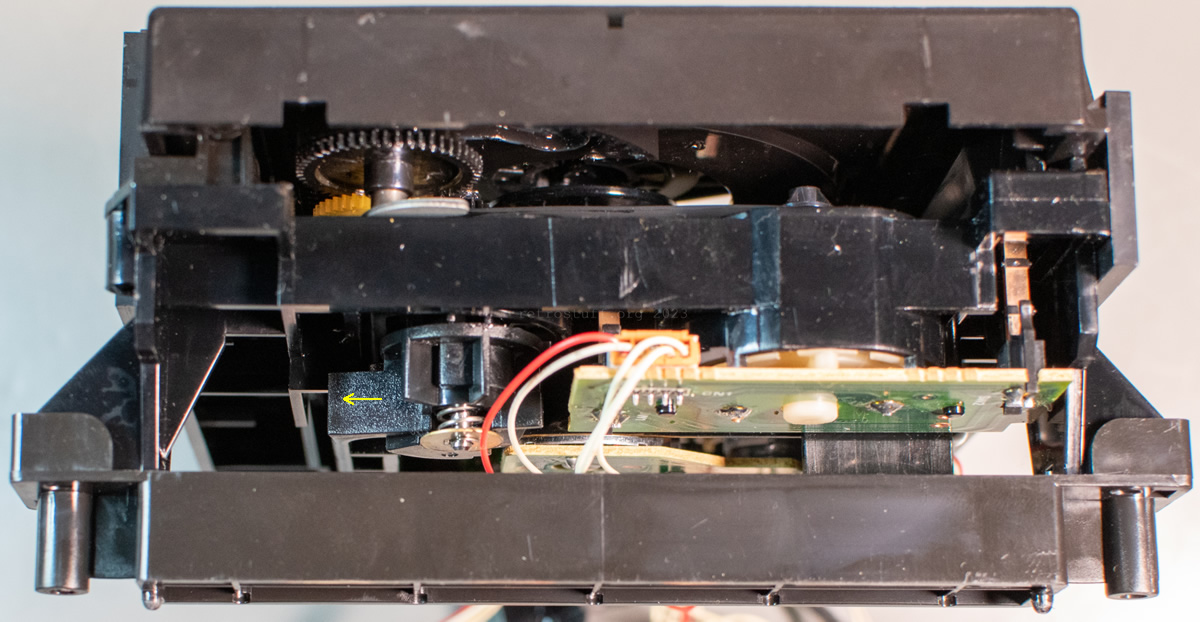
As mentioned earlier, to open the tray, you’ll have use the eject button. Apart from that there is no obvious emergency eject function. If you can’t power it up and the drive bezel is stuck in the front bezel of the player, then you can still unlock it by turning a lever on a wheel in the direction indicated by the arrow. This is a view from the front after the drive has been removed to help you locate the lever:
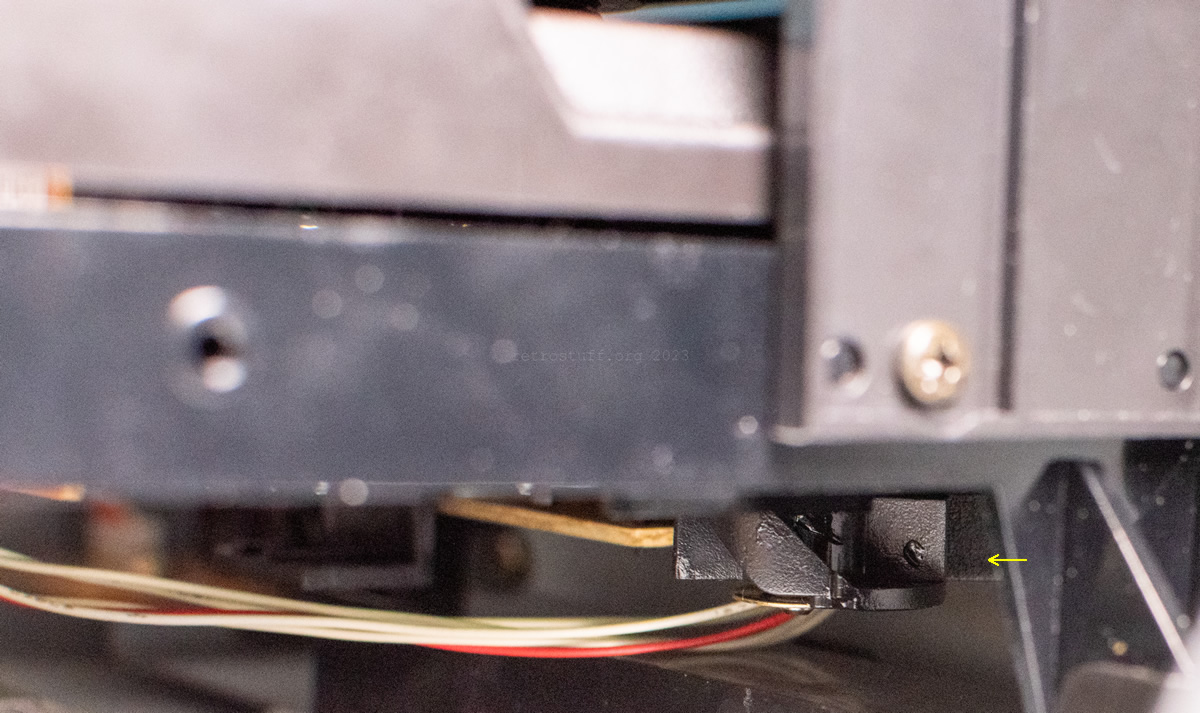
Place the player so that the front is facing away from you and reach between the disc drive and the front of the case with your right index finger. You should then be able to feel the lever you saw above. Pull it clockwise as far back as possible. You can then reach it from underneath the drive and pull it back as far as it will go.

Now, the tray is unlocked and can be pulled out again.
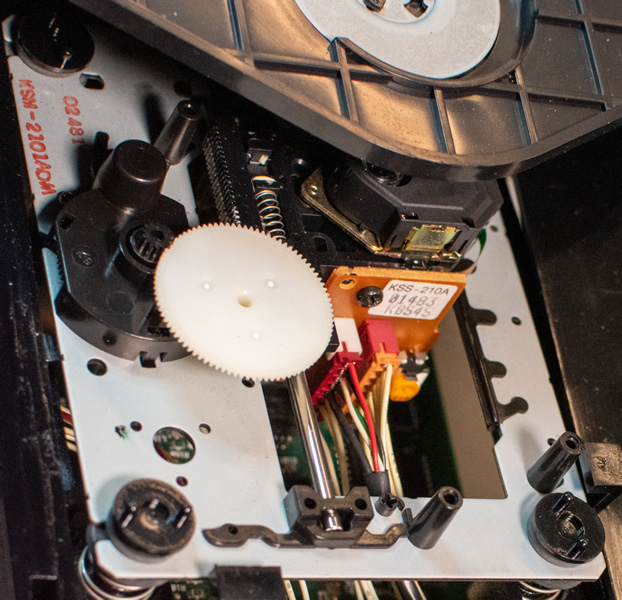
When the tray is finally open, it can be seen that the DVS VE-200 has a KSM-2101ADM CD mechanism with a KSS-210A laser pickup.
Fantastic info on a tremendously obscure machine. Thank you for this!