
For quite some time, I was puzzled why my CDI660 was stuck in a reset loop after I inserted the test/dummy plug into Input 1. I expected it to boot into the Service Shell, like most other CD-i players. My solution so far was to use a 490 system ROM in the 660 whenever I needed the Service Shell (the compatibility and also the error were discovered during this experiment). However, this wasn’t a very practical approach because I had to open up the player and dig out the system ROM from underneath the DVC every time.
When CD-i Emulator with -testplug option showed the same behaviour, CD-i Fan figured out what is causing this error: The Service Shell module sv is missing from the 660/670 system ROM.
In this article, I will show you a simple ROM patch to enable the Service Shell for the CDI660.
Prerequisite: sv module
First of all, you’ll need the dump of a CDI490 system ROM. You can dump it either via CD-i Link (option -roms) or with an EPROM programmer. If you are using an EPROM programmer, make sure to save the file in little-endian format. If the programmer software doesn’t support that, you can use the SRecord tools to convert it. Example:
srec_cat cdi490a.rom -binary -byte-swap 2 -o cdi490a_swap.rom -binary
This is the ROM I was using: cdi490a17.rom (ID 77, R1.7, CRC 9A10DA73). The module sv starts at address $34F2A, has the size of 16.144 bytes and the 24-bit CRC 411228. Don’t worry if your player has a different revision of the ROM; the module sv should be the same for all 490 ROMs and is only located at a different address. You’ll get the right address with cdilink -info.
With a hex editor (e.g. HxD), select 16.144 ($3F10) bytes starting from address $34F2A and copy them to a new file (e.g. sv_mod).

A quick look into the cdi660a10.rom (ID 80, R1.0, CRC FC327BF2) reveals that there are only 14.456 bytes available (inside the module dummy). This is not enough space for the Service Shell module and a reason why it was left out.
Prerequisite: IMPEG DVC and ROM
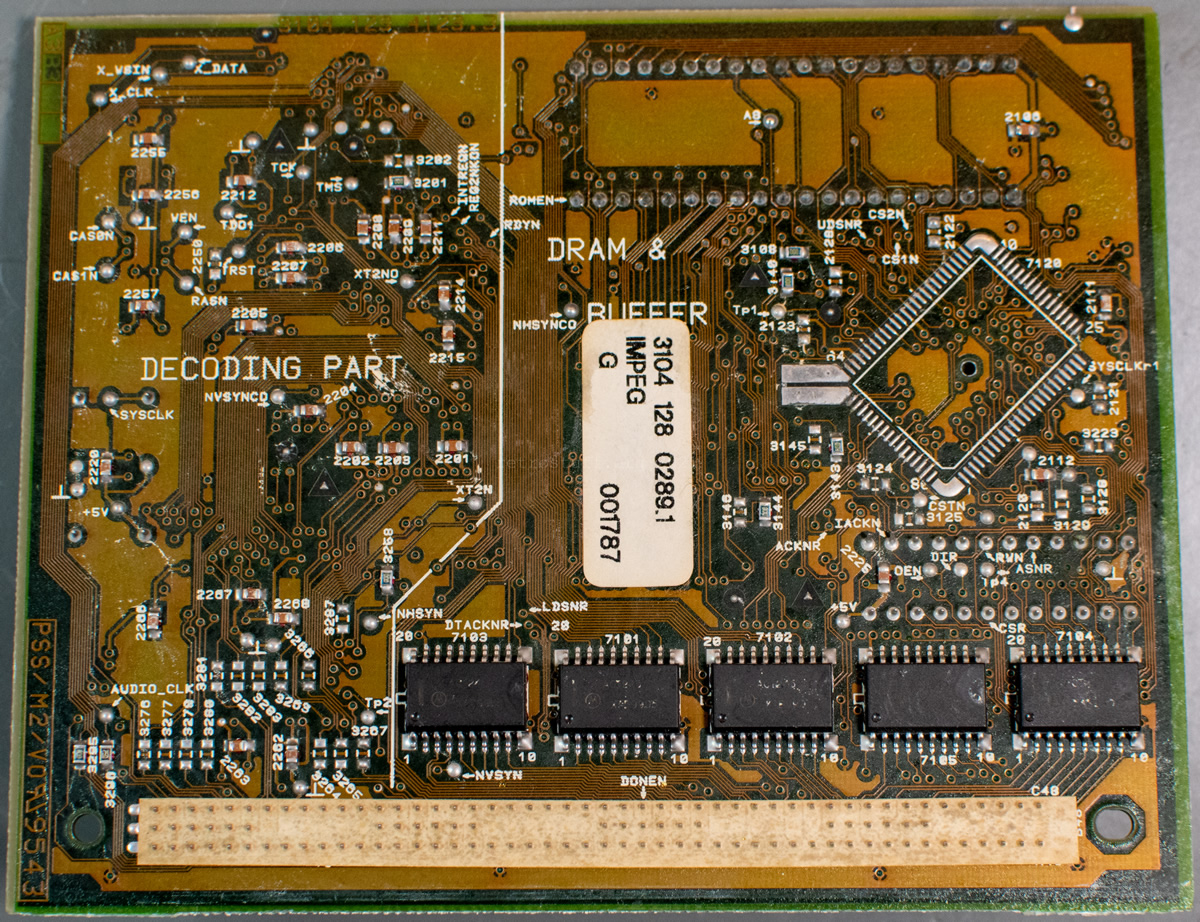
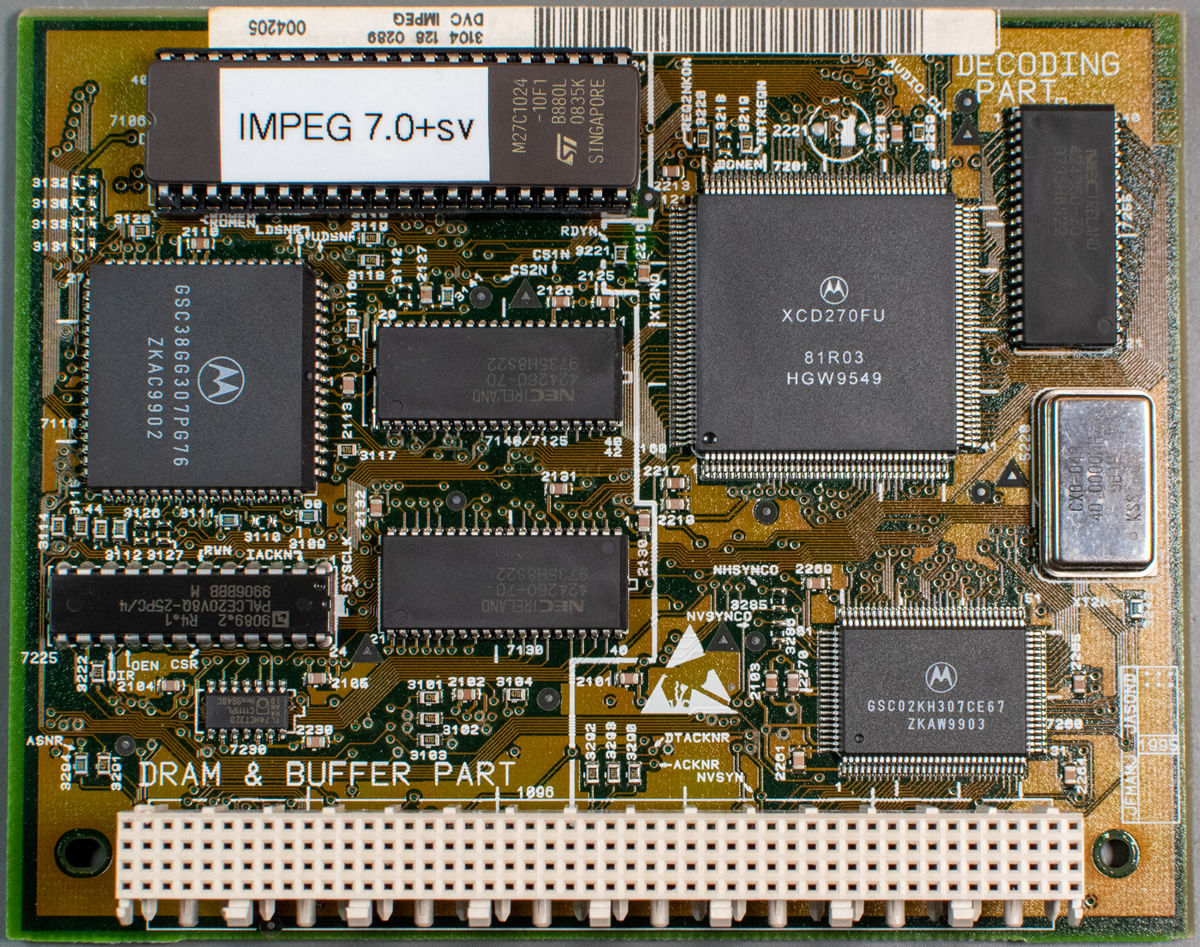
Luckily, there is another location where we can place modules: The ROM of the Digital Video Cartridge. CDI660 players come with a caseless 22ER9956/40 mini DVC with IMPEG 6.3 chipset, installed in a plastic frame. (Read more about the different mini DVC types in this article.)
The frame is fixed with two screws; one is inside (yellow circle) and the other at the back of the player.
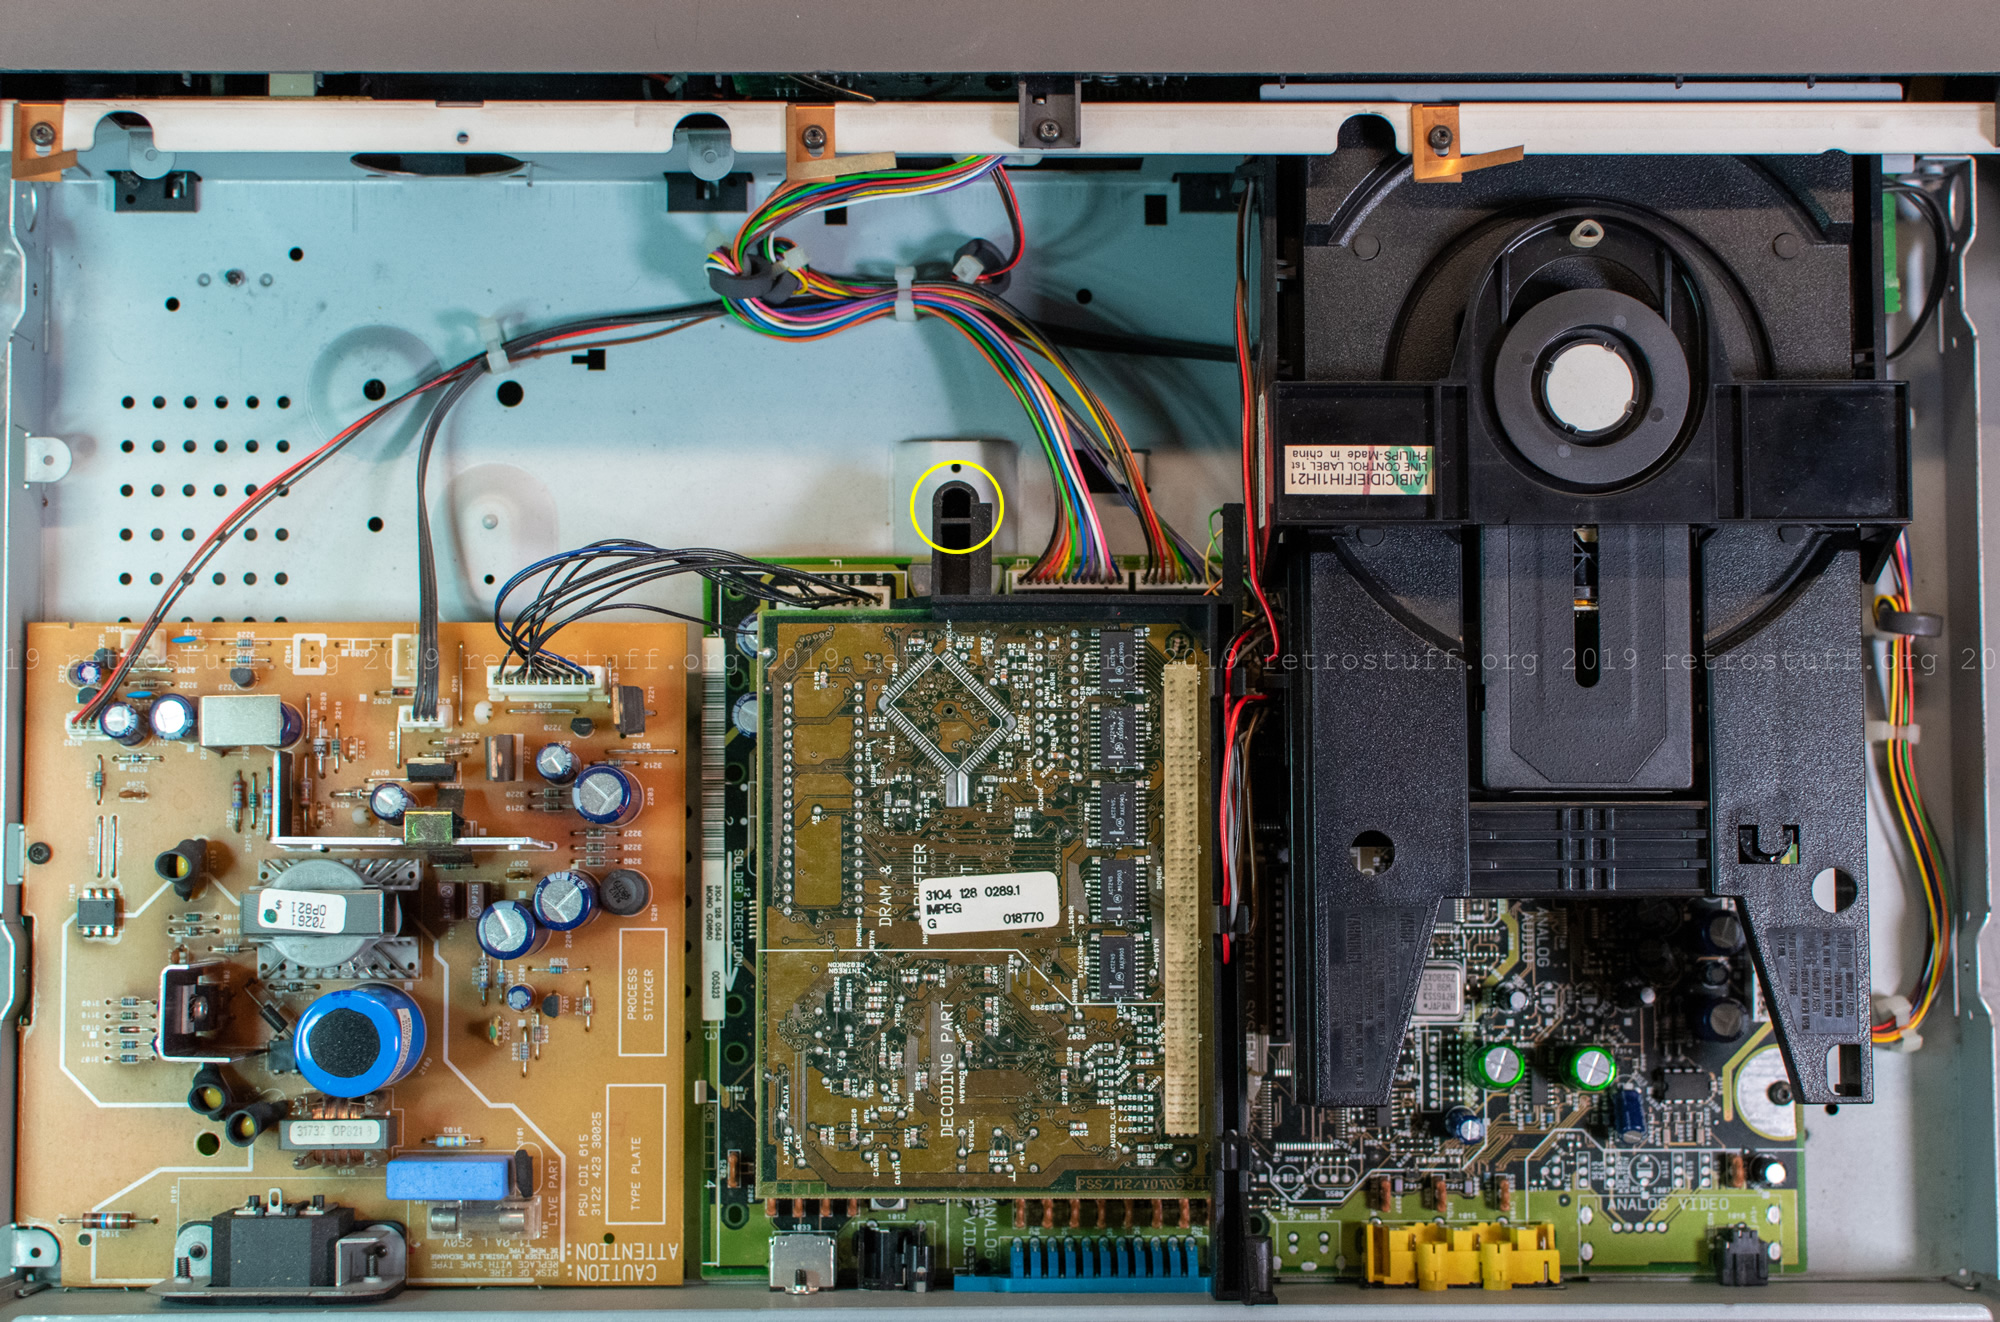
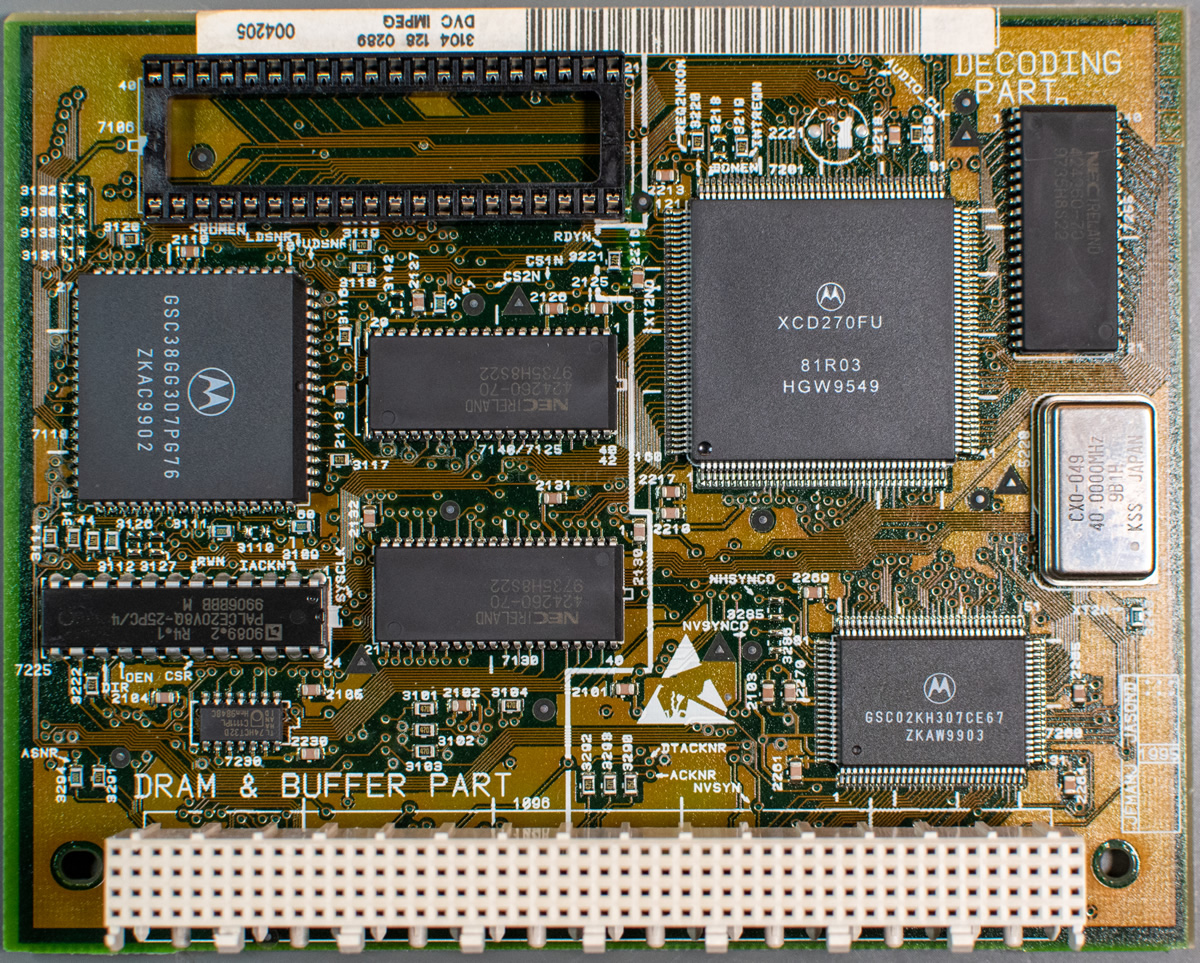
Remove the DVC and inspect it: Usually, it has a 27C1024 EPROM soldered to the PCB. But I’ve seen socketed EPROMs before and if this is the case with your DVC, you can skip the following step.
To remove the EPROM, first apply flux and fresh leaded solder to all pins. Then, use a powerful desoldering gun because the pins are soldered from both sides. Some of them are very persistent and need additional work from the top, e.g. by heating them up and removing as much solder as possible with desoldering wick. Then, use the desoldering gun again from the bottom until the chip is free. Finally, fit a 40-pin IC socket.


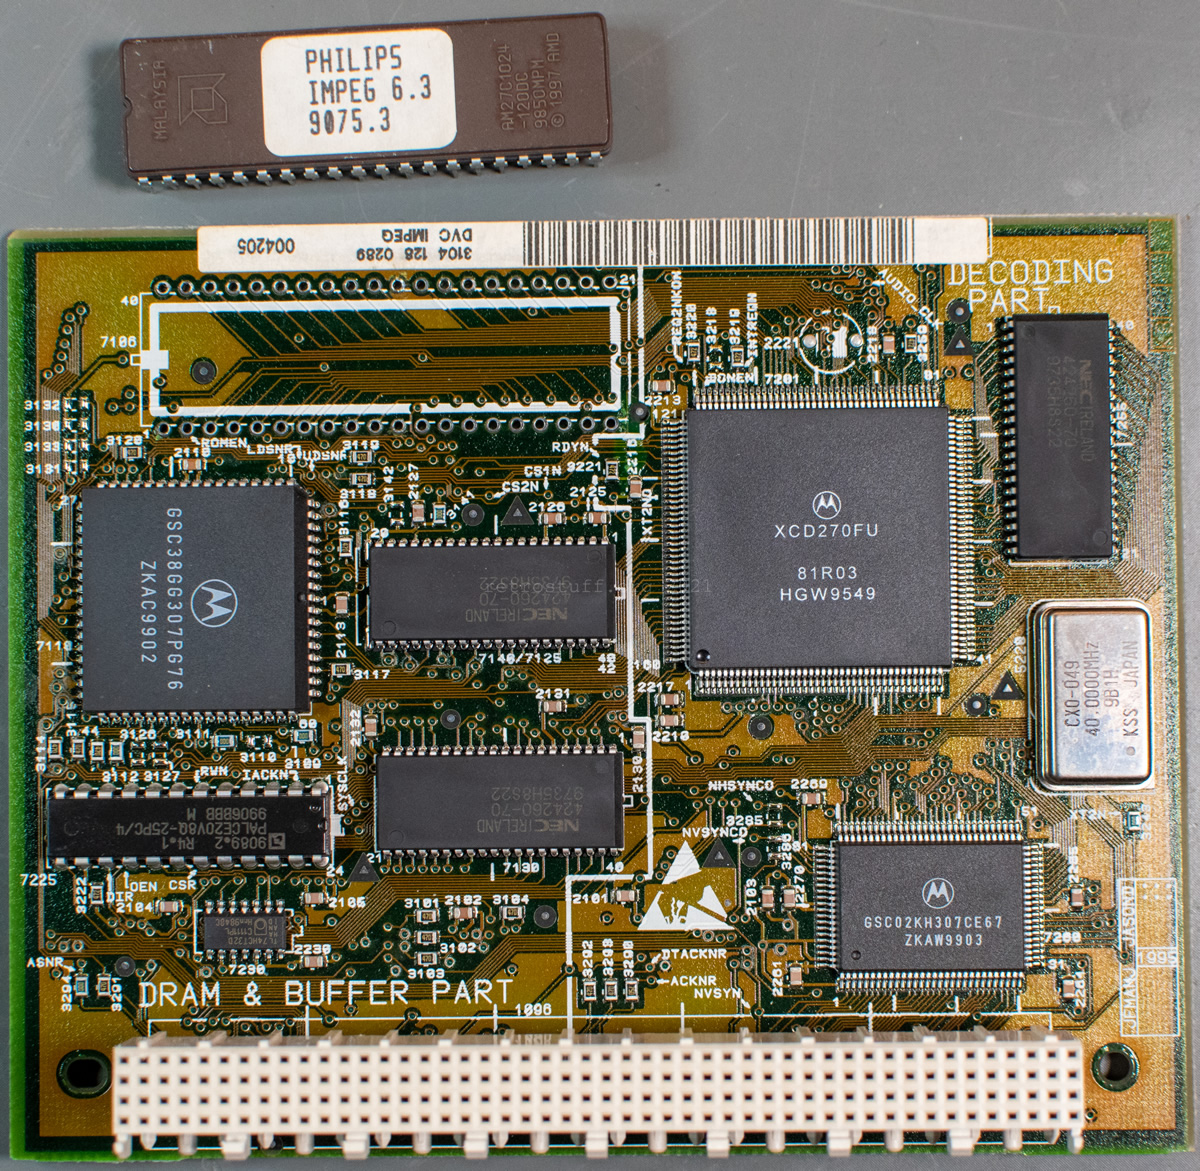

Refer to the section above on how to dump the ROM. This is what you should get: impega63.rom (ID 10, R6.3, CRC 861E0F38).
Note: At the time of writing this article, cdilink is overdumping DVC ROMs and creates 256 KB files. This will be fixed in future versions of the tool. For now, just remove 128 KB from either the beginning or the end of the file.
Patching the ROM
Now it’s time to patch the DVC ROM. On the way, we’ll learn a lot about OS-9 modules in the OS-9 2.4 Technical Manual (Memory Modules, pages 1-7 ff).
Open the file impega63.rom with a hex editor and locate address $11AD6 – the start of the module dummy. This module has the size of 58.656 ($E520) bytes and thus plenty of space for additional modules.

Insert (don’t overwrite!) the module sv that you saved earlier at this address. Then, delete 16.144 ($3F10) bytes of the dummy data (all zeros) further down and you’ll end up with a 128 KB file again.
Module header
Before the ROM will be accepted by a CD-i player or emulator, additional fixing of the module header needs to be done. To make it easier to see, I’ve switched from byte to word view.
M$ID ($00) – Sync bytes ($4AFC)
OS-9 modules start with the sync bytes $4AFC. You have probably seen the the text Jü before when browsing through the contents of the ROMs:

M$Size ($04) – Size of module:
The size of the module including header and checksum. The module spans from address $159E6 to $1FFF2 and has the size of 42.512 ($A610) bytes.
Enter the new size (0000 A610) at offset $04:

M$Name ($0C) – Offset to module name:
The name of the module (“dummy“) starts at address $1FFEC, that’s $A606 bytes away from the start of the module.
Enter the offset to the module name (0000 A606) at offset $0C:

M$Parity ($2E) – Header parity check:
A complement of the exclusive-OR of the previous header words.
To calculate this, copy the header ($00 to $2D):
4AFC 0001 0000 A610 0000 0000 0000 A606 0113 0400 8000 0001 0000 0000 0000 0000 0000 0000 0000 0000 0000 0000 0000
…and delete all leading zeros:
4AFC 1 A610 A606 113 400 8000 1
Use a hex calculator (e.g. Windows Calculator) and type:
4AFC XOR 1 XOR A610 XOR A606 XOR 113 XOR 400 XOR 8000 XOR 1 NOT
The result is $3006.
Enter the header parity (3006) at offset $2E:

Module checksum
Contrary to the documentation, a correct 24-bit CRC checksum doesn’t seem to be mandatory for OS-9 to recognize a module. Still, we want to do it right and use HxD to calculate a custom CRC. The required values to set up the custom CRC algorithm can be found here (CRC-24/OS-9).
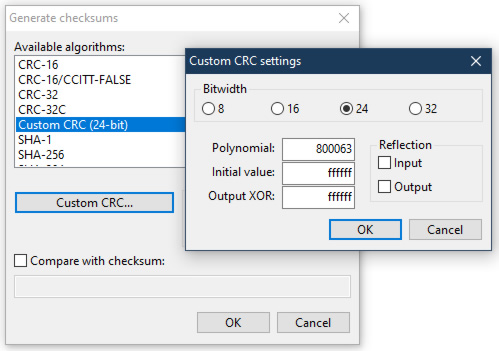
Select the dummy module starting with the fixed header all the way to the end, but without the last three bytes ($159E6 to $1FFF2) and calculate the custom CRC: 2B9693.
Enter the checksum into the last three bytes of the module ($1FFF3 to $1FFF5):

ROM checksum
One more checksum, and we are done with the ROM. It is not mandatory for operation, but it will throw an error in the Low-Level Test if wrong.
Before I fixed that, I raised the release number of the ROM to 7.0 at address $1FFFD to not confuse it with the existing IMPEG 6.3 ROM (this step is optional.):

The ROM checksum is the algebraic sum of all bytes in the file, except the last two bytes that contain the checksum.
Select $0 to $1FFFD and HxD will calculate the Checksum-16 for us: $A4C5
Enter the checksum into the last two bytes of the file ($1FFFE and $1FFFF):

FYI: The actual checksum of the ROM calculated by the Low-Level Test is A62E ($A4C5 + $A4 + $C5).
Isn’t there an easier way to do all this?
Yes, there is. At least, to some extent: The OS-9 fixmod utility checks module and ROM files and can calculate and update header parity and module checksums. There is also a DOS program, FIXMOD.EXE, that is included with the OS-9 C Compiler. (Check gameblabla’s superquartet-cdi repository for a link.)
Note: 16-bit DOS programs don’t run on modern 64-bit operating systems and only accept 8.3 file names. I used Windows 7 32-bit in Oracle VirtualBox for this step.
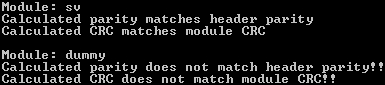
Before you run fixmod for the first time, make sure to have M$Size and M$Name of the module dummy updated, as explained above. As you can see, the program doesn’t like our changes and complains about the module:
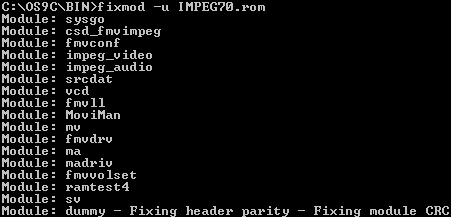
To fix the header parity and CRC-24 checksum of the module, run fixmod -u impeg70.rom (or impeg63.rom):
When this is done, calculate and fix the Checksum-16 of the ROM file as explained above.
Programming the EPROM
Before programming the patched ROM file to an 27C1024 EPROM, we have to pay attention to the endianness (byte order) again because the Motorola 68000 processor expects the data in big-endian format. Usually, the software that comes with the EPROM programmer takes care of that. If not, you can use the SRecord tools to convert the file first. Example:
srec_cat impega70.rom -binary -byte-swap 2 -o impega70_swap.rom -binary
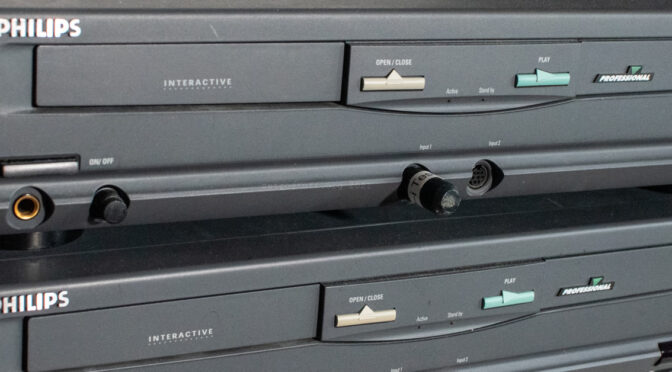
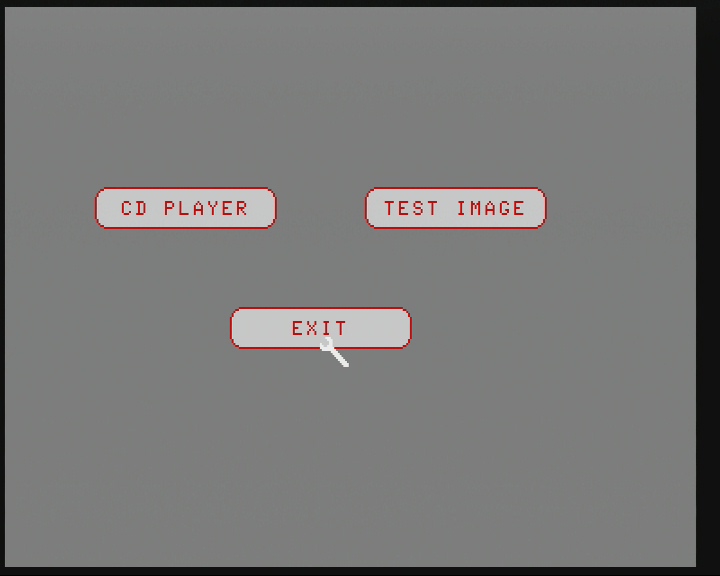
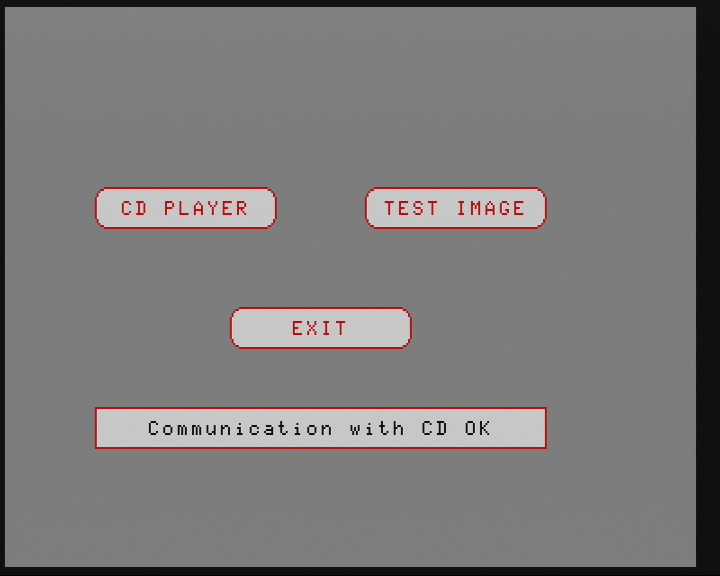
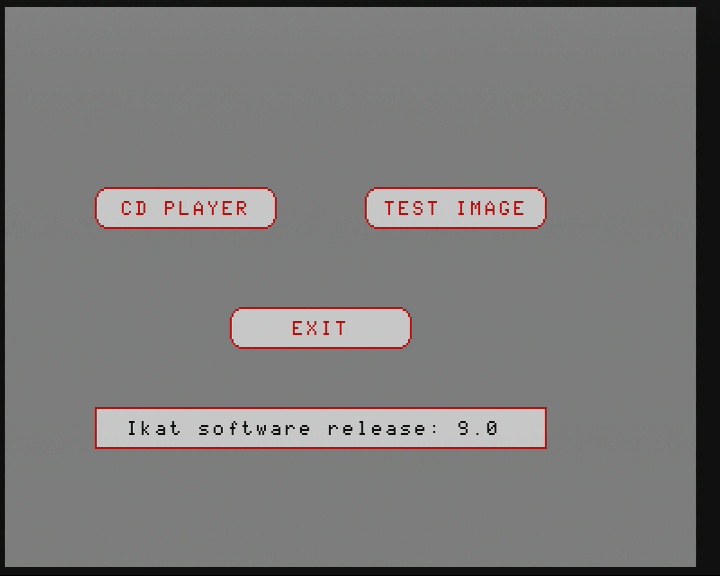
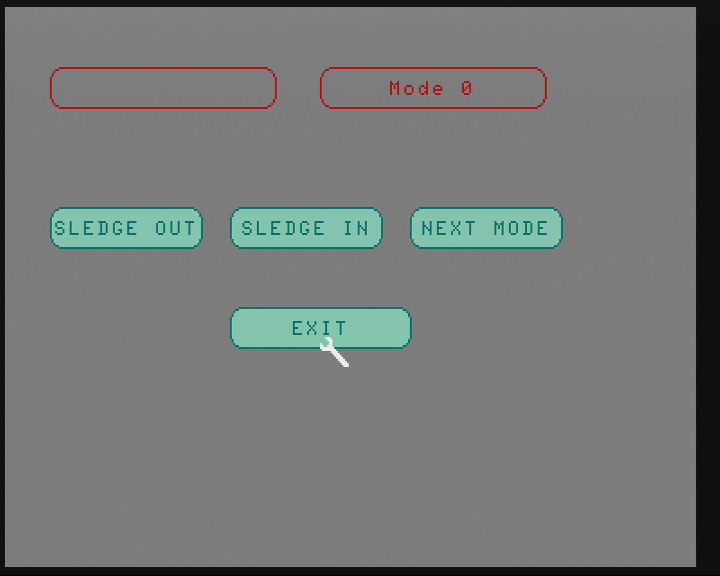
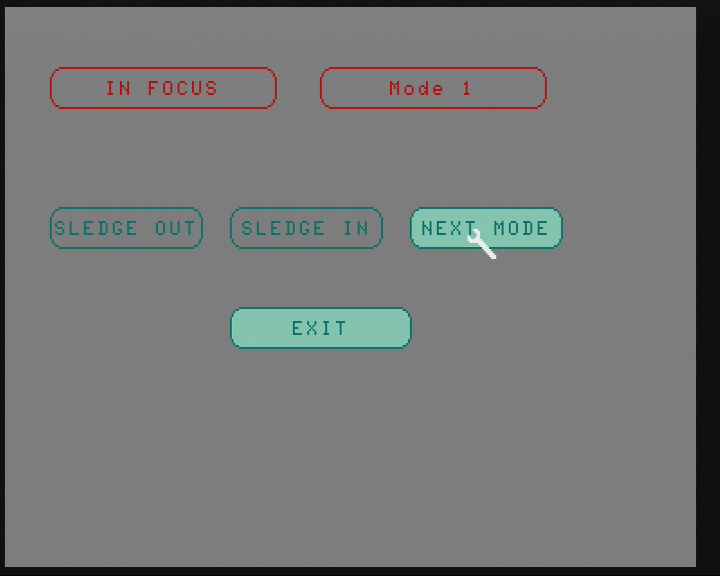
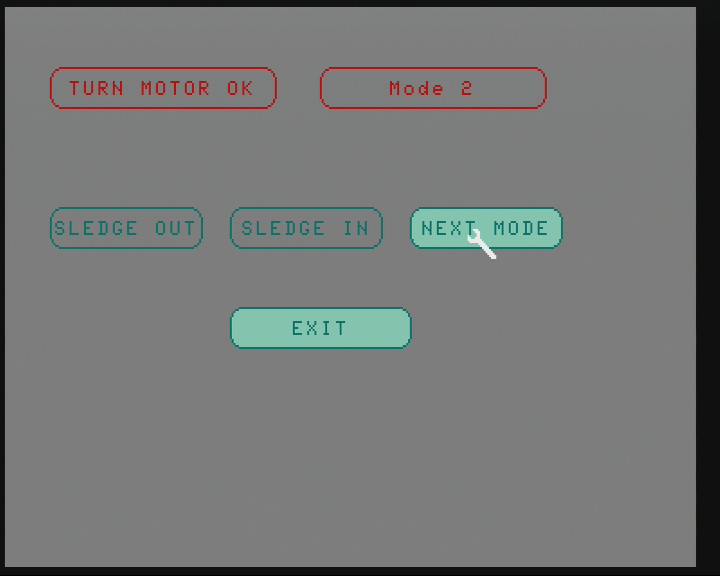
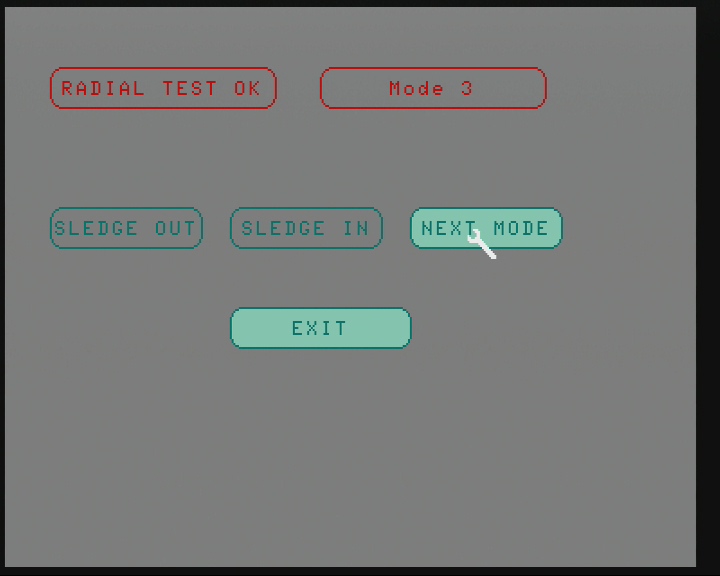
The Philips CDI660 Service Shell
And finally, here it is: A Philips CDI660/00 (PAL) booting into the Service Shell.
(These unedited screenshots were taken with an Avermedia Game Capture HD II, the CD-i player was connected via RGB SCART and OSSC.)
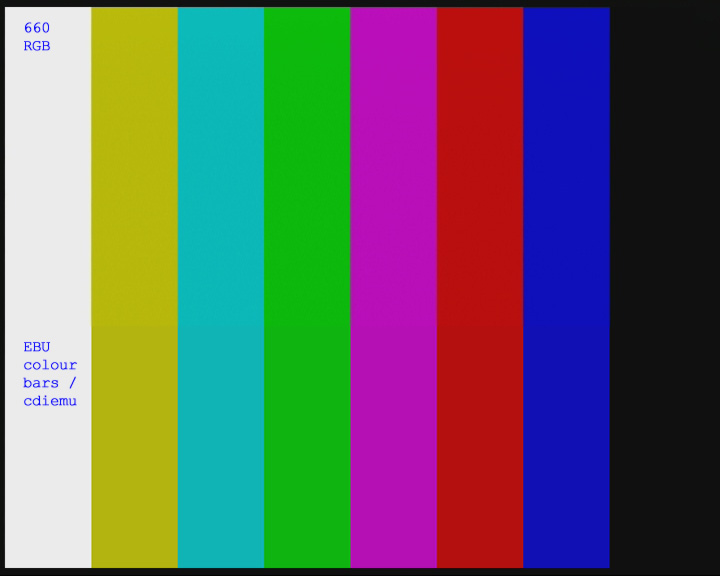
To compare the quality of the EBU colour bars, I also took a screenshot of the TEST IMAGE section of the Service Shell with CD-i Emulator and the ROMs cdi660a10.rom (ID 80, R1.0, CRC FC327BF2) and impega70.rom (ID 10, R7.0, CRC 7A5717CE). The 660 has a much better RGB video output than the other CD-i players that I have checked so far and is an almost perfect match:
Amazing work!
Congratulations!
Thanks, Omegalfa!
I want to lear more about OS-9 2.4
Do you know if it is possible to run CD-RTOS shell from MediaMogul CHD file in MAME (emulator)?
I run:
mame cdimono1 -cdrm ./mediamogul/mediamogul10.chd -v
Obtained proper init screen (info, settings, dim, memory, open butons), then run media, select CD-RTOS on screen, and get terminal, but can’t type any command into console.
On the DEBUG window, I see that the CDI stopped on this line of code (disassembled):
0040A0E6 (address) hex code: 00 7c 07 00 dissasembled to:
ori #$700, SR
CDI in MAME with OS-9 would be nice setup for debugging and learning OS-9.
What you are seeing there is just the output screen, not the terminal. You cannot type on the screen.
Not sure how/if it works in MAME, but you can experiment with it in CD-i Emulator:
wcdiemu-v053b9.exe -term uartBy the way, Service Shell has nothing to do with OS-9 – please read this article: https://retrostuff.org/2019/07/21/first-steps-in-os-9-on-philips-cdi605t/