
I’ve been struggling with a weak PC-FX laser for quite some time now. What kept me from replacing the laser pickup (also known as the optical block or laser sledge) was the supposedly significant effort involved. Taking apart and reassembling the PC-FX was long considered something you wouldn’t wish even on your worst enemy (a full teardown can be found here). However, it’s surprisingly easy to get to the drive unit if you simply follow these instructions.
Disassembly
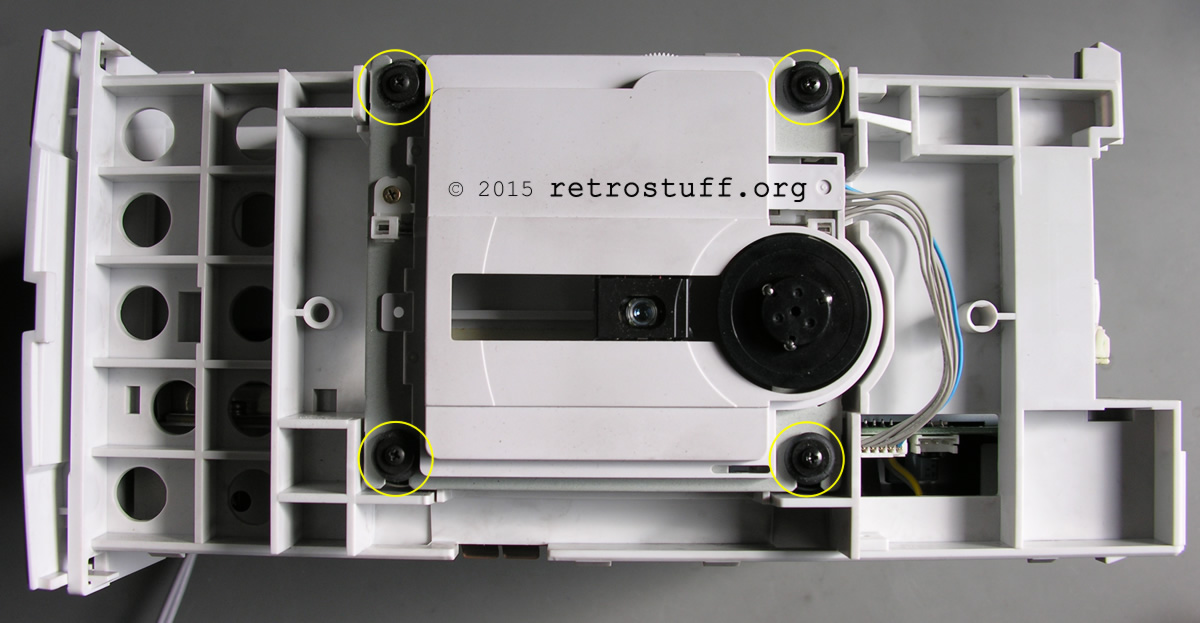
First, turn the PC-FX upside down and unscrew the four Security Torx screws (T10).

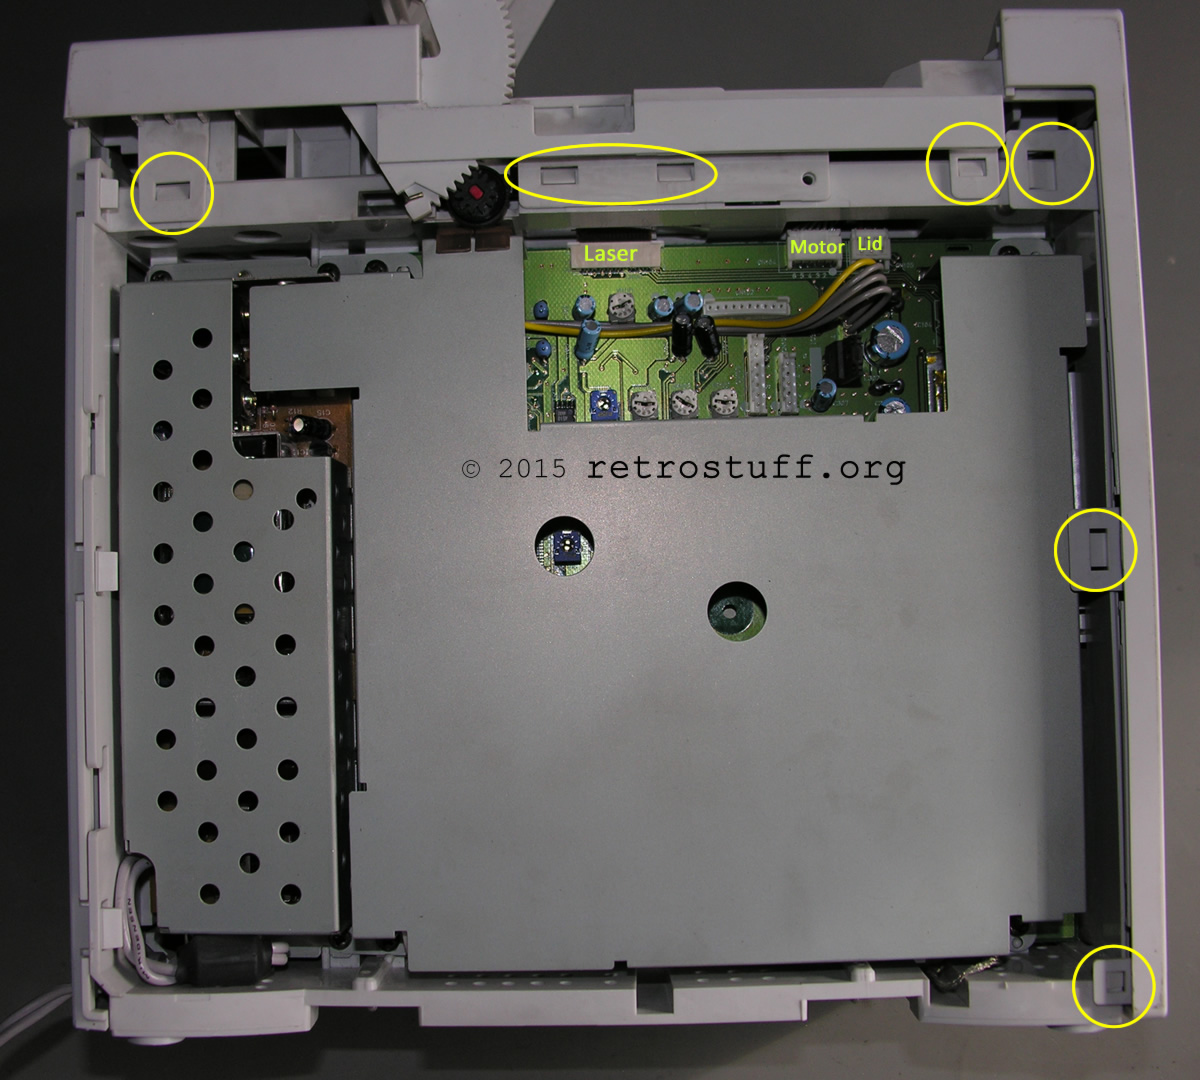
Next, remove both side panels and look at the left side. At the top, you will see the three connectors for the laser, motor and lid sensor. Remove the front panel by carefully bending the three plastic clips on the left side, then turn the PC-FX around and bend the clips on the right side. In this picture, I have also marked the three clips used to remove the top cover.
Front panel removed:
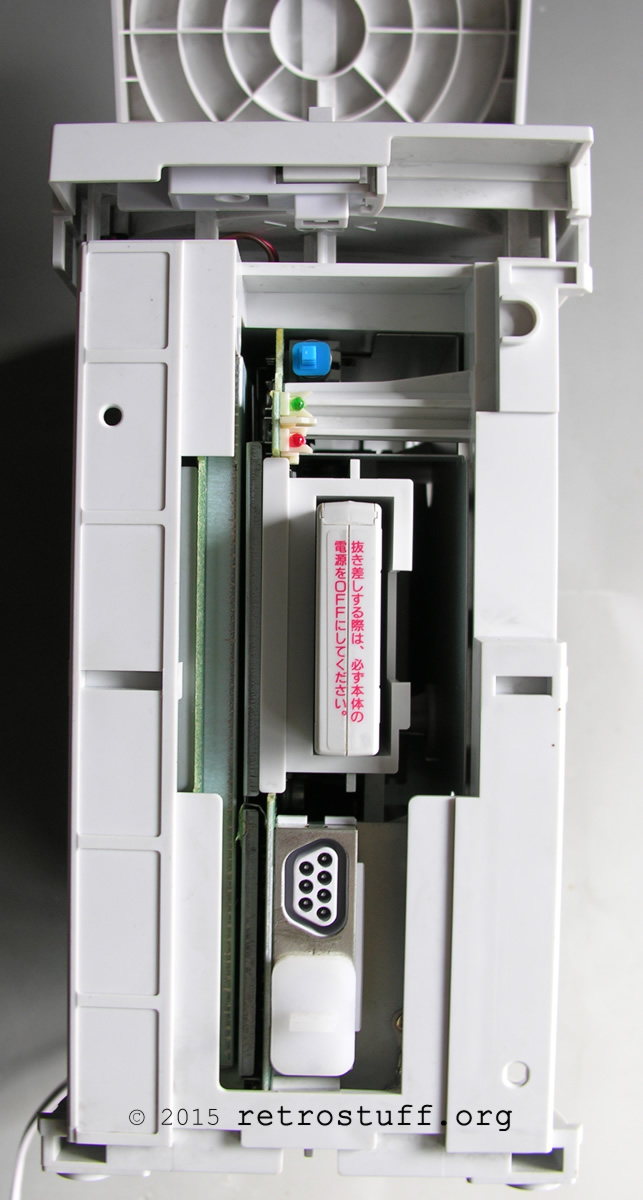
Top panel removed (don’t forget to unplug the lid sensor):
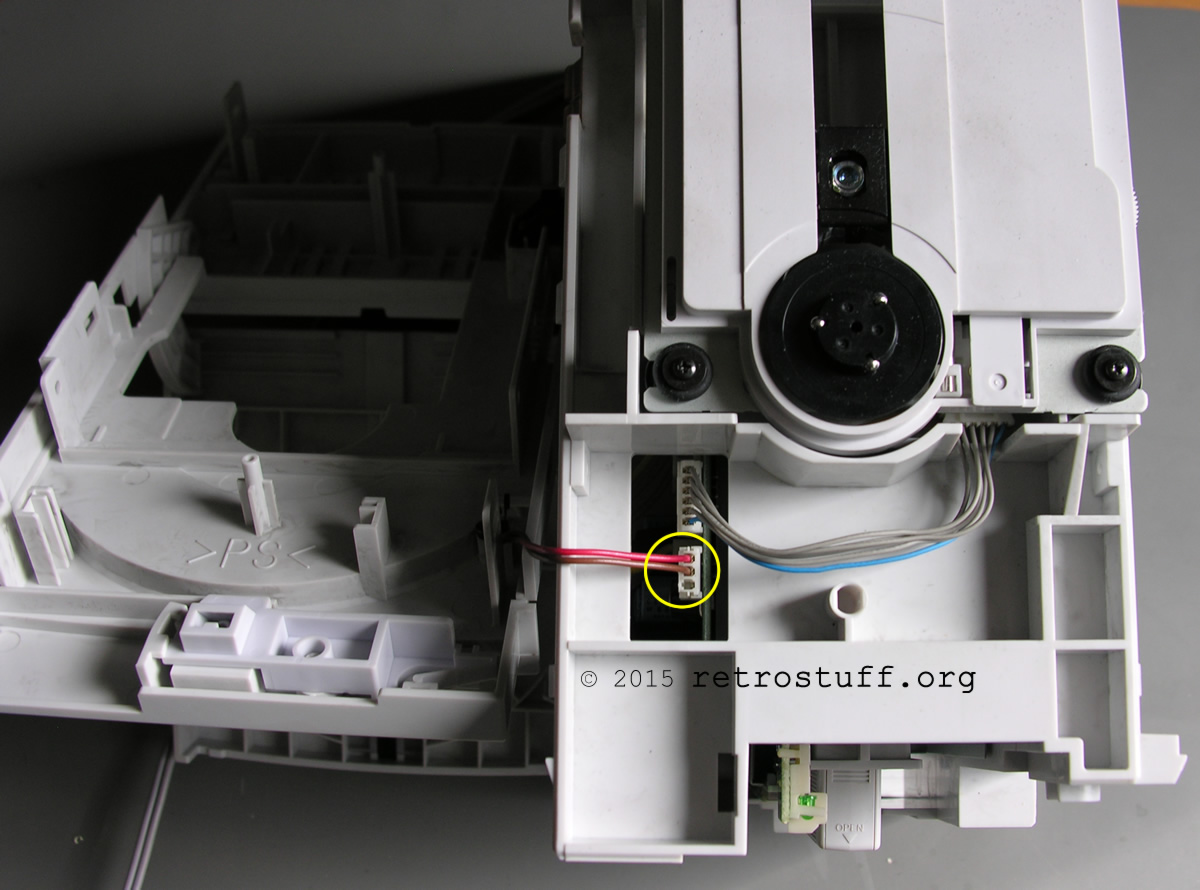
Unscrew the four Phillips screws, unplug the motor cable and carefully lift the CD drive unit. Then unplug the laser pickup cable from the mainboard.

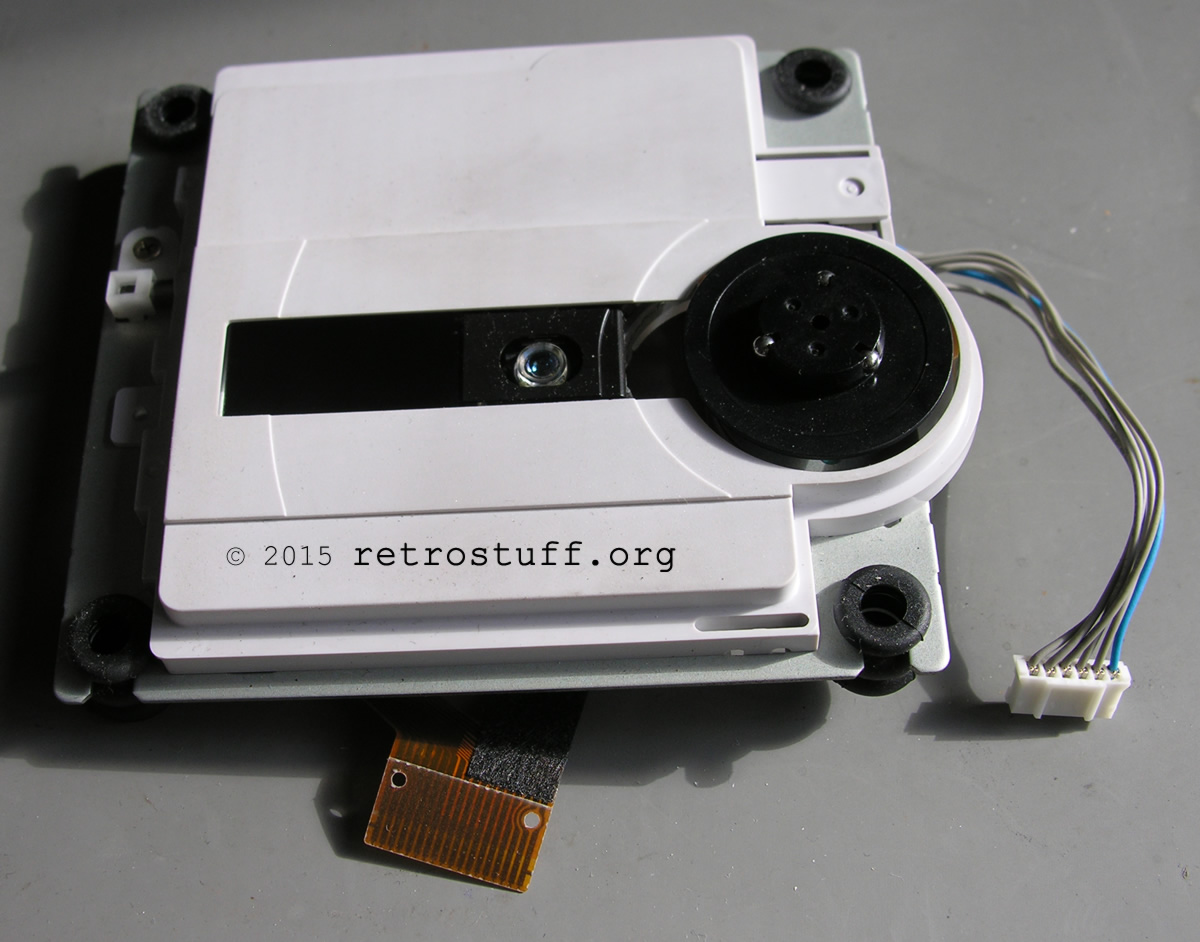
Turn the CD drive unit over and remove the plastic cover by bending the four marked clips:
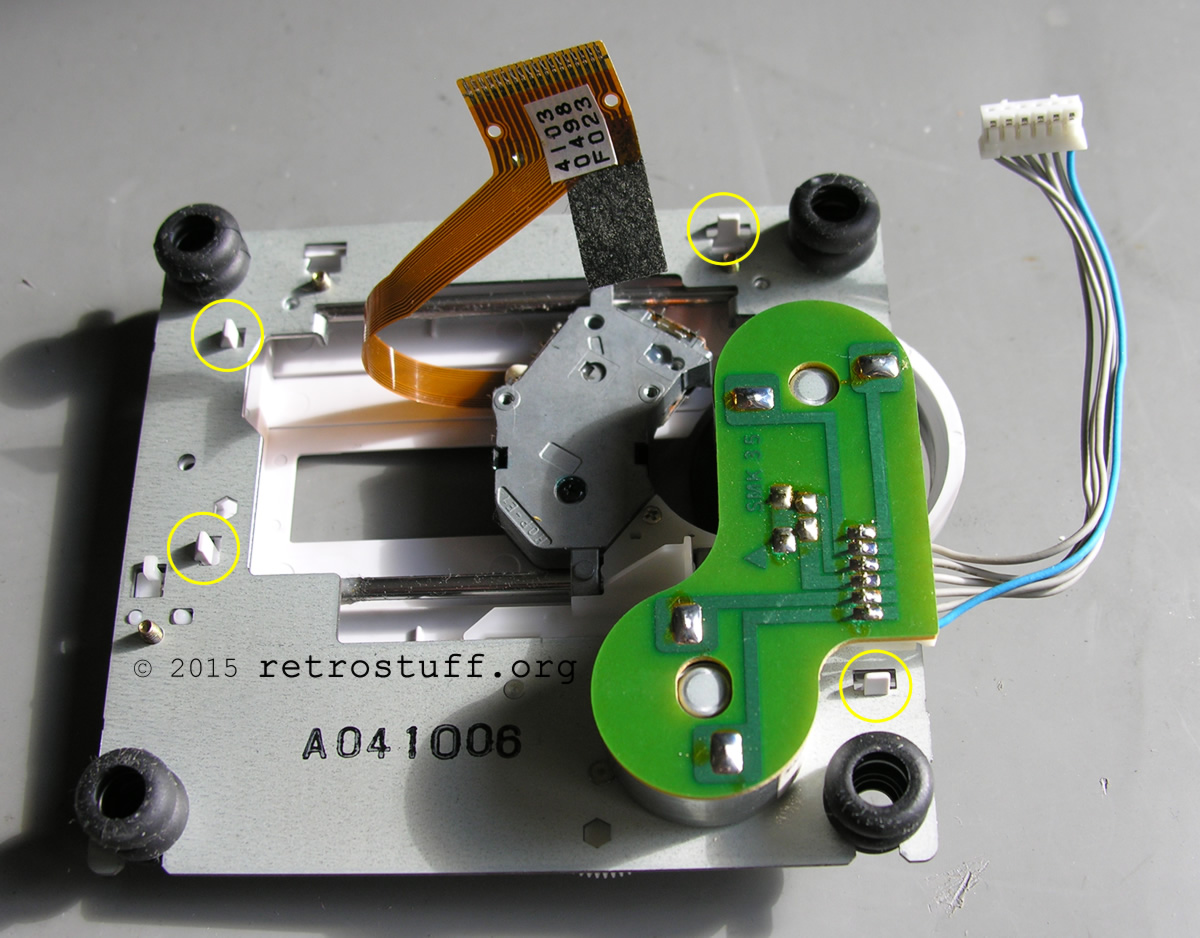
Unscrew both Phillips screws that hold the glide rod of the laser pickup:
Laser pickup
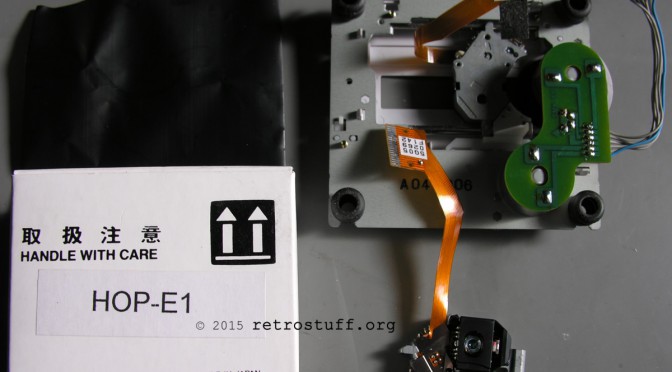
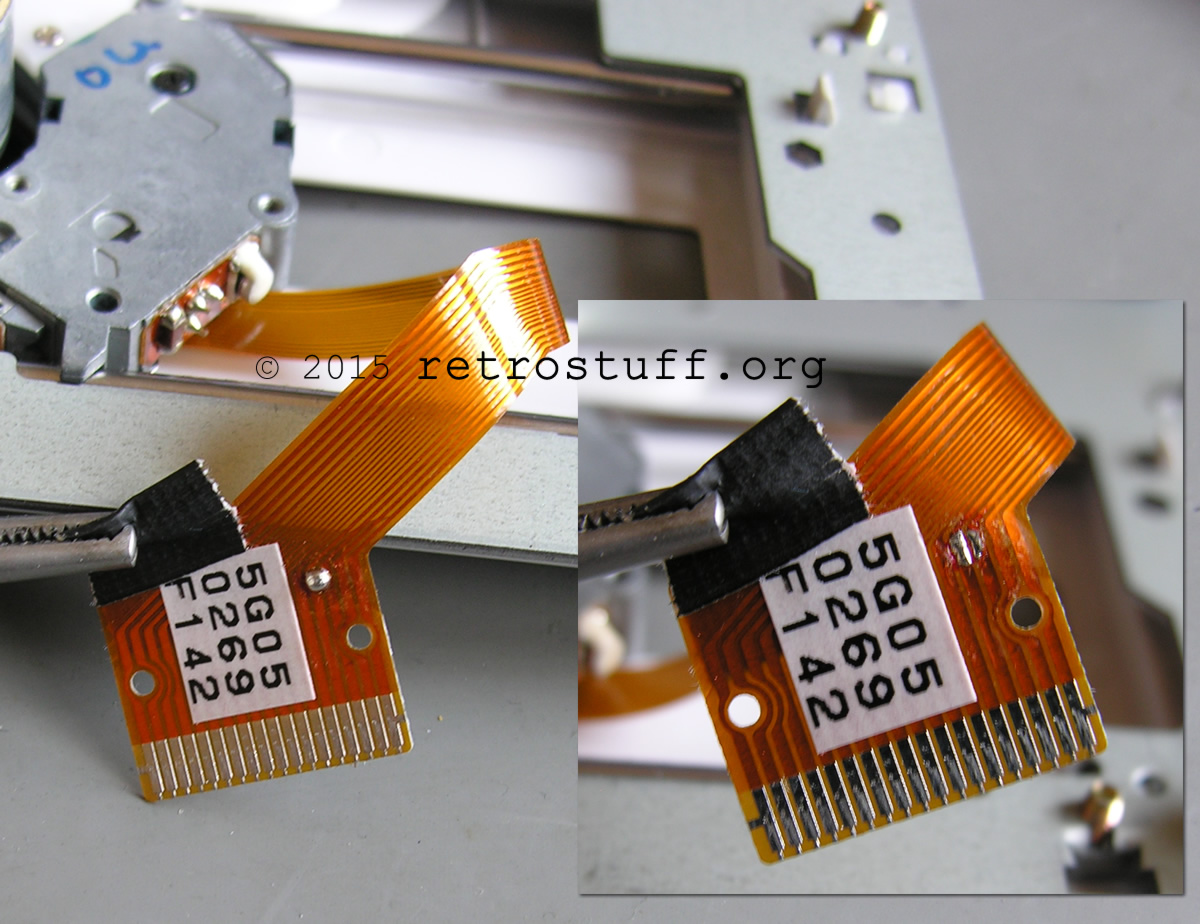
Now is a good time to take a closer look at the cable of the new pickup (Hitachi HOP-E1). There is a solder blob which effectively acts as a transport lock. If you don’t remove this, the laser won’t work.
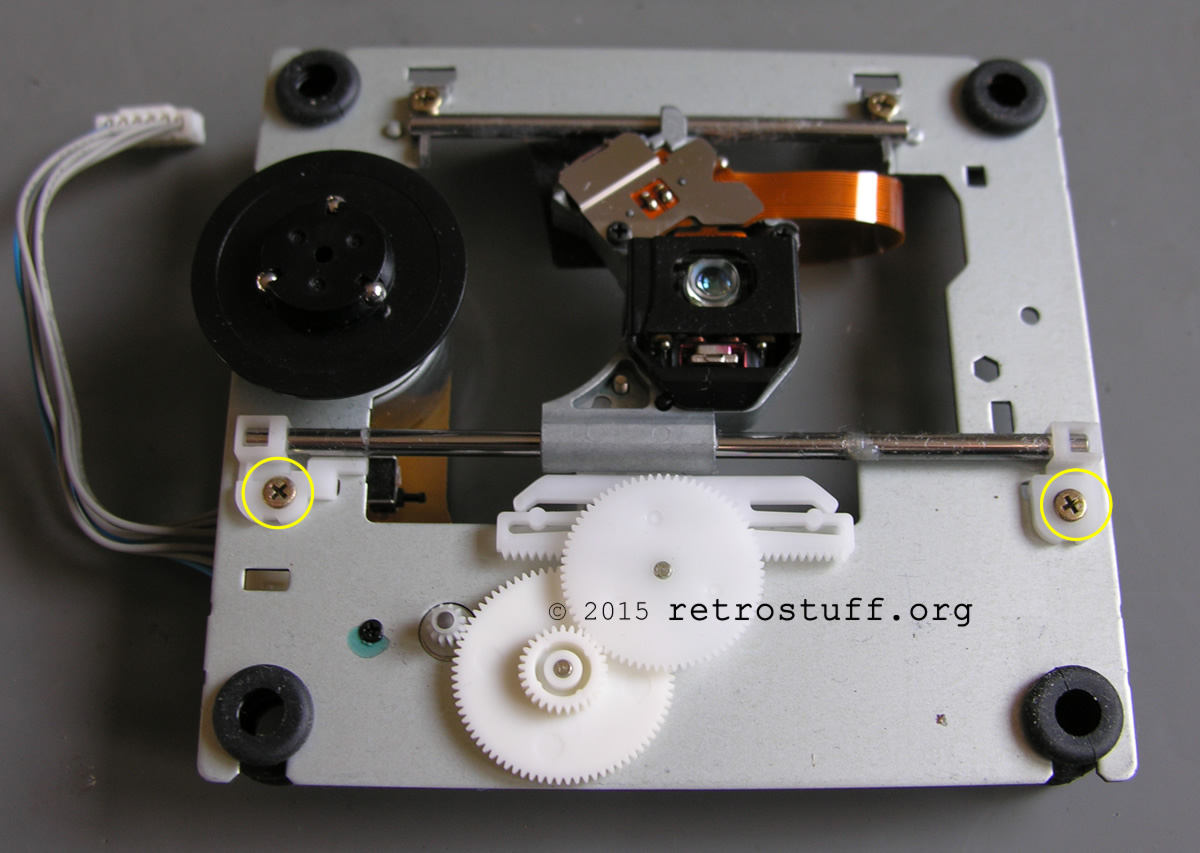
Unscrew the Philips screw on both pickups and exchange the plastic parts. Insert the glide rod into the new pickup and reassemble everything.

Before you reattach the side panels of the case, I strongly recommend that you carry out a functional test (that’s how I realised I’d forgotten to remove the solder blob. . .).
Troubleshooting
A quick update to answer some of the questions I’ve been asked about this article over the last few years:
- The new laser won’t read any discs at all.
Check whether the solder blob has been removed. If it didn’t have a solder blob to begin with, you’ve probably bought a second-hand pickup. - The new laser performs worse than the old one.
You’ve probably bought a second-hand pickup. - There is no difference between the old and the new laser.
Check the disc for scratches or try a different disc. CD-Rs should be avoided, but if you absolutely must use them, ensure they are of good quality (e.g. Verbatim AZO/DataLifePlus). They do not necessarily need to be burned at the lowest speed, such as 1-2x, but at a speed supported by both the disc and the burner.
Calibration: You can find detailed instructions and further information in Ana’s comprehensive article PC-FX CD Drive Adjustment.
A close-up of the daughterboard of my PC-FX. The metal shield hasn’t been removed yet. The potentiometers (trimmers), relevant ICs and connectors are labelled. There are at least two more variants of the daughterboard where the labels are upside down or some components are in different places.

The following crossed-out paragraphs are obsolete and are provided for information purposes only.
You must not adjust the potentiometers if you don’t know what you are doing – it could make things much worse. If you really need to adjust them, measure between all three terminals and note down the values. Make only very small adjustments and do not adjust more than one potentiometer at a time / before doing some tests first.
This is a quote from a post by user SamIAm of the Pcenginefx forums. Annotations have been added in square brackets. I have not tested it yet.
Open up your system, find the row of three white potentiometers, and turn the middle one [VR103] 1/8 of a full rotation [45°] counterclockwise. Check and see if it works. If it doesn’t, give it another 1/8 turn (you want to do this as few times as possible). If it doesn’t work after it’s been turned 4/8 of a full rotation, it’s probably not going to work, and you’ll need a new laser.
History
2015-03-22: Initial version published.
2019-06-02: Added troubleshooting information.
2026-03-29: Added link to the calibration instructions. Minor corrections and cleanup.
Thanks for this guide, really helpful. I too installed a new laser as I was under the impression mine was getting weak – stuttering FMV sequences and disc read error messages.
After fitting the new laser though, all these issues still remain and nothing has changed. Is there any other part of the console that needs replacing or repairing to get past this?
If the issues remain then it’s probably the game disc. Try to make a copy with a pc and play that…
Where did you obtain the laser pickup?
I looked up HOP-E1 in Google and found an online shop.
Thanks for the guide!
I followed it and installed a new pickup only to find that it became even worse at reading discs. I had to put the old one back in. It reads originals fine but not burns. The new pickup for the most part wouldn’t read either, after all sorts of attempts, spindle adjustment, etc. Maybe I got a crap pickup, it was a Chinese shop on ali…
I was surprised to see there was no visible screw for changing the laser focus/height/trim/etc. Do you know if there’s no way to adjust the pickup settings?
Guess I’ll give another go next time I find a pickup for cheap.
Does the new pickup read anything at all or did you forget to remove the solder blob?
I found this a while ago in the Pcenginefx Forums, maybe this helps: http://www.pcengine-fx.com/forums/index.php?topic=20381.0
This is James from NZ again I am hoping you can help, do you repair NEC PC-FXs or know how to adjust the laser pots?
I bought one from Japan and it arrived yesterday (paid nearly 400 NZD including shipping). It will not load games and I think something is wrong with the laser? When I try to load an actual PC-FX game or even a burned copy of a game, it just will not load. I can hear the laser going back and forth. It does play normal CDs (but skips) and I did get one game to work, a burned copy of Pia Carrot but only a few times and it heavily skipped during the FMV sections and speech.
Do you have any idea on what might be wrong or instructions on how to possibly adjust the laser pots>
Please let me know and thanks in advance.
Sorry, I don’t repair PC-FXs or tried to adjust the laser pots before.
Did you read the post in the Pcenginefx Forums http://www.pcengine-fx.com/forums/index.php?topic=20381.0)?
It basically advises to rotate potentiometer VR103 counter clockwise for 1/8 of a full rotation.
Hi there, I got a PC-FX a few days ago, and it has some problems reading discs, specially burned ones. I’m looking into adjusting that potentiometer, but the forum you linked is not allowing registration right now, so I can’t access the information.
Could you post more details about that fix? For example, where the potentiometer is located, maybe some images.
Thank you!
I’ve updated the article with some details for troubleshooting.
Try laying the PC-FX on its side. I have one that will not read upright but on its side it works fine.