
If you drop an Xbox 360 controller, don’t let it land on its bumper buttons. The micro-switches break easily on the inside. They might still work, but need more pressure to be triggered. This problem plagues old Sega Saturn gamepads too.
To open Xbox 360 controllers, you need a special Torx security screwdriver with a hole in the tip, size T8H. If you don’t have this rather unusual screwdriver, you can break the tiny pins in the screws and unscrew them with a regular T8 or T9 Torx screwdriver. Seven screws need to be removed (yellow circles). One of them is hidden behind the white sticker with the barcode and not behind the black sticker where I looked for it first (red circle).

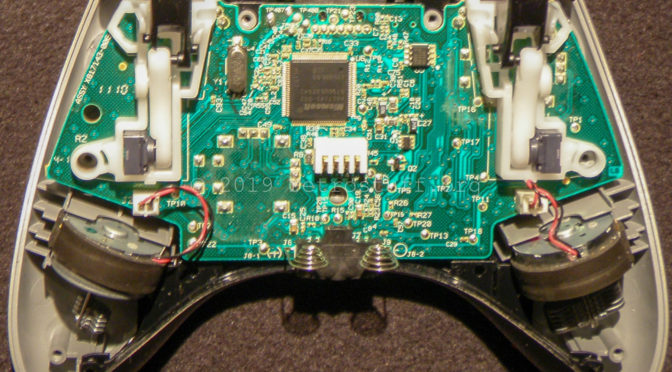
After removing the back cover, it looks like this. The bumper switches hide behind the trigger assemblies:


![]() Next, find a donor controller for a new micro switch. Any (original) Xbox 360 controller with working bumper buttons is fine. Or buy a switch like this:
Next, find a donor controller for a new micro switch. Any (original) Xbox 360 controller with working bumper buttons is fine. Or buy a switch like this:
In order to access the solder points, first desolder the trigger pot and then remove the whole trigger assembly. If you think you could remove the moving parts of it and move it away from the solder points – don’t do it! You’ll break the pot before you reach all of the four solder points. Unplugging the vibration motors helps too.
Detailed views of the trigger assembly, the pot solder points and the bumper switch solder points when the assembly has been removed:


Next, replace the broken micro-switch and put everything back to where it belongs. Don’t forget to test trigger and bumper before you close the back cover.
Just as new and all tests passed – the Xbox 360 controller with donor micro-switch at the right bumper:
